Spicy Arrabbiata Sauce – Glutenfree and Vegan

It’s always better to have a go to pasta sauce recipe…this one here, happens to be mine😊 Especially during these hot summers days….when cooking up a storm isn’t exactly someone’s dream…having this ready in the refrigerator or the freezer can be a lifesaver! 😄

Spicy Arrabbiata Sauce - Glutenfree and Vegan Recipe for easy arrabbiata sauce Italian arrabbiata sauce recipe Polkapuffs recipes Shreya tiwari food photography Macro I in arrabbiata sauce Glutenfree recipe for arrabbiata sauce Vegan arrabbiata sauce

There are days when I go through the entire ritual of sautéing some exotic veggies like some American sweet corn, broccoli, some snow peas and a bit of bell pepper along with some crushed garlic to go with my pasta…and then are days when all I want to do is dump the sauce with some boiled pasta and give it a quick stir and I serve it without any fancy-shmancy garnishing…just a bit of grated cheese and I am all sorted🤗

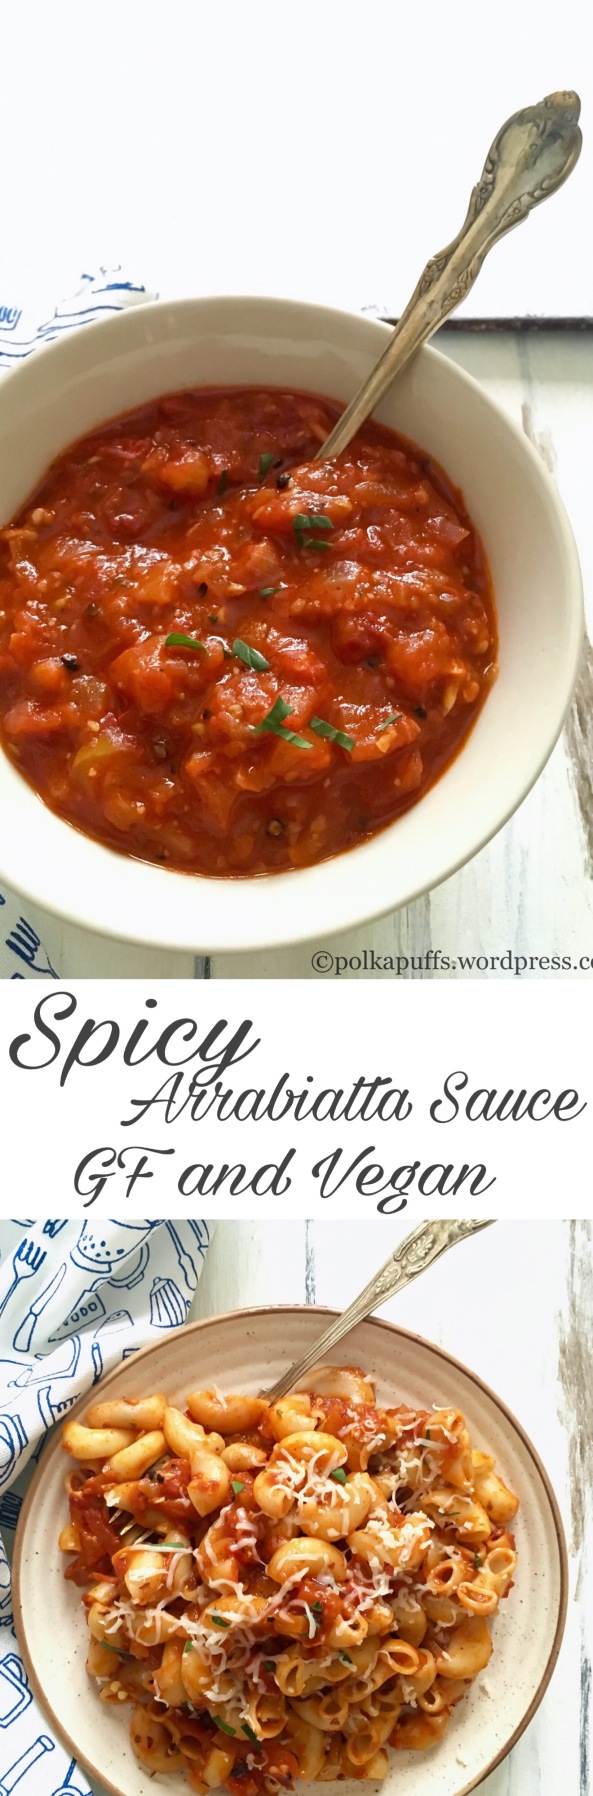
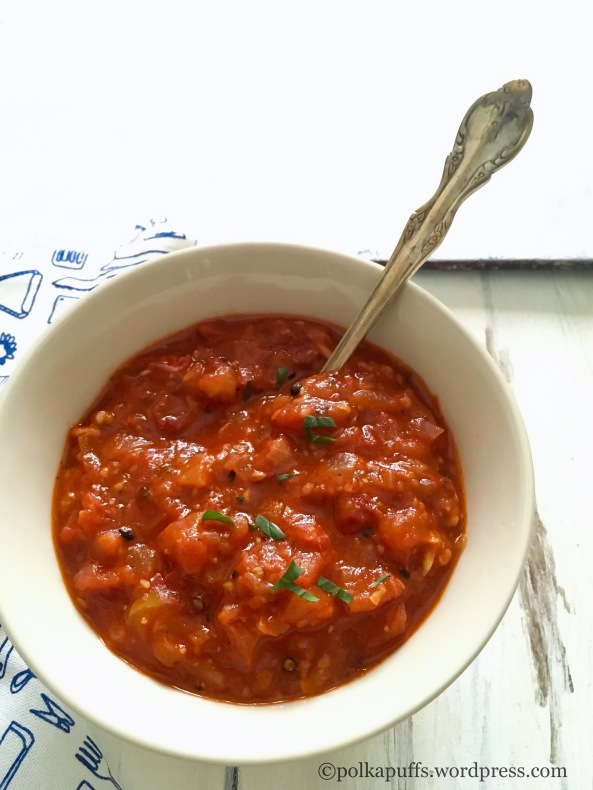
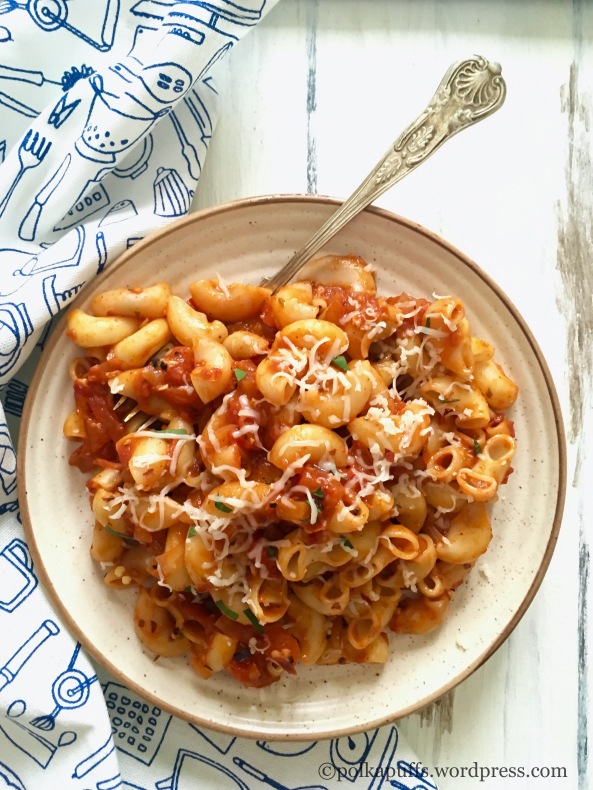
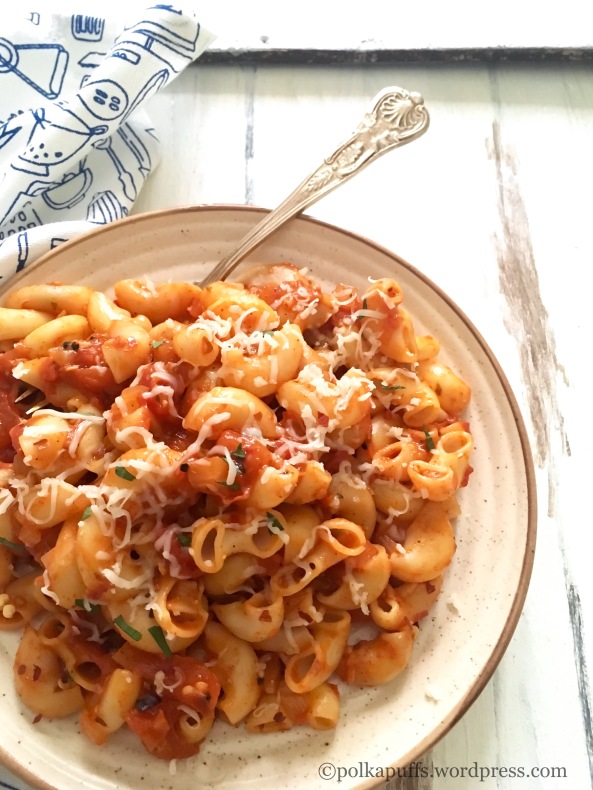
And hence, happens my quick macaroni with some spicy, vegan-Glutenfree arrabbiata sauce! Just like that….and obviously it’s one of my favourite meals👌🏼😍

Spicy Arrabbiata Sauce - Glutenfree and Vegan Recipe for easy arrabbiata sauce Italian arrabbiata sauce recipe Polkapuffs recipes Shreya tiwari food photography Macro I in arrabbiata sauce Glutenfree recipe for arrabbiata sauce Vegan arrabbiata sauce

This sauce can also be used for topping up your bruschetta along with some slices of olives or just some crumbled feta cheese…..some capers, if like little bursts of salty..briny flavours….see..I have given you some ideas for your next girls’ night in…or if you’re a dude reading this here…make a bruschetta platter for your buddies as you watch the latest season of IPL ’17….or impress a lady friend with your sauve kitchen moves😉

I use this sauce for my chip-n-dip platters on movie nights with my fella…it’s healthy and definitely delicious! Follow this easy recipe for some healthy Wholewheat crackers to go with this sauce.

**Coming to how you would go about storing this sauce. I make a slightly larger batch and refrigerate it and it stays fresh for almost 10-12 days. I don’t add salt while this sauce especially when the purpose is to store it. To freeze, simply cool the sauce and pack them in small ziplock pouches and freeze them. The freezer sauce needs to be thawed at room temperature for about an hour before using it. Always remember to season it using the stored sauce. When making the sauce for immediate consumption, then do add salt as per taste.

Now, on to the recipe….

Yield: serves 2-3 persons

Equipment: a heavy bottomed saucepan, measuring cups/ spoons, a ladle, hand blender.

Ingredients:

3 cups blanched and roughly chopped tomatoes (choose ripe tomatoes)

3/4 cup finely chopped onions

salt to taste (I used sea salt)

freshly cracked black pepper to taste

4 tbsp olive oil

3-4 cloves of garlic, crushed

a few fresh basil leaves (or use dried)

2 tsp chilli flakes

1 tsp dried oregano

1/2 tsp dried rosemary

some warm water if needed to correct the consistency

Method:

Heat oil in the pan, once it is hot enough, add crushed garlic and onions. Sweat these until the onions turn translucent and the garlic turns a bit golden. Then go in the roughly chopped chopped blanched tomatoes.

Keep the flame on low, season with salt, chilli flakes, cracked black pepper, rosemary and oregano. Keep stirring these together for a few minutes to ensure the flavours blend well. Add some warm water at this stage to correct the consistency (I added about 3/4 cup), mix well and cover with a lid and let the sauce cook for about 10 mins on low flame.

Open the lid after 10 minutes, the sauce should be done by now. Turn off the flame, let the sauce cool off a bit. Then using a hand blender, blend the sauce as much as you prefer. I like my sauce a bit chunky so I don’t go overboard with the blending.

If you are making a pasta dish immediately, just add this entire sauce to about 2 cups of boiled macaroni or penne and give them a good toss. Garnish with some finely chopped fresh basil leaves and some grated cheese!

**scroll above to read about how to store this sauce.

Spicy Arrabbiata Sauce - Glutenfree and Vegan Recipe for easy arrabbiata sauce Italian arrabbiata sauce recipe Polkapuffs recipes Shreya tiwari food photography Macro I in arrabbiata sauce Glutenfree recipe for arrabbiata sauce Vegan arrabbiata sauce

Do try this sauce soon…you know what? This even works as a great pizza sauce😉😉

Love,

Shreya💖

Spicy Arrabbiata Sauce Glutenfree and Vegan


Volcano Popsicles | Strawberry and Orange Popsicles

Yes, I am absolutely obsessed with Popsicles of any and every kind…actually anything icy! I loved chilled things, even in the dead of cold, I could never pass a chance of enjoying a Popsicle! Not ice-cream though, although my blog has many recipes for both, I am more of a Popsicle girl😋😋😍

If you ask me why not ice-creams…I don’t really have a reason. I just love the juicy and watery flavours of fruit based Popsicles! Always have….always will! They do give me bad throat infections at times but I think they worth every course of anti-biotics I’ve had over the years 😜😜😂

How to make strawberry orange popsicle Volcano Popsicle recipe Summer treat Popsicles with glucose recipe Polkapuffs recipes Food photo by Shreya Tiwari

Don’t they look llike your best mate for every summer afternoon!? I can have them for breakfast, lunch ….dinner!! 😉 Besides, making them is a breeze! Just pick whatever flavours you like or if you are like me…choose your fruits….summer fruits like mango, kiwis or even oranges work very well!

How to make strawberry orange popsicle Volcano Popsicle recipe Summer treat Popsicles with glucose recipe Polkapuffs recipes Food photo by Shreya Tiwari

But with this recipe, I will teach you how to make perfect store bought-like texture for these Popsicles. Yes, store bought Popsicles are not full of icicles in them. They are more smooth and have a very even texture, almost like a sorbet but firmer. However, if you wish can follow simple juice and freeze method tooand make Popsicles but they will have icy bits (icicles) in them. I don’t like icicles in my Popsicles and hence this recipe is good for me…I was keen to understand what ingredients goes into the store bought Popsicles, and just on the cover of each popsicle, it is mentioned ‘glucose’….so I’ve done exactly that! Liquid glucose worked so well. Obviously, I adjusted the measurements as the cover never mentioned the proportion and alongside the store bought ones have a fair bit of preservatives too. But I have used just 4 ingredients to make them!

Yield: 4 Popsicles

Equipments: a sauce pan, a juicer (if using homemade juice), measuring cups/ spoons, Popsicle mould, ice cream sticks.

Ingredients:

1/2 cup pulp of fresh strawberries (I did not add sugar, you may if the berries aren’t sweet enough)

200 ml freshly squeezed orange juice (juice of approximately 5-6 oranges)

2 tbsp sugar (I used some for the orange juice as the oranges were a bit tart)

2 tbsp glucose syrup (sweetened, it’s available in any store that stocks all the baking related ingredients) or even corn syrup.

Method:

Keep the mould ready.

In a saucepan, heat orange juice for a few mins. Once it has come to a gentle boil, add the sugar. Mix well using a whisk. Next add the glucose syrup and whisk quickly. Make sure the syrup is mixed very well. Now, turn off the flame and let the orange juice cook down for a few minutes.

Next, fill about 3/4th (approximately 50 ml) of each popsicle mould with the orange juice- glucose mixture. Place the moulds in the freezer and let them set for about 2-3 hours. Remove from the freezer and insert ice-cream sticks in the center of each mould. Freeze again for about 1 hour.

Remove the moulds again from the freezer after an hour, fill each mould to it’s brim with the strawberry pulp. (I didn’t treat the strawberry pulp with the glucose syrup as the pulp doesn’t really have any icicles after freezing).

Freeze the moulds for another 3-4 hours or until the Popsicles are frozen well. To serve, dip the mould in some lukewarm water for 2 mins, gently tug the ice cream sticks and pull out the popsicle from the moulds! Voilà!!! 😍😍 enjoy!!

(Note- adding glucose syrup is optional, we can omit that as well and make basic Popsicles)

How to make strawberry orange popsicle Volcano Popsicle recipe Summer treat Popsicles with glucose recipe Polkapuffs recipes Food photo by Shreya Tiwari

You can follow this recipe for any fruit juice/ pulp in any combination…they are so delicious and absolutely preservative free. They keep well in the freezer for upto a week, but I suggest try to finish them and make fresh batches every few days. It’s so easy 😄

Love,

Shreya💗

Volcano Popsicles Vegan & Glutenfree | Strawberry & Orange Popsicles

Baigan ka Bharta aur Makke ki Roti |Brinjal Mash with Maize Flour Flatbreads | Glutenfree and Vegan

Winter comes with it’s bounty…such fresh veggies and fruits everywhere, I can’t seem to get enough of them! One of my favourite things to make in winters is Makke ki Roti (maize flour flatbreads – they are vegan and gluten free). And to go with these flatbread, I am having my fill of Baigan ka Bharta these days….fresh, spicy and so full of flavours..you’d be wanting more!

I simply follow my Mom’s no-fail recipe for both these delicious things…and it’s finger licking awesome:)

Baigan ka Bharta aur Makke ki Roti |Brinjal Mash with Maize Flour Flatbreads | Glutenfree and Vegan Polkapuffs recipes North Indian recipes Roasted brinjal recipes

I made this combination again just this last weekend and we were in a much happy food-coma! The Makke ki Roti (ahem, please excuse my badly shaped rotis/ flatbread, I find it very difficult to give them any fixed shape or even size as the dough is gluten free and not the easiest to handle…..but I believe it’s the taste that matters in this case🤗😀). However, I try to roll them between two sheetss of cling wraps mostly…but this is the best I can manage!

Baigan ka Bharta aur Makke ki Roti |Brinjal Mash with Maize Flour Flatbreads | Glutenfree and Vegan Polkapuffs recipes North Indian recipes Roasted brinjal recipes

The Bharta or the mash, well it’s a whole different story….I spend all the time to make as perfect as it can get and I nail it every time 😉 Brinjal is roasted to a charred beauty and then everything starts from there.. tip – buy a lighter brinjal as they are perfect and do not have many seeds.

Baigan ka Bharta aur Makke ki Roti |Brinjal Mash with Maize Flour Flatbreads | Glutenfree and Vegan Polkapuffs recipes North Indian recipes Roasted brinjal recipes

Let’s get cracking…it’s not much effort…:)

Yield: serves 2

Equipment: wired roasting stand, measuring cups/ spoons, a mixing bowl, a small bowl, a pair of kitchen tongs, a large mixing  bowl – for the maize dough, rolling pin, cling wraps, a pan, a spatula.

Ingredients:

For the Bharta:

1 nos. medium large, round brinjal (bharte Wala Baigan)

2 nos. medium tomato (choose ripe, juicy tomatoes)

7-8 garlic cloves

1 nos. finely chopped onion

1/4 cup mustard oil (this is what we use traditionally up North)

1 tsp finely chopped green chilli

1 tsp grated ginger

salt to taste

fresh coriander, as needed

For the Makke ke Roti:

2 cup maize flour (Makke ka atta)

salt to taste

1 tsp crushed kasuri methi (dried fenugreek leaves)

water as needed to knead

4-5 tsp oil, for cooking the Roti/ flatbread

Method for the Bharta: 

So, right at the start I will urge you to follow the step wise pictures, they are pretty much self explanatory. I will explain in writing as and when necessary.

Wash and wipe the tomatoes and the brinjal. Set the tomatoes aside.

Keep the brinjal’s stem intact. Make an inch long slit in the brinjal. This slit must be a bit deep. Stuff the garlic cloves in this slit. Massage the entire brinjal with some mustard oil.

Baigan ka Bharta aur Makke ki Roti |Brinjal Mash with Maize Flour Flatbreads | Glutenfree and Vegan Polkapuffs recipes North Indian recipes Roasted brinjal recipesimg_6017

Next, turn on the flame and place the wired roasting stand over the flame. Place the oiled brinjal over it and roast it well on all sides until well charred.

Baigan ka Bharta aur Makke ki Roti |Brinjal Mash with Maize Flour Flatbreads | Glutenfree and Vegan Polkapuffs recipes North Indian recipes Roasted brinjal recipesimg_6020

While the brinjal cools down, massage the tomatoes with some oil, make a couple of small slits on each tomato and roast them too just the way we did for the brinjal.

Baigan ka Bharta aur Makke ki Roti |Brinjal Mash with Maize Flour Flatbreads | Glutenfree and Vegan Polkapuffs recipes North Indian recipes Roasted brinjal recipesimg_6021img_6022

Now, take some water in a small bowl. Dip your fingers in the water and slowly peel the charred skin off the brinjal and tomatoes. Set them aside in a mixing bowl. Mash these together along with the garlic that was roasted within the brinjal as well. Season with salt.

Baigan ka Bharta aur Makke ki Roti |Brinjal Mash with Maize Flour Flatbreads | Glutenfree and Vegan Polkapuffs recipes North Indian recipes Roasted brinjal recipesimg_6025

Next, add the chopped onions, chopped chillies, grated ginger, remaining mustard oil, chopped coriander leaves to the the mashed tomatoes and brinjal. Give everything a good mix! This is done!

Method for the Makke ki Roti:

In a large mixing bow, take the flour, season it with salt and kasuri methi. Mix them well. Add water as you go and knead to make a dough until everything comes together. Cover the dough with a damp kitchen towel for a few minutes before making the Roti/ flatbread.

Baigan ka Bharta aur Makke ki Roti |Brinjal Mash with Maize Flour Flatbreads | Glutenfree and Vegan Polkapuffs recipes North Indian recipes Roasted brinjal recipes

Next, take a lemon sized ball of dough,place it between two cling wrap sheets and using a rolling pin make a roti. (No pictures of these steps, I’d probably need 4 more sets of hands to do that! 😂)

Heat the pan, drizzle some oil on the pan and place the rolled Roti and cook it on both sides until well cooked and charred around the edges. Serve piping hot with Baigan ka Bharta, some pieces of jaggery and a salad.

Baigan ka Bharta aur Makke ki Roti |Brinjal Mash with Maize Flour Flatbreads | Glutenfree and Vegan Polkapuffs recipes North Indian recipes Roasted brinjal recipes

Isn’t that easy and absolutely yum! If you’ve liked this, do try my take on popular Bihari favourite Litti Chokha here. This Baigan Bharta goes so well with some Litti too!

Love,

Shreya 💖

Chawal ke Namak Paare

Diwali is just around the corner….and I am sure everyone’s planning what to make for our families and friends, to gift and to enjoy! Delicious, obviously everything must be delicious…and I think they ought to be healthy too….I mean as far as possible😄

So today, I am sharing a glutenfree recipe of our very famous North Indian ‘namak paare‘ (savory crisps). I don’t really think there is anyone out there who’d not like the taste and the texture of some ‘namak paare’…😋

1476694470239

These ‘Chawal ke namak paare’ are very crisp and light, I was almost surprised with the flavours. To be honest, these are the result of small blunder in my kitchen from this weekend 😂..yeah!! I had to make something else with APF (Maida) and I accidentally measured out the rice flour and only when I’d started kneading the dough did I realise my mistake…well..it was quick thinking from there and I just made these crisp treats in the next half an hour! My Mom loved them…and I know so did my hubby. These taste just yum with some hot ginger tea or even as a munchy while you watch your favourite show on the television….😉

Although, these are fried…rice flour on its own absorbs very little to almost no oil and stays crisp for at least 3-4 days. I am hooked!

Let’s make them…they’re fast, easy and absolutely mess free!! So barely any cleaning up after you are done👌🏼

Yield: serves 2-3

Equipment: measurging cups/ spoons, a large wok, a slotted ladle, a chakli press/ kitchen press, some kitchen tissues.

Ingredients:

1 cup rice flour (Chawal ka atta)

salt to taste

a pinch of baking soda (soda bicarb)

1/2 tsp black pepper powder

5 tbsp ghee

water as needed

oil to fry

Method:

Seive rice flour in a large mixing bowl, add salt black pepper, soda bicarb and ghee.

Keep rubbing these together until the flour resembles a bread crumb like texture and it holds it’s shape when held in a fist (I do it for about 20 mins to get a crisp texture later).

img_5476img_5477img_5478img_5479

Then using little water make a hard dough. Cover the dough and let it rest for 15 mins.

Next, fill the dough in the kitchen and use the plate shown in the second picture above to make the shapes of the namak paare (as the dough is glutenfree, I wasn’t comfortable rolling it and cutting it into small diamonds, you can do so if you are able to manage to roll the dough).

Heat sufficient oil in a wok, once it’s hot, turn the flame to low. Now drop the pressed pieces of dough into the oil and fry on both sides. Remember to fry on low flame so that they cook evenly and turn crisp.

img_5480

This is what it looks like after frying ⬆️

Once done, remove from the oil and place on kitchen tissue to absorb excess oil. Let them cool off completely before storing them in airtight containers.

1476694668497

If you are looking for more ideas for savory treats this Diwali, click here for crispy Rawa Chakli recipe, click here for Masala Sev recipe, click here for Khasti Mathri recipe.

Love,

Shreya💝

Chatpate Saunfia Aloo No onion no garlic recipes Polkapuffs Aloo Recipe Recipes for Navratri

Chatpate Saunfia Aloo (no onion no garlic recipe)

I love potatoes! I can have them in any form except sweet 😱😱 Potatoes got to be spicy and delicious….can’t be bland and sad…! That’s what I am sharing today…awesome, spicy and so easy to make too!

Besides, it’s without any onion and garlic too…so perfect for the upcoming Indian festivals like Navratri when most of us eat food sans the onion and garlic element for 10 whole days. I won’t get into giving you the background of the festivals and the why’s and the how’s!

Chatpate Saunfia Aloo No onion no garlic recipes Polkapuffs Aloo Recipe Recipes for Navratri

This recipe can be made in many ways and enjoyed in many more too! My Mom usually makes another kind of Aloo without onion and garlic, this is inspired from her basic recipe..which by the way has way too many fans out there 😍

I have mentioned the spices that I have used, but you can always change them slightly to your preference. These potatoes can be served as starters, along with dal and some steamed rice or you can add them to any curry/ gravy and enjoy it with Phulkas (Indian flatbread).

Yield: serves 2

Equipment: a heavy bottom skillet or pan, a large pot, measuring cups/ spoons.

Ingredients:

300 gms baby potatoes (I have used the smallest kind, you can also use regular potatoes and cut them into cubes for this recipe)

salt to taste

3 cups water

1 tbsp refined oil

a pinch of asafoetida (hing)

1 tsp fennel seeds (saunf)

2-3 nos. green cardamom (choti Elaichi)

1 tsp roasted cumin pwd (bhuna jeera pwd)

1/4 tsp turmeric pwd

1/2 tsp red chilly pwd (I used degi mirch)

1/2 tsp crushed anardaana seeds

1/4 tsp chaat masala (optional)

a pinch of Garam masala 

chopped coriander to garnish

Method:

Wash the baby potatoes well, do not peel them.

In a large pot, boil water with salt. Add these potatoes in boil until 80 percent cooked. They must not be mushy in texture. Drain the water and let the potatoes cool (skip the boiling bit if using large potatoes cut into cubes).

img_5228

Now, heat oil in the skillet. Add hing and saunf along with cardamom. Let them crackle. Next, add the dry spicies mentioned above except anardana pwd and chaat masala. Sauté them together for 2 mins. Next, tip in the potatoes and check the seasoning, add more salt if needed. Mix well and cook for about 5-8 mins (I let the skin crisp up a bit). Finally, add the anardaana pwd and/ or chaat masala (I always add a bit, tastes so good!). Turn off the heat and garnish with some chopped coriander leaves. Serve them piping hot!

img_5230

Also, try my dahi aloo (no onion garlic), phalhari Kadhai paneer (no onion garlic), Phalhari chutney (no onion garlic) or see my collection of Navratri Recipes here.

Happy Cooking folks!

Love,

Shreya💝

Brownie Muffins recipe How to make fudgy brownies Polkapuffs recipe for brownie Easy homemade brownie recipe

Brownie Muffins

Brownie…..isn’t that one word enough to make you reach out and grab a piece and then turn around the other way, all by yourself and not share with anyone! Mind you…grab a large or probably even the largest piece if possible. Happens with you?! A lot?! LoL😂 Then these Brownie Muffins are for you my friend. Err…not these ones though..you got to make your own!😜

Reason….because these were made just for my hubby..celebrating his birthday! 💖😘🎂 with these chocolaty, super fudgy and gooey brownies! Who says you must have a cake on a birthday with candles???! We have these brownies and a peck on the cheek😍

Brownie Muffins recipe How to make fudgy brownies Polkapuffs recipe for brownie Easy homemade brownie recipe

He loves them! They are morish…slightly crisp on the top and soft within. I have just sprinkled them with some slivers of chocolate…..you can choose not to or maybe dust these with some cocoa instead. Or even keep them plain. This is kind of my go-to recipe for brownies, you can make a large brownie too, need not bother with making Muffins at all. But as I said you get a whole muffin to yourself, right 😜!

Anyways…let get started..

Yield: 6 large brownies

Equipment: a large saucepan, a heat resistant bowl, a sieve, a large mixing bowl, electric whisk (or manual), muffin tray, muffin liners, cooling rack, a rubber spatula, measuring cups/spoons (I have used a weighing scale to measure everything in grams)

Ingredients:

56 gms dark chopped cooking chocolate (I use Morde)

56 gms unsalted butter chopped roughly  (approximately 1/2 cup)

28 gms maida (all purpose flour)

18 gms unsweetened cocoa pwd

75 gms fine castor sugar

1/2 tsp vanilla extract

1 nos. large egg

Method:

Pre-heat the oven @180’c for 10 mins.

Keep chopped chocolate and butter in a heat proof bowl. Place water in the saucepan to boil. Once it comes to a boil, place the heat proof bowl with the chocolate and butter on top of the sauce pan. Let the chocolate and butter melt together, stir it a couple of times with a rubber spatula. Once it’s melted, set the bowl aside and let it cool.

Brownie Muffins recipe How to make fudgy brownies Polkapuffs recipe for brownie Easy homemade brownie recipeBrownie Muffins recipe How to make fudgy brownies Polkapuffs recipe for brownie Easy homemade brownie recipeBrownie Muffins recipe How to make fudgy brownies Polkapuffs recipe for brownie Easy homemade brownie recipe

Next, beat the egg and sugar together in a large mixing bowl until light and fluffy. Add the melted chocolate and butter mixture into the eggs. Whisk once more. Then sieve in the cocoa powder and maida into the eggs. Add the vanilla extract too. Fold the mixture gently with a rubber spatula. Do not over mix the mixture.

Line the muffin tray with liners and fill each portion with the mixture upto 3/4 th capacity. Bake them at 180’c for 18-20 mins. Once baked, insert a toothpick in the centre of a brownie, it must come out with moist and gooey crumbs. That’s it, the Muffins are ready. Cool them on the cooling rack for a few minutes. Serve them warm with a scoop of ice cream or just enjoy them plain.

Brownie Muffins recipe How to make fudgy brownies Polkapuffs recipe for brownie Easy homemade brownie recipe

Don’t these tempt you…😁 Also try my eggless nutties brownie.

Love,

Shreya💝

How to make veg quesadillas Polkapuffs recipes Recipe for Mexican quesadillas

Cheesy Vegetarian Quesadilla

I am always up for Tex-Mex! Are you?! 😁 I had shared Cheesy Veg Tacos last year….just like the ones we enjoy at Taco Bell. My hubby loves them…just as much as he loves these veg quesadillas which taste better than the ones you get at your favourite Tax-Mex joint 😉 

How to make veg quesadillas Polkapuffs recipes Recipe for Mexican quesadillas

Whenever we visit Chilies, our favourite for Tex-Mex or even TGIF…quesadillas are definitely ordered..veg or non-veg, they are so crisp and flavourful! Cheesy..yes but that’s just a necessity. It holds the quesadillas together and adds that tartness in every bite 😀

How to make veg quesadillas Polkapuffs recipes Recipe for Mexican quesadillas

There can be many options for fillings in veg or non veg..I make different versions of vegetarian fillings…each better than the other….😁😁

I personally like the ones with roasted veggies and lots of chillies. But I made these one’s as per my hubby’s choice of veg fillings. If you’re waiting to try these then don’t, you are bound to love these flavours. Mexican food is very close Indian flavours and they too use a lot of spices like cumin, paprika, garlic and lots of chillies!! Perfect 👌🏼👌🏼

Let’s see how…

Yield: serves 2-3

Equipment: a non-stick pan, measuring cups/ spoons, a wok, a plate.

Ingredients:

3 nos. readymade tortillas (or even homemade thick paratha/ Indian flatbread)

Filling:

1/2 cup sweet corn

1/2 cup chopped green capsicum

1/4 cup chopped onions

1/2 tsp minced garlic

2 tsp oil

salt to taste

1 tsp cumin powder

1+1/2 tsp red chilli pwd

1 tsp fresh cream

1 tsp lime juice

1/4 tsp dried thyme

Cheese as required

Method:

Heat oil in the wok. Add the onions and garlic. Sauté for a few mins. Next, add the corn and capsicum. Season with salt, red chilli pwd, thyme, cumin pwd. Mix well and cook for 5-8 mins on low flame. Turn off the heat, add cream and lime juice. Mix well and set aside.

Most of the Tex-Mex food is served with Pico de Gallo (a salsa) and some sour cream.

Ingredients for Pico de Gallo

1/2 cup each of finely chopped tomatoes & onions.

salt to taste

1/2 tsp chopped coriander leaves

1/2 tsp finely chopped green chillies

1 tbsp lemon juice

Method:

Mix all the ingredients together and set it aside to serve.

How to make veg quesadillas Polkapuffs recipes Recipe for Mexican quesadillas

To assemble a quesadilla:

Follow the pictures below

How to make veg quesadillas Polkapuffs recipes Recipe for Mexican quesadillasHow to make veg quesadillas Polkapuffs recipes Recipe for Mexican quesadillasHow to make veg quesadillas Polkapuffs recipes Recipe for Mexican quesadillas

First, place the cheese at the bottom, then the filling and then more cheese on top. Then fold it in half as shown above in the second picture.

Heat the pan on low flame. Place the filled and folded quesadilla on the pan. Press down slightly and toast on both side until brown and crisp. You can use oil too but I do not use any.

To serve:

Cut each quesadilla into 2 or 4 pieces and serve with Pico de Gallo and sour cream along with some wedges of fresh lime 😀

How to make veg quesadillas Polkapuffs recipes Recipe for Mexican quesadillas

This is the brand of tortilla that I use. Also, learn to make Tacos here.

Love,

Shreya💕

How to make wholewheat cookies Wholewheat cardamom cookies recipe Atta biscuit recipe How to make atta cookies Polkapuffs wholewheat cookies

Eggless Wholewheat Cardamom Cookies | Elaichi Biscuits

Chai and biscuits…have become chai and cookies. The English biscuits have been taken over by chunky cookies all the way from the West! I am not complaining…I never have tea…so the cookies over biscuits dilemma has never haunted me🤗

But my hubby loves his tea…it’s no secret. Although he is not a biscuit or cookie loving kind of a guy…he does like them once in a blue moon…and on that lucky day, he can clean out the tin! 😂

How to make wholewheat cookies Wholewheat cardamom cookies recipe Atta biscuit recipe How to make atta cookies Polkapuffs wholewheat cookies

Store bought cookies are not his kind…he finds them too sweet and the Maida (all purpose flour) makes it way too heavy. I agree…these are precisely the reasons why even I don’t like indulging in them too often. Also, these cookies or biscuits are often made with Dalda (vegetable fat) which isn’t the healthiest choice. Though they are very crisp but definitely not our choice.

So these atta biscuits (wholewheat cookies) were one of the earliest things I learnt to bake for my hubby back when I got my oven! There were few hits and many more misses 😂😂😂😂 I had burned bases to rock solid cookies which wouldn’t come off from the tray…though they were lined with parchment paper! Sometimes, they’d spread so much and turn into a congealed mass…LOL! 😜

But you learn..make your own mistakes and then understand where you went wrong. I referred to so many recipes all over the place just to make a good wholewheat cookie. Finally, almost over a year ago I was able to stick to a recipe where I was happy with each aspect of the result…. It was crisp, perfectly cooked and did not spread much. Just the way I wanted.

It took me almost over an year to bring them to my blog for you as I always bake these at night and clicking pictures isn’t possible then or even if I bake them during weekends, my hubby starts eating them warm off the baking tray! There’s hardly any left for me…forget clicking them 😁

I am going to share a few tips here that I learnt in the process of learning to bake these atta cookies ..

* the very first trial with making these atta cookies was inspired by a recipe I saw in some magazine at my Mom’s place. It had used butter obviously, but I used oil to make it healthy. The result was a congealed mass on the tray even after baking for 25 mins. It simply spread.

* next, after a few hits and misses, I tried them using ghee (clarified butter). They tasted decent but felt a little heavy for our palates. They were crisp but became soggy on the second day. They too spread but not too much. Not satisfactory.

* finally I thought of trying with unsalted cooking butter as per the original recipe but I changed the proportions as per my choice and used just the basic ingredients. By this time I’d already baked the exact same thing over 7-8 times. So I was able to judge the texture and the quantity on sight. Also, extensive research online made me understand the value of refrigerating the cookie/ biscuit dough. It helps. Big time! Using butter does make it crisper and the end result is what you see in the pictures here. The cookies/ biscuits do spread. It will. But it is minimal and gives you perfect looking cookies. These cookies stay fresh and crisp for upto 3 days in an airtight box. (My experience, it never lasts longer than that as I always make a small batch)

Hope you have gone through the tips above before we begin the actual recipe.

Yield: 12-14 small cookies

Equipment: (no fancy equipment is ever used for this, remember I was learning to bake with basic things at home) a wired whisk, a large mixing bowl, a small bowl, baking tray, parchment paper/ baking paper, a cooling rack, measuring cups/ spoons, as small pan, a weighing scale if you have one would be excellent.

Ingredients:

1 cup wholewheat atta (ashirwaad select atta)

75 gms unsalted butter (approximately 3/4th quantity of a 100gm. I used a weighing scale here)

6 tbsp powdered sugar (add more or less as per taste)

1/2 tsp cardamom pwd (Elaichi pwd)

1 small pinch baking soda

Method:

How to measure the atta – fill the cup with spoonfuls of atta. Do not dip the cup into the container with the atta. That way you will always end up with extra atta and the ratio will be wrong.

Seive the atta along with the baking soda once. Set it aside.

Take butter in the pan. Let it melt on very low flame. Once it’s melted, let it cool for 2 mins. Take the butter in a small bowl, then add the powdered sugar and cardamom pwd in the butter. Whisk well to make a smooth mixture.

How to make wholewheat cookies Wholewheat cardamom cookies recipe Atta biscuit recipe How to make atta cookies Polkapuffs wholewheat cookiesHow to make wholewheat cookies Wholewheat cardamom cookies recipe Atta biscuit recipe How to make atta cookies Polkapuffs wholewheat cookiesHow to make wholewheat cookies Wholewheat cardamom cookies recipe Atta biscuit recipe How to make atta cookies Polkapuffs wholewheat cookies

Now add this mixture to the sieved atta and baking pwd. Mix it gently and bring it together. This is not like Roti dough so it with crumbly. Let the dough rest for 5-7 mins to absorb the butter. Then gently shape the cookies (takes me 20 mins for just 12 cookies each time). Make sure the shape of cookies is evenly sized and smooth all over. (See the pic above). Place them apart on parchment lined baking tray.

I can make 12 cookies with this quantity, you may have 10 or 14 as well, depending on the size. Once you have shaped the dough, keep them in the refrigerator for 15 mins.

Preheat the oven at 150’c for 10 mins. (Every oven is different so work according to that for setting the temperature and duration for baking).

Take the baking tray out from the refrigerator and place it in the middle of the oven to bake at 150’c for 20-22 mins. They will turn golden on the top and slightly brown at the bottom. Do not bake at high temperatures else the cookies with burn at the base. Once the cookies are baked, keep the baking tray out of the oven for 10 mins on a cooling rack.

How to make wholewheat cookies Wholewheat cardamom cookies recipe Atta biscuit recipe How to make atta cookies Polkapuffs wholewheat cookies

Then transfer the cookies to the cooling rack for cooling them completely. They are soft at first then turn crisp as they cool.

Once completely cooled, store them in airtight box.

How to make wholewheat cookies Wholewheat cardamom cookies recipe Atta biscuit recipe How to make atta cookies Polkapuffs wholewheat cookies

Occasionally, I do like a cup of lemon tea with these cookies! Also, try sugar cookies by me.

Love,

Shreya💝

Slightly adapted.

How to make penne pasta in lemon cream sauce Polkapuffs recipe Pasta in white sauce recipe

Penne in Basil and Lemon Cream Sauce

Pasta has to be one of my favourite comfort foods…it just lifts my mood. I can have it in any kind of sauce…or even just a basic tossed pasta salad with some olive oil and some herbs!

Besides, you can do so many variations with pasta…baked cheesy pasta with some veggies is another favourite at our place, my hubby loves it with some garlic bread💖

How to make penne pasta in lemon cream sauce Polkapuffs recipe Pasta in white sauce recipe

I particularly prefer the red sauce for any pasta…but since I also enjoy a citrusy flavour to pasta sometimes, I planned to go with my Lemon Cream sauce which is absolutely delicious for our weekend brunch, it’s a bit tangy and goes so well with penne or even spaghetti for that matter. Since the sauce is cream based, it coats the pasta well…and I chose to add some sweet corn, you can add more veggies or even boiled & shredded chicken or some sliced sausages if you wish.

Let’s begin..

Yield: serves 2

Equipment: a non-stick pan, measuring cups/ spoons.

Ingredients:

1 cup boiled penne pasta (follow the instructions on the packaging)

2 tbsp garlic butter (or regular butter)

1 tsp oil

5-6 nos. black peppercorns

1/2 cup boiled sweet corn kernels

4-5 nos. fresh basil leaves sliced

1 tbsp Maida all purpose flour)

3/4 cup milk

2 tbsp fresh cream

1/2 tsp lemon juice

salt to taste

Dried Italian herbs to taste

Method:

Heat the pan on low flame, add butter & oil. Once the butter melts into the oil, add the peppercorns. Sauté for a minute.

How to make penne pasta in lemon cream sauce Polkapuffs recipe Pasta in white sauce recipe

Then add the flour and sauté for 2-3 mins. Once the roux is ready, add milk and stir continuously to avoid lumps. Let the sauce simmer for a couple of mins while you stir it. Add the sliced basil leaves and corn kernels, season with salt and dry Italian herbs. Mix well. Turn off the flame. Let the sauce cool for a minute or two, add the cream and lemon juice. Stir well. Once again keep turn on the flame on low mode. Then add the boiled penne and toss everything together quickly. Turn off the flame. That’s it, it’s ready. You can add grated cheese on the top if you wish…I don’t. 😊

How to make penne pasta in lemon cream sauce Polkapuffs recipe Pasta in white sauce recipe

It’s a must try recipe…easy and yummy!

Love,

Shreya💝

How to make Pav at home Easy recipe for dinner rolls Pav recipe Pau recipe Polkapuffs recipe

Homemade Pav | Pav Buns | Dinner Rolls

Pav Bhaji on my mind….like for the last entire week I am unable to think beyond it. Every veggie that I glance at reminds me that it could go into my Bombay Pav Bhaji 😂😂 no, I am very serious! I so didn’t want to order any…because those are just not my kind of Bhaji…hence tonight is going to be it:) {happy dance}

Anyways…so I planned to make some Pav ahead of making the Bhaji. It’s beyond easy if you ask me…one bowl magic I call it😊

How to make Pav at home Easy recipe for dinner rolls Pav recipe Pau recipe Polkapuffs recipe

Once you learn to handle the yeast well, making a bread or Pav bread isn’t difficult at all. For me, it’s always been more of the technical part that I concentrate on rather than the recipe itself. The ratios are no doubt very important, I can’t stress enough on that here. One needs to measure them out correctly else things could go horribly wrong! So pay attention to every detail when making a Pav or Bread dough.

How to make Pav at home Easy recipe for dinner rolls Pav recipe Pau recipe Polkapuffs recipe

Let’s learn how..

Yield: 6 Pav (depends on the size of the Pav)

Equipment: measuring cups/ spoons, baking tin, cooling rack, a large mixing bowl.

Ingredients:

2+1/2 cups Maida (all purpose flour) + extra Maida (APF) to dust the dough while kneading (I used appropriately 1/2 cup)

5 tbsp oil + extra to grease the tin & to brush on top of the Pav

salt to taste

1/2 cup lukewarm water (comfortable enough to dip your finger)

3 tsp yeast (I used active dry yeast)

2+1/2 tsp sugar

Method:

Take 1/2 cup of lukewarm water in a glass or bowl, add the yeast & sugar. Stir it lightly. Set it aside for 10 to let the yeast bloom. (Note that if the water is too hot, the yeast won’t bloom. So be careful with the water. If the yeast doesn’t bloom, start again)

How to make Pav at home Easy recipe for dinner rolls Pav recipe Pau recipe Polkapuffs recipeHow to make Pav at home Easy recipe for dinner rolls Pav recipe Pau recipe Polkapuffs recipeHow to make Pav at home Easy recipe for dinner rolls Pav recipe Pau recipe Polkapuffs recipe

See the first picture above, the yeast has bloomed really well. It almost overflowed on the kitchen top.

Next, see the second picture above. For making the dough add the flour in the bowl, season with salt. Add the oil and slowly add the yeast mixture. Do not add all the mixture at one go as we may end up with a very gluey and wet dough. Keep adding a little bit at a time and make a dough like we do for rotis. This dough will be sticky so you can add some more flour and knead it well. The longer you knead it, the smoother and softer it will be.

If you feel the dough has become too dry while kneading, add the yeast mixture and continue kneading. I used the entire yeast mixture but did not require any more water. Once the dough has become smooth, grease it with oil and place it the bowl for it’s first rise/ prove. I gave it approximately 30 mins or so.

See the third picture above, the dough almost tripled.

Then I pushed down the dough and released the air within. I then greased my hands and divided the dough into 6 parts. I greased the baking tin and placed the divided dough in it. Brushed each portion with oil. Then I left it for the second rise/ prove for 20 mins.

How to make Pav at home Easy recipe for dinner rolls Pav recipe Pau recipe Polkapuffs recipe

Preheat the oven at 200’c for 10 mins. Place the tin on the middle rack and bake the Pav for 20 mins @ 200’c using both the upper and the lower heating coil/ rods/ elements. (Please note every oven works differently hence adjust the temperature and duration according to that). I let them sit in the oven with the upper rods turned on for an extra 5-7 mins to get a lovely brown crust.

This is what they looked like as they came out of the oven! Brush them with some melted butter if you like.

They turned pillowy soft with a firm crust and absolutely melt in the mouth kinda good….yum!

How to make Pav at home Easy recipe for dinner rolls Pav recipe Pau recipe Polkapuffs recipe

How to make Pav at home Easy recipe for dinner rolls Pav recipe Pau recipe Polkapuffs recipe

I have made Pizza Rolls, sandwich breads, focaccia bread & Wholewheat Pizza Base too for the blog, do check them out.

Love,

Shreya💝