Bombay Masala Aloo sandwich recipe Bombay toast sandwich recipe Lunchbox ideas Street food of mumbai Polkapuffs recipes Shreya Tiwari photography

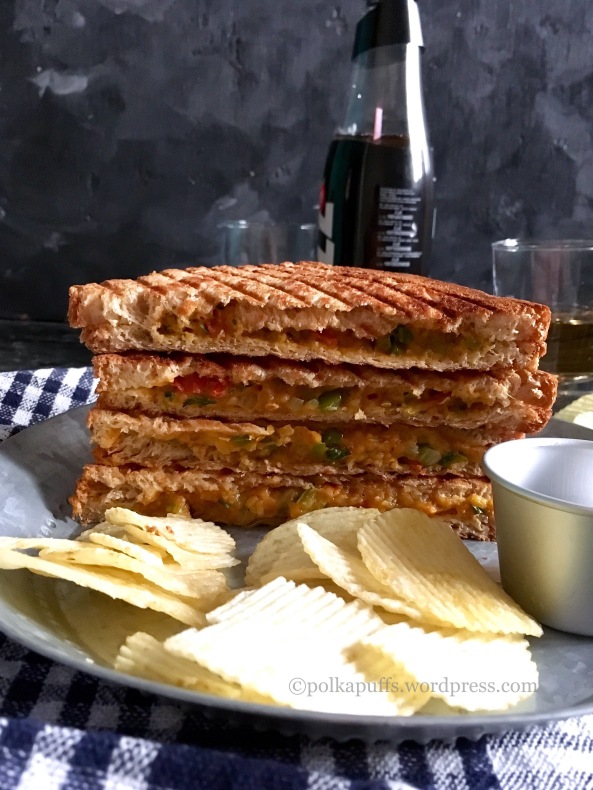
Bombay Aloo Masala Sandwich | Spicy Potato Sandwich

Sandwiches are a staple street food in Amchi Mumbai….be it vegetable toast sandwich or a plain Chutney (salsa) sandwich…the options are endless and oh so yummy! 😍
Bombay Masala Aloo sandwich recipe Bombay toast sandwich recipe Lunchbox ideas Street food of mumbai Polkapuffs recipes Shreya Tiwari photography

I personally love the vegetable cheese grill sandwich! It’s like the best of both worlds…you get veggies and if you are a cheese lover like me…it’s just so good with that cheese within and on the outside😍😍😍😍….a side of some potato crisps/ chips/ wafers…and some ketchup😋

Similarly, there is another hot favourite among most Mumbaikars….the spicy, aromatic and very delicious Bombay Aloo Masala Sandwich…make it as a toast sandwich or a grilled one…it’s amazing! Aaaaannnddd…..it’s my hubby’s favorite 😘
Bombay Masala Aloo sandwich recipe Bombay toast sandwich recipe Lunchbox ideas Street food of mumbai Polkapuffs recipes Shreya Tiwari photography

This is a regular breakfast or evening snack at our place…and my Mom’s recipe for the filling/ Aloo Masala is super duper yum!

I usually use brown bread to make them…you can use regular white sandwich bread or any multigrain bread if your choice. I had once even used a Homemade Herbed Focacia bread for this sandwich and it was so good!

Anyways…let’s get you started on the recipe..

Yield: can be used for upto 6-7 sandwiches with generous amount of the potato filling.

Equipment: a non-stick pan, measuring cups/ spoons, grilled or toaster or a pan to grill or toast the sandwiches, a bread knife to cut the sandwiches into portions.

Ingredients:

5 nos. large potatoes (boiled and mashed)

3 tbsp oil

1 tsp finely chopped green chilli

a pinch of hing (asafoetida)

1/4 tsp cumin seeds (jeera)

1/2 cup finely chopped onions

1/4 cup finely chopped green bell pepper (capsicum)

2 nos. finely chopped tomatoes

salt to taste

1 tsp ginger-garlic paste

1/4 tsp turmeric powder

1/2 tsp red chilli powder

1 tsp Pav bhaji Masala

1/4 tsp amchur powder (raw mango powder)

1-2 tsp water (if needed to correct the consistency)

2 tsp chopped fresh coriander leaves

butter as needed to grill/ toast the sandwiches

Method:

To make the filling:

Heat oil in a non-stick pan. Once the oil is hot, add cumin seeds, hing and chopped green chillie. Sauté for a minute.

Next, add the chopped onions. Sweat them for a few minutes. Then add the capsicum. Sauté again. Tip in the tomatoes followed by the salt, turmeric, red chillie powder, ginger-garlic paste. Mix well and cook these together until the tomatoes turn mushy and the raw smell of the ginger- garlic paste goes away.

Next, add the mashed potatoes along with the Pav bhaji Masala. Also add the amchur powder and mix well. Turn off the flea me. Add chopped coriander leaves and give them all a final mix. That’s your filling done! Keep well in the refrigerator for 3-4 days.

Bombay Masala Aloo sandwich recipe Bombay toast sandwich recipe Lunchbox ideas Street food of mumbai Polkapuffs recipes Shreya Tiwari photography

To make the sandwich:

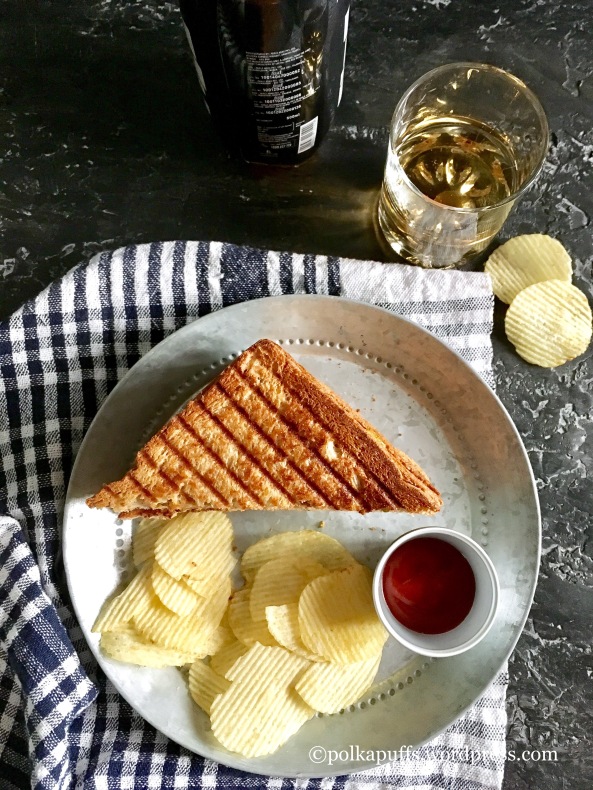
Take 2 slices of bread. Slather both the slices with butter. Sprinkle some chaat Masala (optional) and spread a thick layer of the potato filling. Heat the griller/ toaster…spread some butter on the griller plate and place the sandwich on it and let it crisp up on both sides. Serve hot with some chips/ crisps and ketchup!

Bombay Masala Aloo sandwich recipe Bombay toast sandwich recipe Lunchbox ideas Street food of mumbai Polkapuffs recipes Shreya Tiwari photography

You can add some veggies to this filling recipe or even minus a few things if you wish. Do try it…it’s lip smacking 😍

Love,

Shreya💖

Sandwiches with Spicy Potato fillng | Bombay Masala Aloo Sandwich | PolkaPuffs


3 Ingredients Mixed Berries Jam | No Pectin Jam Recipe | Berry Jam Recipe

It’s the ‘very berry’ season in my home!! I am literally swamped with berries of late! I am having strawberries and mulberries for breakfast, lunch…dinner and then some for desserts 😁 and I am loving them! They are so juicy and the colour…oh my.. I have an almost permanent purple stain on my lips because of the mulberries 😂😂 but I can’t seem to stop popping them each time I walk past the dining table…and I am never short of excuses to be ‘walking past’!! LoL!

3 ingredient strawberry jam 3 Ingredient mixed berries jam Homemade strawberry jam recipe Polkapuffs recipe No pectin strawberry jam recipe No pectin jam recipe Mulberry jam recipe How to make jam at home without pectin

I mean, look at them beauties…can keep your hands off?! Specially the mulberries….this is just the third, maybe the fourth time in my entire 29 years of existence that I could lay my hands on them…probably I couldn’t have paid much attention to them around me…but this year has been different…I can see them everywhere..beautiful, organic and absolutely delicious! Just as yummy as the juicy red strawberries.

3 ingredient strawberry jam  3 Ingredient mixed berries jam Homemade strawberry jam recipe Polkapuffs recipe No pectin strawberry jam recipe No pectin jam recipe  Mulberry jam recipe  How to make jam at home without pectin

I will share some health benefits of various berries here……I have read a lot about them online and because I prefer eating seasonal produce, I strongly recommend that one must have them but obviously you must consult doctors whenever necessary.

Strawberries:

Improves immune system.

Reduces the chance of contracting eye related ailments and issues.

Helps maintains a healthy heart by keeping Blood Pressure in check.

Reduces risk of of gout, cancer and arthritis.

Reduces cholesterol.

Great anti-oxidant and helps maintain great skin, hair and overall health.

Studies say that one bowl of strawberries a d is just about 50 calories!

Mulberry (Shahtoot): 

Cures certain diseases.

Cures cancer.

Prevents blood clots and heart stroke.

Cleanses blood.

Prevents seasonal cold and flu.

Strengthens kidney and helps cleanse liver.

Keeps blood sugar in check.

3 ingredient strawberry jam  3 Ingredient mixed berries jam Homemade strawberry jam recipe Polkapuffs recipe No pectin strawberry jam recipe No pectin jam recipe  Mulberry jam recipe  How to make jam at home without pectin

So coming to what I did with these berries besides chomping on them was jamming! I made Strawberry Jam last year, it was super delicious and absolutely lip-smacking! I made another batch within a month because I almost didn’t want it to ever get over 😋

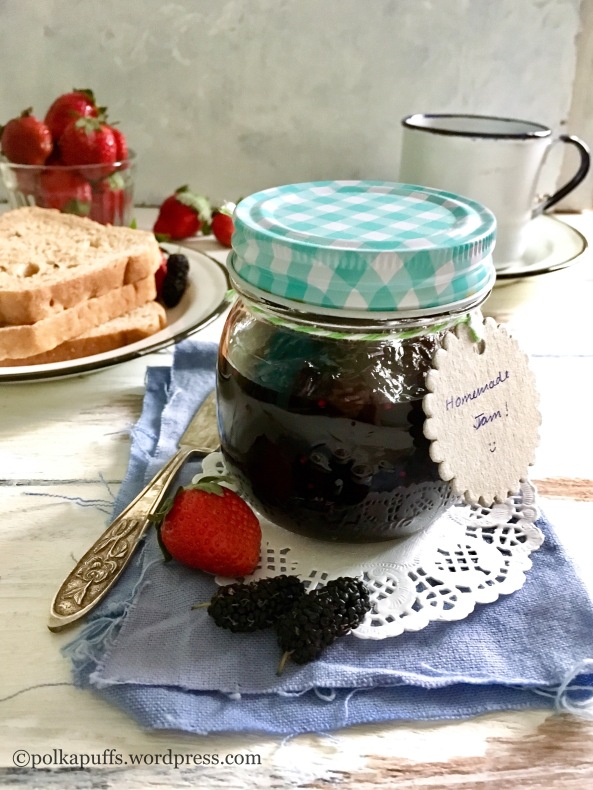
So this time around, I wanted to use both the berries in the jam and that’s exactly what I have done! Look at the jam…it’s so beautifully coloured…and has little chunks of strawberries and mulberries 😍…perfect on a slice of fresh homemade sandwich bread!…..yummmm!

3 ingredient strawberry jam  3 Ingredient mixed berries jam Homemade strawberry jam recipe Polkapuffs recipe No pectin strawberry jam recipe No pectin jam recipe  Mulberry jam recipe  How to make jam at home without pectin

Since I am not tea/ coffee person, I prefer a light lemon tea with a ton of sugar…literally 😂😂 and a couple of slices of bread with my homemade jam slathered all over ….pure bliss!

3 ingredient strawberry jam  3 Ingredient mixed berries jam Homemade strawberry jam recipe Polkapuffs recipe No pectin strawberry jam recipe No pectin jam recipe  Mulberry jam recipe  How to make jam at home without pectin

Let’s make some jam….

Yield: Approx 200 gms

Equipment: a big bowl, measuring cups/ spoons, a heavy bottomed pan, a potato masher, a small stainless steel/ ceramic plate, a clean & dry glass bottle to store the jam.

Ingredients:

300 gms fresh strawberry

100 gms fresh mulberries

3/4 cup sugar (I added this much as it is good enough for our taste and the mulberries we’re extremely sweet. Adjust to your taste preferences and as per how sweet the berries are!)

1 tsp lemon juice

Method:

Wash the mulberries and the strawberries, pat them dry. Then hull the strawberries using a paring knife (a regular knife will also do). Remove the small stalks on each mulberry. Chop the berries  roughly and keep them in a large bowl.

Add sugar to this and mix well. Cover and set it aside for 4-5 hours. Remember to stir it once every 30 mins or so. This will macerate the mulberries and the strawberries well (help in releasing the juices).

3 ingredient strawberry jam  3 Ingredient mixed berries jam Homemade strawberry jam recipe Polkapuffs recipe No pectin strawberry jam recipe No pectin jam recipe  Mulberry jam recipe  How to make jam at home without pectin img_6822

After 4-5 hours, that’s how they should look.

Alongside, place a ceramic/ stainless steel plate in the freezer, it will be used later to check the consistency of the jam.

Heat a heavy bottomed pan, add the mulberries and the strawberries with all their juices to the pan, stir continuously until they come a rolling boil, this will take about 6-7 mins. Using a potato masher, mash the mulberries and the strawberries well and continue to stir. Cook for another 10 mins. Add the lemon juice at this stage (lemon juice is added to give a nice gloss to the jam). Let it cook & allow the juices to reduce for a few mins, but ensure you stir it constantly.

3 ingredient strawberry jam 3 Ingredient mixed berries jam Homemade strawberry jam recipe Polkapuffs recipe No pectin strawberry jam recipe No pectin jam recipe Mulberry jam recipe How to make jam at home without pectinimg_6824img_6825

Once the jam looks thick and gooey, keeping the flame on, drop some on the chilled plate and wait for 30 secs to let it set. Then draw a line in between, if the lines do not spread into each other, it means that the jam is ready & you can turn off the gas.

If not, then cook it for another 5-7 mins and repeat this step with another chilled plate.

3 ingredient strawberry jam 3 Ingredient mixed berries jam Homemade strawberry jam recipe Polkapuffs recipe No pectin strawberry jam recipe No pectin jam recipe Mulberry jam recipe How to make jam at home without pectinimg_6827

Cool the cooked jam thoroughly and store it a clean & dry glass bottle/ jar. Always use a dry spoon to remove the jam. Store this in the refrigerator and it should last for over 6 months ☺️

3 ingredient strawberry jam 3 Ingredient mixed berries jam Homemade strawberry jam recipe Polkapuffs recipe No pectin strawberry jam recipe No pectin jam recipe Mulberry jam recipe How to make jam at home without pectin

I even add some this jam to bowl of warm custard and it tastes delicious…a dessert without effort 😍😍😍

Love,

Shreya💝

Matar Kachori | Khasti Matar Kachori

Let’s call it as Kachori Weekends at our place….last weekend it was Aloo ki Kachori and this week, I was keen to make my favourite green peas stuffed Kachoris to devoured with some green Chutney! 👌🏼😁

Mattar ki kachori recipe Mutter ki kachori recipe How to make green peas kachori Polkapuffs recipes Shreyatiwari recipes

The market is flooded with fresh, bright green peas. They so sweet and perfect! I have shelled and cleaned about 4-5 kgs of green peas, frozen them in sterilised Ziplock bags to last me for the entire year….more than enough for the two of us! I do this almost every year as I detest the flavour of the store bought frozen peas, they are quite tasteless.

Mattar ki kachori recipe Mutter ki kachori recipe How to make green peas kachori Polkapuffs recipes Shreyatiwari recipes

Anyhow, with all the green peas around me got me craving for some Nimona (a gravy made with puréed green peas, very famous in Uttar Pradesh and enjoyed with steamed rice and some ghee) with the onset of the winters in December…..I have made it almost every week. And now, with the winter almost on it’s way out…I wanted to make Matar ki Kachori once, as it’s fried..once is more than enough for the entire season 😂

Mattar ki kachori recipe Mutter ki kachori recipe How to make green peas kachori Polkapuffs recipes Shreyatiwari recipes

They turned out so crisp and flaky…just the way I love my kachoris. My Mom’s recipe never fails me….be it her Plyaaz ki Kachori or this …just perfect😋

The stuffing is made with fresh, sweet green peas and some spices tasters tangy, earthy as it uses my home made Garam Masala along with loads of ginger…all the flavours of a perfect Northern winter!  There is no onion or garlic in this recipe. The outer pastry is flaky and very crisp as its fried on slow flame…always fry your kachoris low and slow! They cook well and never turn limp and soggy.

You can pair these Matar ki Kachoris with dubkimaar Aloo Tamatar and chutney or just some imli ki chutney…just so yummy👌

Let’s start…

Yield: 9 large kachoris

Equipment: a heavy bottom wok, a slotted ladle, measuring spoons/ cups, rolling board, rolling board, kitchen paper, a small pan, potato masher, mixing bowls.

Ingredients:

For the outer cover:

2+1/2 cup all purpose flour (Maida)

salt to taste

3 tbsp ghee

water as needed

Method:

Take flour in a  mixing bowl, season it with salt. Add ghee and rub it into the flour until the flour resembles bread crumbs. This ensures that the outer cover of the kachori is crisp and flaky. Next, add sufficient water to make a semi stiff dough. Cover the dough and set it aside to let it rest for a minimum of 30 mins.

For the stuffing: 

1 cup fresh green peas

1 nos. boiled potato

salt to taste

2 tsp mustard oil (use any oil as per your preference)

a pinch of hing (asafoetida)

1 tsp finely chopped green chillies

1/2 tsp cumin seeds

1 tbsp freshly grated ginger

1 tbsp coriander powder

3/4 tsp red chilli powder

1/4 tsp turmeric powder (optional)

1/2 tsp amchoor powder (dry mango powder)

1/2 tsp Garam Masala

chopped coriander leaves as needed

oil to fry

Method:

Mash the boiled potato and set it aside. Potato is used as a binder, if you wish you can avoid it too.

In a pan, heat oil. Once it’s hot, add hing, cumin seeds and green chillies. Let them splatter around for a minute. Then add the grated ginger. Cook it for a minute.

The washed and dried green peas go in next. Season with salt and cook the peas for a few minutes. Then add the turmeric, red chilli powder, coriander powder, Garam Masala powder. Mix well. Add the mashed potato and mix well with the spices and the peas. Cover and cook for 5-7 minutes or until the peas become mushy.

Add the amchoor powder along with chopped coriander leaves next and mix well. Turn off the flame. Cover the pan with the ready stuffing for a few minutes. Then using a potato masher, mash the peas and potato mixtures well. Let some of the peas stay whole, while roughly mashing the others. That’s done.

Assembling:

Divide the dough which was kept aside into 9 equal sized balls.(I could make 9, if you choose to make smaller Kachoris, you can easily make upto 12 kachoris with this much amount of dough). Flatten each ball of dough to a thickness 2-3 mm and diameter about 3″, add 2-3 tsp of the stuffing. Close the dough ball around stuffing tightly and secure the ends so that the stuffing doesn’t spill out while frying. Flatten out the kachori a bit using a rolling board and pin.

Do the same with all the other 8 dough balls as well. Set them aside. Heat oil to fry in a heavy bottomed wok. Once it hot enough, drop 1-2 kachoris at a time and fry on low flame until golfden and crisp on all sides. Remove from oil and drain excess oil on kitchen papers. Fry them all and the serve these piping hot with sides of your choice.

The stuffing keeps well for 2-3 days in the refrigerator if stored in a glass or porcelain bowl. (I avoid plastic)

Mattar ki kachori recipe Mutter ki kachori recipe How to make green peas kachori Polkapuffs recipes Shreyatiwari recipes

I am drooling all over again just as I was typing out this draft 😜 But, seriously, do try this one out soon …..so easy to make and very flavoursome!!! You will be making these again and again.

Love,

Shreya💖


Chocolate Peanut Butter Banana Bread (Eggless)

I guess I can’t keep my hands off the oven…specially when I have to clean out left overs😉😉 I found some peanut butter sitting on one of the shelves in my pantry…and I was like….what can we do with this….. was just about 2-3 tbsps of it….guess it is from my last batch of eggless Peanut Butter and Choco Chip Cookies. Definitely not enough to make a sandwich for lunch. Anyhow, I put it out on the dining table only to notice a few ripe bananas from a copulent of days ago! 😑😑😑 why do I always have bananas when we hardly eat them!!

I will tell you why?! Because they make for some incredibly delicious banana muffins or bread. That’s when it clicked to me that I’d saved a delicious recipe including bananas and peanut butter with some chocolate 🤗🤗🤗 yayyyyy! I knew what I’d do with these. My afternoon project…and something very tempting for my hub’s evening tea 😀

How to make peanut butter Choco chip banana bread Recipe for choco chip banana cake Eggless Banana cake recipe Polkapuffs Eggfree baking recipes Shreya tiwari recipes

Look at the crumbs…so moist! This bread turned out to be so soft and light….just the way we like it! I am glad I did make this because a girl can never have too many banana bread recipes at hand! My Chocolicious Banana & Butterscotch Breakfast Bars are one of my go to recipes whenever I am in a rush to have something ready for a quick breakfast and have some ripe bananas. I think this Chocolate Peanut Butter Banana Bread is going to be the next.

It’s just been a little over 18 hours since I baked this and almost half of it is gone….we are just the two of us😜😜 some gluttons!!! I baked two loaves, one of 7″ and another mini sized of 6″.

How to make peanut butter Choco chip banana bread Recipe for choco chip banana cake Eggless Banana cake recipe Polkapuffs Eggfree baking recipes Shreya tiwari recipes

Making mini loaves is a good idea if you have plans to send some to your loved ones. Else you can dump all of the batter in one larger loaf tin and bake a single bread. (**Always remember to fill the loaf tin only to 3/4th of it’s capacity to avoid the batter spilling over as it bakes and also line the tray well with parchment paper as shown in the pictures below).

I did replace the eggs with thick homemade yogurt and the bread still turned out so good! But I will try with eggs the next time around just to see the difference.

Oh that reminds me…summers are around the corner…do try my 2 ingredient Banana Ice Cream 🍦 You can add raisins or some chopped roasted almonds to the ice cream as well 😊

But for now, let’s make us some delicious Chocolate Peanut Butter Banana Bread 👌

Yield: 1 loaf of 7″ and 1 loaf of 6″

Equipment: a large mixing bowl, a small mixing bowl, a hand blender, measuring cups/ spoons, baking tins, parchment paper or butter paper, a silicon spatula, cooling rack.

Ingredients:

1 cup all purpose flour (Maida)

1/2 tsp baking powder

1/4 tsp baking soda

1/2 tsp salt

3/4 cup powdered sugar

2 nos. medium ripe bananas

1/4 cup thick yogurt (not sour)

4 tbsp smooth peanut butter

1/8 cup (2 tbsp)  vegetable oil

1 tsp vanilla extract

6 tbsp milk

1/2 cup chocolate chips

Method:

Preheat the oven @ 180’c. Line the baking trays with parchment or butter paper. Set them aside.

Sift the flour, salt, baking powder, baking soda in the smaller mixing bowl, stir them together and set the bowl aside.

In the larger mixing bowl, add chopped bananas, oil, milk, vanilla extract, yogurt and the peanut butter. Using a hand blender, blend these together until smooth.

Next, add the wet ingredients to the dry and using a silicon spatula, fold them together. Do not whisk, just fold them gently. (If the batter looks a bit dry, add 1 tsp to 2tsp extra milk but not too much, the batter must be thick and not runny). Add the chocolate chips next. Fold them in too with the ready batter. (If you do not have chocolate chips, use roughly chopped chocolate chunks of Morde cooking chocolate).

Fill the baking trays with the ready batter only upto 3/4th of their capacity. Tap the trays on the counter a few times to release any air bubbles.

How to make peanut butter Choco chip banana bread Recipe for choco chip banana cake Eggless Banana cake recipe Polkapuffs Eggfree baking recipes Shreya tiwari recipes

Bake them at 180’c for 25 to 30 mins or until a toothpick inserted in the centre of the bread comes out clean or with just a few moist crumbs.

(note – I baked the 7″ bread for 35 mins and the 6″ bread for approximately 27 mins. Please adjust the temperature and duration as per your own oven. Every oven does work differently).

Once the breads are baked, let them be in their tin for 10 mins, then unmould them and let them cool on the cooling rack for 20 mins or so before slicing.

Enjoy them with tea, coffee, milk or just as it is….I served these with some of my eggless homemade Honey Butterscotch ice cream as desserts last night! ……..now you know how it is getting over too soon😂😂


How to make peanut butter Choco chip banana bread Recipe for choco chip banana cake Eggless Banana cake recipe Polkapuffs Eggfree baking recipes Shreya tiwari recipes

Love,

Shreya❤

Adapted from Sincerely Jean.


Baigan ka Bharta aur Makke ki Roti |Brinjal Mash with Maize Flour Flatbreads | Glutenfree and Vegan

Winter comes with it’s bounty…such fresh veggies and fruits everywhere, I can’t seem to get enough of them! One of my favourite things to make in winters is Makke ki Roti (maize flour flatbreads – they are vegan and gluten free). And to go with these flatbread, I am having my fill of Baigan ka Bharta these days….fresh, spicy and so full of flavours..you’d be wanting more!

I simply follow my Mom’s no-fail recipe for both these delicious things…and it’s finger licking awesome:)

Baigan ka Bharta aur Makke ki Roti |Brinjal Mash with Maize Flour Flatbreads | Glutenfree and Vegan Polkapuffs recipes North Indian recipes Roasted brinjal recipes

I made this combination again just this last weekend and we were in a much happy food-coma! The Makke ki Roti (ahem, please excuse my badly shaped rotis/ flatbread, I find it very difficult to give them any fixed shape or even size as the dough is gluten free and not the easiest to handle…..but I believe it’s the taste that matters in this case🤗😀). However, I try to roll them between two sheetss of cling wraps mostly…but this is the best I can manage!

Baigan ka Bharta aur Makke ki Roti |Brinjal Mash with Maize Flour Flatbreads | Glutenfree and Vegan Polkapuffs recipes North Indian recipes Roasted brinjal recipes

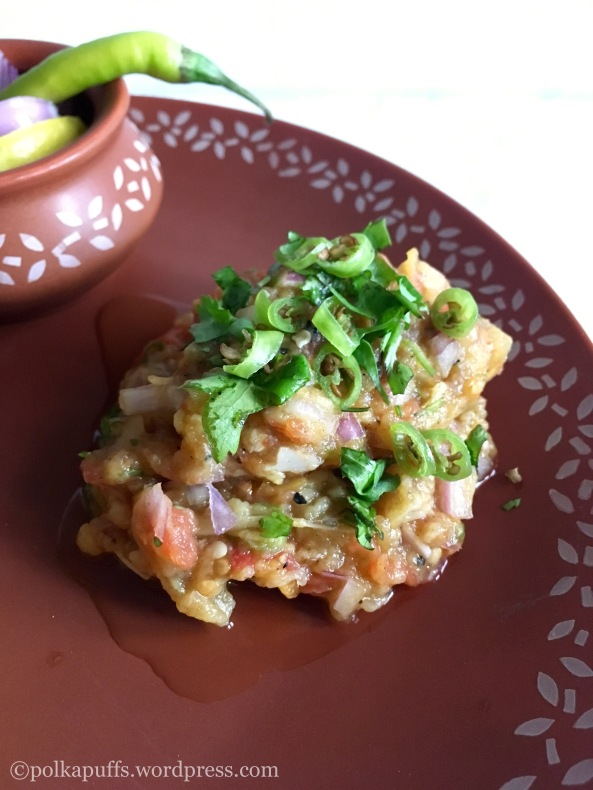
The Bharta or the mash, well it’s a whole different story….I spend all the time to make as perfect as it can get and I nail it every time 😉 Brinjal is roasted to a charred beauty and then everything starts from there.. tip – buy a lighter brinjal as they are perfect and do not have many seeds.

Baigan ka Bharta aur Makke ki Roti |Brinjal Mash with Maize Flour Flatbreads | Glutenfree and Vegan Polkapuffs recipes North Indian recipes Roasted brinjal recipes

Let’s get cracking…it’s not much effort…:)

Yield: serves 2

Equipment: wired roasting stand, measuring cups/ spoons, a mixing bowl, a small bowl, a pair of kitchen tongs, a large mixing  bowl – for the maize dough, rolling pin, cling wraps, a pan, a spatula.

Ingredients:

For the Bharta:

1 nos. medium large, round brinjal (bharte Wala Baigan)

2 nos. medium tomato (choose ripe, juicy tomatoes)

7-8 garlic cloves

1 nos. finely chopped onion

1/4 cup mustard oil (this is what we use traditionally up North)

1 tsp finely chopped green chilli

1 tsp grated ginger

salt to taste

fresh coriander, as needed

For the Makke ke Roti:

2 cup maize flour (Makke ka atta)

salt to taste

1 tsp crushed kasuri methi (dried fenugreek leaves)

water as needed to knead

4-5 tsp oil, for cooking the Roti/ flatbread

Method for the Bharta: 

So, right at the start I will urge you to follow the step wise pictures, they are pretty much self explanatory. I will explain in writing as and when necessary.

Wash and wipe the tomatoes and the brinjal. Set the tomatoes aside.

Keep the brinjal’s stem intact. Make an inch long slit in the brinjal. This slit must be a bit deep. Stuff the garlic cloves in this slit. Massage the entire brinjal with some mustard oil.

Baigan ka Bharta aur Makke ki Roti |Brinjal Mash with Maize Flour Flatbreads | Glutenfree and Vegan Polkapuffs recipes North Indian recipes Roasted brinjal recipesimg_6017

Next, turn on the flame and place the wired roasting stand over the flame. Place the oiled brinjal over it and roast it well on all sides until well charred.

Baigan ka Bharta aur Makke ki Roti |Brinjal Mash with Maize Flour Flatbreads | Glutenfree and Vegan Polkapuffs recipes North Indian recipes Roasted brinjal recipesimg_6020

While the brinjal cools down, massage the tomatoes with some oil, make a couple of small slits on each tomato and roast them too just the way we did for the brinjal.

Baigan ka Bharta aur Makke ki Roti |Brinjal Mash with Maize Flour Flatbreads | Glutenfree and Vegan Polkapuffs recipes North Indian recipes Roasted brinjal recipesimg_6021img_6022

Now, take some water in a small bowl. Dip your fingers in the water and slowly peel the charred skin off the brinjal and tomatoes. Set them aside in a mixing bowl. Mash these together along with the garlic that was roasted within the brinjal as well. Season with salt.

Baigan ka Bharta aur Makke ki Roti |Brinjal Mash with Maize Flour Flatbreads | Glutenfree and Vegan Polkapuffs recipes North Indian recipes Roasted brinjal recipesimg_6025

Next, add the chopped onions, chopped chillies, grated ginger, remaining mustard oil, chopped coriander leaves to the the mashed tomatoes and brinjal. Give everything a good mix! This is done!

Method for the Makke ki Roti:

In a large mixing bow, take the flour, season it with salt and kasuri methi. Mix them well. Add water as you go and knead to make a dough until everything comes together. Cover the dough with a damp kitchen towel for a few minutes before making the Roti/ flatbread.

Baigan ka Bharta aur Makke ki Roti |Brinjal Mash with Maize Flour Flatbreads | Glutenfree and Vegan Polkapuffs recipes North Indian recipes Roasted brinjal recipes

Next, take a lemon sized ball of dough,place it between two cling wrap sheets and using a rolling pin make a roti. (No pictures of these steps, I’d probably need 4 more sets of hands to do that! 😂)

Heat the pan, drizzle some oil on the pan and place the rolled Roti and cook it on both sides until well cooked and charred around the edges. Serve piping hot with Baigan ka Bharta, some pieces of jaggery and a salad.

Baigan ka Bharta aur Makke ki Roti |Brinjal Mash with Maize Flour Flatbreads | Glutenfree and Vegan Polkapuffs recipes North Indian recipes Roasted brinjal recipes

Isn’t that easy and absolutely yum! If you’ve liked this, do try my take on popular Bihari favourite Litti Chokha here. This Baigan Bharta goes so well with some Litti too!

Love,

Shreya 💖

No onion no garlic potato wrap

Spicy Potato and Wholewheat Wrap (no onion no garlic)

Most of us have been avoiding the consumption of onion and garlic during Navratris and stick to eating home cooked and light meals. I feel that doesn’t need to be restricted to Aloo Tamatar ka Rassa (potato tomato curry) or Sabudana Wada (sago fritters) for every other meal.. this perception has to change! We can easily incorporate so many flavours to make a whole new and exciting meal even as we abstain from some key ingredients ☺️ 

No onion no garlic potato wrap

Some people do not consume whole grains like wheat, they can easily make Buckwheat (kuttu ki Roti) flatbreads for this recipe. I have used a spicy version of potatoes for the filling and some veggies like carrots and cucumber for the salad. The dressing or the sauce is very exciting….read until the end to know more!! 😀

No onion no garlic potato wrap

Lets begin spicing up the festivities!..

Yield: 2-3 wraps

Equipments: measuring cups/ spoons, a pan, a wok, a large mixing bowl.

Ingredients for the the ww wrap:

1 cup wholewheat flour (I used Aashirwad Select)

salt to taste (regular or vrat ka namak)

2 tsp oil

water a needed to knead a dough

Method:

Take flour, salt and oil in a large mixing bowl. Add water little by little as you go on kneading a soft dough. Once the dough comes together, cover it with a kitchen towel and set aside for 30 mins.

Then take a Orange sized portion of the dough and make a thick Roti and cook it on the pan until crisp on both sides. Click here to see pictures.  Make 3-4 ww wraps and set them aside in a hot case/ casserole.

Ingredients for the potato filling:

250 gms baby potatoes (boiled) or use regular cubed potatoes

salt to taste (regular or Vrat ka namak)

2 tsp oil

1/2 tsp red chilli pwd

1 tsp ginger paste

1/4 tsp cumin powder

1/4 tsp lemon juice

Method:

Heat oil in a wok, add the boiled potatoes. Sauté well until slightly crisp and golden brown on all sides. Season with salt, red chilli pwd. Sauté for another 2 mins. Add ginger paste along with cumin pwd. Mix well, cover and cook for about 5-7 mins. Turn off the flame and set aside to cool the filling. Add the lemon juice once it cools down and mix it well.

Ingredients for Salad:

a few juliennes of carrot and cucumber and beetroot (optional)

Ingredients for the sauce:

1/2 cup chilled hung curd

1/4 tsp roasted cumin pwd

salt to taste (regular or Vrat ka namak)

Method:

Mix these ingredients together and set it aside.

Assemble the wrap:

Place a ww wrap, smash some potatoes and place them on the wrap. Top them with some salad and sauce! What more!?? Some chopped coriander too 👌👌

No onion no garlic potato wrap

Exciting…tempting…you crave these!? Go, make some 😋➡️

Also try my Phalhari Kadhai Paneer (click here for recipe) as the filling for these wraps.

Love,

Shreya💗

How to make Pav at home Easy recipe for dinner rolls Pav recipe Pau recipe Polkapuffs recipe

Homemade Pav | Pav Buns | Dinner Rolls

Pav Bhaji on my mind….like for the last entire week I am unable to think beyond it. Every veggie that I glance at reminds me that it could go into my Bombay Pav Bhaji 😂😂 no, I am very serious! I so didn’t want to order any…because those are just not my kind of Bhaji…hence tonight is going to be it:) {happy dance}

Anyways…so I planned to make some Pav ahead of making the Bhaji. It’s beyond easy if you ask me…one bowl magic I call it😊

How to make Pav at home Easy recipe for dinner rolls Pav recipe Pau recipe Polkapuffs recipe

Once you learn to handle the yeast well, making a bread or Pav bread isn’t difficult at all. For me, it’s always been more of the technical part that I concentrate on rather than the recipe itself. The ratios are no doubt very important, I can’t stress enough on that here. One needs to measure them out correctly else things could go horribly wrong! So pay attention to every detail when making a Pav or Bread dough.

How to make Pav at home Easy recipe for dinner rolls Pav recipe Pau recipe Polkapuffs recipe

Let’s learn how..

Yield: 6 Pav (depends on the size of the Pav)

Equipment: measuring cups/ spoons, baking tin, cooling rack, a large mixing bowl.

Ingredients:

2+1/2 cups Maida (all purpose flour) + extra Maida (APF) to dust the dough while kneading (I used appropriately 1/2 cup)

5 tbsp oil + extra to grease the tin & to brush on top of the Pav

salt to taste

1/2 cup lukewarm water (comfortable enough to dip your finger)

3 tsp yeast (I used active dry yeast)

2+1/2 tsp sugar

Method:

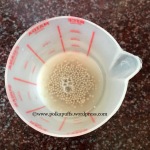
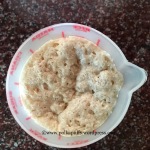
Take 1/2 cup of lukewarm water in a glass or bowl, add the yeast & sugar. Stir it lightly. Set it aside for 10 to let the yeast bloom. (Note that if the water is too hot, the yeast won’t bloom. So be careful with the water. If the yeast doesn’t bloom, start again)

How to make Pav at home Easy recipe for dinner rolls Pav recipe Pau recipe Polkapuffs recipeHow to make Pav at home Easy recipe for dinner rolls Pav recipe Pau recipe Polkapuffs recipeHow to make Pav at home Easy recipe for dinner rolls Pav recipe Pau recipe Polkapuffs recipe

See the first picture above, the yeast has bloomed really well. It almost overflowed on the kitchen top.

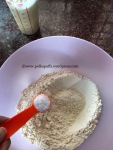
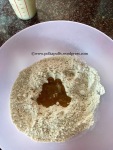
Next, see the second picture above. For making the dough add the flour in the bowl, season with salt. Add the oil and slowly add the yeast mixture. Do not add all the mixture at one go as we may end up with a very gluey and wet dough. Keep adding a little bit at a time and make a dough like we do for rotis. This dough will be sticky so you can add some more flour and knead it well. The longer you knead it, the smoother and softer it will be.

If you feel the dough has become too dry while kneading, add the yeast mixture and continue kneading. I used the entire yeast mixture but did not require any more water. Once the dough has become smooth, grease it with oil and place it the bowl for it’s first rise/ prove. I gave it approximately 30 mins or so.

See the third picture above, the dough almost tripled.

Then I pushed down the dough and released the air within. I then greased my hands and divided the dough into 6 parts. I greased the baking tin and placed the divided dough in it. Brushed each portion with oil. Then I left it for the second rise/ prove for 20 mins.

How to make Pav at home Easy recipe for dinner rolls Pav recipe Pau recipe Polkapuffs recipe

Preheat the oven at 200’c for 10 mins. Place the tin on the middle rack and bake the Pav for 20 mins @ 200’c using both the upper and the lower heating coil/ rods/ elements. (Please note every oven works differently hence adjust the temperature and duration according to that). I let them sit in the oven with the upper rods turned on for an extra 5-7 mins to get a lovely brown crust.

This is what they looked like as they came out of the oven! Brush them with some melted butter if you like.

They turned pillowy soft with a firm crust and absolutely melt in the mouth kinda good….yum!

How to make Pav at home Easy recipe for dinner rolls Pav recipe Pau recipe Polkapuffs recipe

How to make Pav at home Easy recipe for dinner rolls Pav recipe Pau recipe Polkapuffs recipe

I have made Pizza Rolls, sandwich breads, focaccia bread & Wholewheat Pizza Base too for the blog, do check them out.

Love,

Shreya💝

Wholewheat Pizza Base | How to make Wholewheat Pizza Base

You like pizza, I know you do! It’s Friday night…you’re watching your favourite rom-com, you scarf down 5 slices of Pizza without pausing for a breath….and then the DOUGH hits you! Hits you hard 😶😶😶 it’s super chewy, hard and weighs you down. Not the best note to start your weekend on, right!?

We are all the same, I am just like you…love to have pizzas…watch movie marathons and hate getting off my couch on weekends! But not at the cost of feeling weighed down and missing the next two meals or so. Hence, my Wholewheat Pizza Base is perfect for satisfying all those pizza cravings in a healthy way 🤗

Wholewheat pizza base recipe Polkapuffs recipes Vegan pizza base recipe

They are extremely light, crisp on the outside, moist within and taste way better than the all purpose flour ones. And the toppings…well that’s a whole other topic! Play! Yes, simply play with the toppings…veg..non-veg..greens or just plain cheese and herbs! They all work well with this Wholewheat Pizza Base. Although, if you still feel good about a APF pizza base, click here for a detailed, step by step recipe. Also, learn to make your own homemade pizza sauce, absolutely lip smacking and the quickest recipe ever!

A few things to keep in mind when making your own Wholewheat Pizza Base..

1. Yeast – I have used Active Dry yeast. Keep in mind the manufacturing date and the expiration date. Mine is manufactured in June’16 and expires in February ’17. So that’s the window..but I won’t be using this packet after December ’16. The effectiveness of the yeast diminishes with time. So work according to the dates.

2. Wholewheat Flour – I have used Aashirwaad Select flour here. Also, I didn’t seive the flour before kneading the dough. Just measured it correctly by first fluffing the flour, then adding spoonfuls of the flour into the measuring cup and then levelling it off with a palette knife. This is very crucial, so be measure it right!

3. Hydration – Wholewheat flour based breads need slightly more hydration as opposed to the APF ones. I used olive oil and water to hydrate the dough. (You can use regular refined oil too).

Let’s get baking!

Yield: 4-5 pizza bases depending on the size and the thickness. (I made 5 bases of approximately 7″ diameter).

Equipment: a baking tray, measuring cups/ spoons, rolling board, rolling pin, a large mixing bowl, a small mixing bowl, cooling rack, a fork.

Ingredients:

2.5 cups wholewheat flour + some extra flour to dust the board while rolling the dough

125 ml warm water (you should be able to comfortably hold your finger in the water)

25-30 ml water @r.t.

3 tsp sugar

3 tsp active dry yeast

4 tbsp olive oil + 2 tsp extra to grease the dough

1.5 tsp sea salt

Method:

Activate the yeast – take 125 ml warm water and add the sugar & yeast. Mix well. Cover and set aside for 10 mins without disturbing it, to let the yeast bloom. If it doesn’t bloom, discard & start again. Don’t compromise this step.

Wholewheat pizza base recipe Polkapuffs recipes Vegan pizza base recipeWholewheat pizza base recipe Polkapuffs recipes Vegan pizza base recipe

To make the dough – take the flour in a bowl, add salt and oil. Next add all the bloomed yeast mixture in one go. Start mixing them altogether using your fingers. At first the dough will be sticky but it will come together with 3-5 mins of kneading. Add 25 ml of water and keep kneading until you have a smooth dough. The more you knead, the better the dough shall rise! Grease the dough with 2 tsp oil and knead again for a 2-3 mins. Totally, you need to knead for about 15-20 mins. Cover with a kitchen towel and place it in a warm place for 45-60 mins to rise.

Wholewheat pizza base recipe Polkapuffs recipes Vegan pizza base recipe

image

Wholewheat pizza base recipe Polkapuffs recipes Vegan pizza base recipe

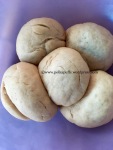
After 45 mins, this is what the dough looked like post the first rise. 

Wholewheat pizza base recipe Polkapuffs recipes Vegan pizza base recipe

Now, we punch the dough down and divide it into equals sized balls. Cover them again and let them rest for 30 mins for the second rise. The third picture below shows the size of the dough balls post the second rise.

Wholewheat pizza base recipe Polkapuffs recipes Vegan pizza base recipeWholewheat pizza base recipe Polkapuffs recipes Vegan pizza base recipeWholewheat pizza base recipe Polkapuffs recipes Vegan pizza base recipe

Preheat the oven for 10 mins at 200’c.

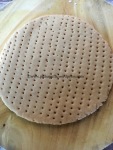
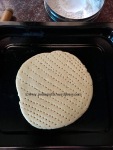
Now, dust the rolling board and the pin with some wholewheat flour and roll out the balls into a flatbread of about 3mm thickness and the diameter of about 6″-7″. Prick them well with fork as shown below.

imageWholewheat pizza base recipe Polkapuffs recipes Vegan pizza base recipe

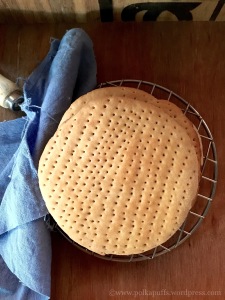
Place the rolled dough on the baking tray and bake for 12-15 mins using both, upper & lower heating elements at 200’c to 210’c. (Please note every oven works differently so keep an eye on the pizza base, once it turns golden on the top side, take it out of the oven).

Once baked, cool the base on a cooling rack for 10 mins. Then apply pizza sauce & add other toppings and cheese and bake for another 10 mins or until the cheese melts. Enjoy!

If storing for future use, cool them completely, wrap them in cling wrap and refrigerate. Stays fresh for 2-3 days under refrigeration.

Wholewheat pizza base recipe Polkapuffs recipes Vegan pizza base recipe

Do try these out soon…you’ll love them!

Love,

Shreya💖

Bakery Style Vegetable Puffs recipe McDonalds Pizza McPuffs recipe Polkapuffs recipes

McDonald’s Style Pizza McPuffs | Bakery Style Vegetable Puffs

Vegetable Puff anyone?! You? And you?! Yes, I guess all of us would grab one the moment we’d set our eyes on these. They are so light, crisp…buttery, flaky…absolutely melt in the mouth yummy! The filling too an integral part…spicy veggies with a dash of tang is what made these Puffs to die for! Even the non-veg version was always so delicious…one Puff would never suffice! 😉

Bakery Style Vegetable Puffs recipe McDonalds Pizza McPuffs recipe Polkapuffs recipes

Hence, I will having 3 of them! Hahah! No, i didn’t, I shared these with my hubby…who couldn’t stop chomping on them. My hubby kept saying that they taste better than the bakery ones. The filling was very different he said, more like the one in a Pizza McPuff from McDonalds! I was like…yes, I did try to replicate the filling, he loved my version.😊

Bakery Style Vegetable Puffs recipe McDonalds Pizza McPuffs recipe Polkapuffs recipes

Why is the filling like Pizza McPuffs, you’d ask me…simply because I love the flavour bomb that is inside a McPuff. It’s so creamy and yet light, perfection in every bite! But I always wanted to make that in Puff Pastry version. So I did.

That filling, those buttery layers made this for the perfect snack…or if I may suggest, a light meal with some soup on the side on a winter night! Wow, sounds about right! 😍

Making the Puff pastry sheet at home is quite a task..trust me! The rolling, the folding, and repeating the steps at least 10-12 times is a challenge that may or may not give you perfect results. I have used ready to use sheets which I always keep in my freezer when I need to whisk quick snacks or pies even! They are handy and absolutely perfect. But there are few tips on using them that I will share here along with the recipe for the McPuffs filling.

Firstly, always buy a frozen pastry sheet which has a manufacturing date closer to the date you are buying it. Say for example, if you are shopping for this on 15 Jul 2016, the manufacturing date should nothing older than 01st June 2016. That way, you will get the freshest product.

They expire in 90 days, so do plan accordingly. Buy 1 or more packets depending on your consumption. (I always buy 2 at a time, because I know I will use it all in about 5-6 weeks.)

Thawing a frozen pastry sheet, it is crucial to know how you thaw (bring a frozen pastry sheet to room temperature) them. Every package once opened cannot be refrozen. To thaw, place the frozen pastry sheet roll at room temperature for about an hour. It also depends where you are, say if the climate is humid, it will soften faster and the same goes for the other way around too.

The size of the frozen pastry sheets is just right to make about 4-5 of these vegetable puffs. But it also depends on how you have sized the puffs, you could even make 6-7 of them. (I usually make large ones)

Let’s get started..

Yield: 4-5 large McPuffs/ Vegetable Puffs

Equipment: a baking tray, cooling rack, a knife, a fork, a small pan, measuring cups/ spoons, pastry brush.

Ingredients:

1 nos. frozen pastry sheet

oil as needed to brush the puffs before baking

For the filling:

1 cup each boiled and chopped carrots & beans (you can add any veggies or meat)

salt to taste

1/4 tsp crushed black pepper

1/4 tsp turmeric pwd

1/2 tsp red chilly pwd

3/4 tsp mixed Italian herbs

1 tsp ginger garlic paste

2 tbsp tomato ketchup

3 tbsp Amul fresh cream

2 tsp oil

Method:

Heat oil in a pan, add the chopped veggies. Season with salt & pepper. Mix well & sauté for 3-4 mins.

Bakery Style Vegetable Puffs recipe McDonalds Pizza McPuffs recipe Polkapuffs recipesBakery Style Vegetable Puffs recipe McDonalds Pizza McPuffs recipe Polkapuffs recipesBakery Style Vegetable Puffs recipe McDonalds Pizza McPuffs recipe Polkapuffs recipes

Next, add ginger garlic paste, turmeric, red chilly pwd and Italian herbs. Mix well and cook for 5 mins. Now turn off the flame, add cream and ketchup. Mix well. Set the ready filling aside to cool for a few mins.

Assembling the Puffs:

Lay the thawed pastry sheet and cut the pastry into pieces as per your choice. Place the filling in the centre and close the pastry from the other side as shown below. Use a fork and press down the edges to secure the filling within the puff.

Bakery Style Vegetable Puffs recipe McDonalds Pizza McPuffs recipe Polkapuffs recipesBakery Style Vegetable Puffs recipe McDonalds Pizza McPuffs recipe Polkapuffs recipesBakery Style Vegetable Puffs recipe McDonalds Pizza McPuffs recipe Polkapuffs recipes

Make small incision on top of every puff and brush them with oil.

Bakery Style Vegetable Puffs recipe McDonalds Pizza McPuffs recipe Polkapuffs recipesBakery Style Vegetable Puffs recipe McDonalds Pizza McPuffs recipe Polkapuffs recipes

Place the ready to bake puffs in the refrigerator for 10 mins to firm up, that way they get perfect flaky layers once baked.

As they cool in the refrigerator, preheat the oven at 180’c for 10 mins. Now place the baking tray in the oven to bake the puffs for 20-25 mins @190’c using both the upper & lower rods. (Please note that every oven works differently and you may need to adjust the timing and the temperature too. These settings worked for me.)

They will start turning brown on the top as they puff up, so keep an eye on them as they bake. Once done, remove from the oven and place the them on the cooling rack for a few mins to cool them a bit. Serve warm/ hot with ketchup.

Bakery Style Vegetable Puffs recipe McDonalds Pizza McPuffs recipe Polkapuffs recipes

Hope you try these soon and don’t be intimidated by the pastry sheets! They are very simple to use. ☺️

Love,

Shreya💖

Tortilla pizza cups by PolkaPuffs

Tortilla Pizza Cups

I am game for a pizza at any hour of the day! Sounds familiar….obviously! Most of us are…I can’t imagine someone who isn’t, literally. The gooey cheese oozing with every bite is just too tempting to deny. Calories.??😱😱 Well, give it a rest…indulge your tastebuds…and they don’t matter much when pizza can fit in a cup! 😉😉Portion control! 

Tortilla pizza cups by PolkaPuffs

Remember my Pizza Pinwheels…they were super hit! I mean…I have made them so often. They make for a great finger food just like the Bread Pizza I’d shared.

Tortilla pizza cups by PolkaPuffs

Coming to these Cups, well they are made using readymade Tortillas (someday, I will share how to make Tortillas at home😀) and can be put together in a jiffy. One can add veg or non-veg filling or just keep it simple with some cheese & pizza sauce (kid friendly). In fact, involve your kids…they’ll be so excited.

I will let you in on a quick tip here, these are perfect for portion control as I have said above too and if you do not have Tortillas then simply use Parathas and follow my recipe! They will taste just as good!

2 numbers tortilla sheets
1/2 cup grated mozzarella cheese
1/2 cup chopped bell pepper (red, yellow & green)
1/4 cup sweet corn
1/2 cup pizza sauce (I used homemade)
to taste Salt & Pepper
Oil to grease the muffin pan

Preheat the oven @180’c. Grease the muffin pan. Set that aside
Cut circles from the tortilla sheets using a round cookie cutter or any object with a sharp edge. You will get 4 rounds from 1 sheet.
Place the cut rounds in the muffin tray and apply the pizza sauce.

Tortilla pizza cups by PolkaPuffs Tortilla pizza cups by PolkaPuffs
Add the veggies and cheese next, season with salt & pepper.
Bake them @180’c for 7-8 mins or until the cheese melts and the tortilla cups turn a bit crisp from the edges.
Serve them hot with some ketchup.
Don’t they look so tempting!?
Tortilla pizza cups by PolkaPuffs

Love,
Shreya❤️

Idea taken from Pinterest.