Mango Kulfi | How to make Kulhad Kulfi

An Indian dessert that is loved by everyone and I guess there is rarely anyone who’d say no to Kulfi! This luciously creamy, deliciously sweet and chilled dessert is perfect for summers and compliments any Indian meal when looking for that perfect end to your meal 😍👌🏼 Flavour it with whatever takes your fancy! Mangoes….yes that is what I have used here to make it even more irresistible and delicious.

Mango Kulfi recipe Kulhad kulfi recipe How to make instant kulfi Easy recipe for kulfi Homemade mango kulfi recipe Kesar pista kulfi recipe Polkapuffs recipes Indian ice cream No condensed milk no milk powder Kulfi recipe Shreya Tiwari recipes

Look at the golden colour..and I have used a bit of freshly pounded cardamom powder to elevate the flavour of Alphonso Mangoes….the King of fruits 😍 and garnished it with some pistachio slivers and homemade dried rose petals (organic) ….this recipe also calls for some fresh, thick cream from full fat milk…yes homemade made fresh cream, it makes the Kulfi even more smooth and the taste is very authentic! But then again, you can always use fresh cream from a tetra pack too😋

Mango Kulfi recipe Kulhad kulfi recipe How to make instant kulfi Easy recipe for kulfi Homemade mango kulfi recipe Kesar pista kulfi recipe Polkapuffs recipes Indian ice cream No condensed milk no milk powder Kulfi recipe Shreya Tiwari recipes

Last year I had shared an easy recipe for Kesar Pista Kulfi on the blog and this recipe is another take on that!😀 You can add some chopped pistachios and almonds to this Mango Kulfi recipe and make it a Dry Fruit Mango Kulfi too!

Mango Kulfi recipe Kulhad kulfi recipe How to make instant kulfi Easy recipe for kulfi Homemade mango kulfi recipe Kesar pista kulfi recipe Polkapuffs recipes Indian ice cream No condensed milk no milk powder Kulfi recipe Shreya Tiwari recipes

I used kulhad and matkas (Indian earthenware) of different shapes and sizes to set the Kulfi, you can use simple Kulfi or Popsicle moulds as well or simply use little stainless bowl to set them. Although the kulhad and matkas I have here aren’t actually earthenware, they are all made of porcelain.

Common, let’s make Kulfi!

Yield: 5-6 kulfis

Equipment: a heavy bottomed pan, a ladle, measuring cups/ spoons, kulfi moulds/ Popsicle moulds/ small bowls, ice cream sticks etc.

Ingredients:

500 ml milk (I use Amul toned milk – 2%fat)

pulp of 3 nos. medium Alphonso mangoes

1/4 cup warm milk

2+1/2 tbsp cornflour

1+1/4 cup sugar (adjust as per your preference)

1/2 cup cream (I used homemade cream from full fat milk, you can use tetra packed Amul fresh cream as well)

1/2 tsp cardamom pwd

chopped pistachio & dried rose petals to garnish

Method:

Heat 500 ml milk in the pan, let it boil until the milk reduces a little and becomes thick. Keep stirring so that the milk does not stick at the bottom and burn.

Mix cornflour with 1/4 cup warm milk until it’s lump free. Add this mixture to the reduced milk and keep stirring until the cornflour blends properly with the milk. Add sugar, cardamom powder and the mango pulp. Cook for two mins more. Keep it aside to cool for a few mins.

Next, lightly beat the cream. Add the cooled milk and mango mixture to the beaten cream. Beat again for a few mins (I used a electric beater). Fill this mixture into moulds/ matkas/ bowls and keep it in freezer to set for about 7-8 hours or even overnight.

Mango Kulfi recipe Kulhad kulfi recipe How to make instant kulfi Easy recipe for kulfi Homemade mango kulfi recipe Kesar pista kulfi recipe Polkapuffs recipes Indian ice cream No condensed milk no milk powder Kulfi recipe Shreya Tiwari recipes

Once the Kulfi has set for 3-4 hours, put an ice cream stick in the centre of each mould if using Popsicle mould or traditional Kulfi mould.

Thaw the frozen Kulfi for a few mins, rub the moulds between your palms, tug on the ice cream stick and unmould it gently. That’s it! Your creamy Kulfi is ready☺️ Look at that texture…..yumm!

Mango Kulfi recipe Kulhad kulfi recipe How to make instant kulfi Easy recipe for kulfi Homemade mango kulfi recipe Kesar pista kulfi recipe Polkapuffs recipes Indian ice cream No condensed milk no milk powder Kulfi recipe Shreya Tiwari recipes

Love,

Shreya💗

Mango Kulfi | Mango flavoured Indian Ice Cream | Glutenfree recipe


Sindhi Kadhi and Karare Aloo and a lazy lunch scene

Weekends are for slow starts… we truly believe that! Nothing makes me rush through my weekends…I simply choose not to get fussed and bothered about much. I pretty much hit the snooze button on Fridays…say around noon 😜 and try to finish all my commitments before Friday..😜 Trust me, no one can even catch me on the cell! Besides, it’s just the two of us….the boons of being a couple with no kids ….no responsibilities! I mean, we love kids…but I guess this works for us better👌🏼

Karare Aloo recipe UP style Aloo ki bhujia recipe Sindhi kadhi recipe Polkapuffs recipes Shreya Tiwari recipes

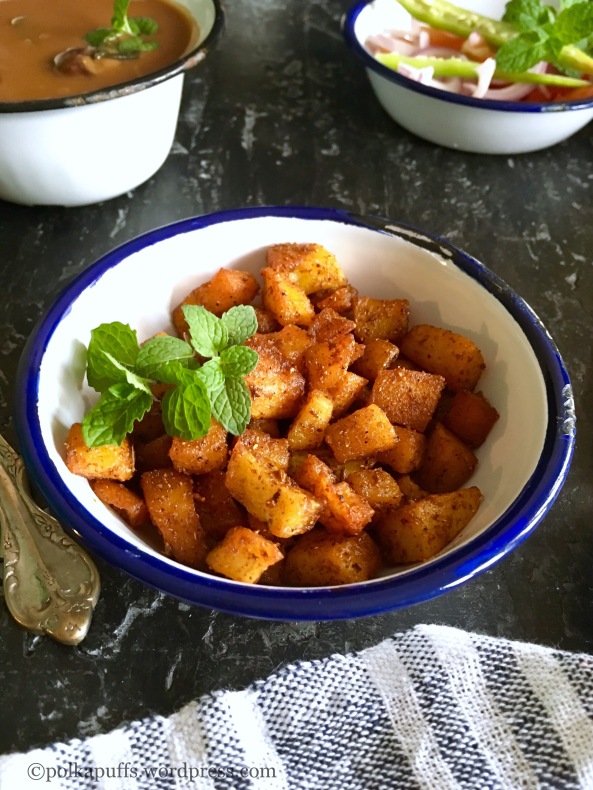
So when I decide to cook on a weekend…that’s if I do plan on cooking on weekends..I look for comfort food apart from being quick and absolutely fuss-free. Yes, I am not a kitchen person when I am on the snooze-mode. More of a couch potato…..who literally loves her potatoes 😍 Hence, I will share a very delicious recipe from my Mom’s kitchen of Aloo ki Bhujia or as my hubby chooses to call it, Karare Aloo 👌 (No onion no garlic). Such basic ingredients with absolutely stunning flavours. I can practically live on this! This recipe is typically a U.P. Style of preparation…but one can find variants of the same being made across India.

Karare Aloo recipe UP style Aloo ki bhujia recipe Sindhi kadhi recipe Polkapuffs recipes Shreya Tiwari recipes

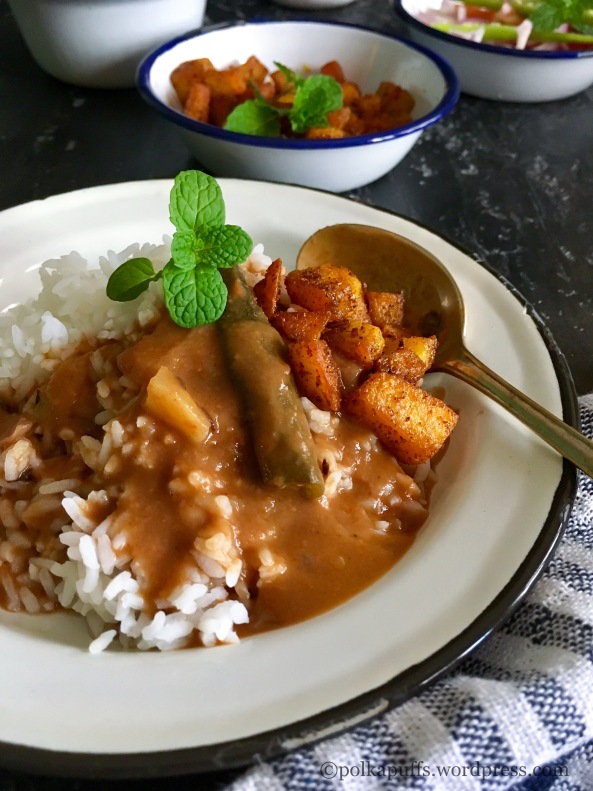
Sindhi Kadhi….again a personal favourite since childhood, I can have it by the gallon! Give me some steamed rice …a bit of my Mom’s Karare Aloo along with a few ladlefuls of her lip smacking, tangy Sindhi Kadhi…and I’ll probably love you forever! 😂…yeah…my love sounds cheap…but it’s really difficult to make a teeny space in my heart…..so it’s not a bad deal actually!

Karare Aloo recipe UP style Aloo ki bhujia recipe Sindhi kadhi recipe Polkapuffs recipes Shreya Tiwari recipes

Look how luscious this kadhi looks….a roasted chickpea flour base is given lots of flavour using tamarind pulp, some whole seeds and dried red chillies add to the punch…..the best part it again had no garlic ….onion, yes, but that is a must for the sweet aRoma that it gives to the kadhi (curry).

A side of some home style onion and tomato salad with lots of lemon juice and a dash of salt along with a glass full of chilled Masala Chaas (not in the pictures above…as I’d already chugged that down while I shot for this post 😉) completes this meal!

Let’s start with the Karare Aloo…

Yield : serves 2

Equipments: a heavy bottom wok, measuring cups/ spoons, a spatula.

Ingredients:

3 nos. large potatoes (peeled, washed and cubed)

4 tbsp mustard oil (this tastes best in mustard but feel free to use any oil of your choice)

a pinch of hing (asafoetida)

1/2 tsp paanch phoran (mixed seeds) 

salt to taste

1/2 tsp turmeric pwd

1 tsp each of red chilli pwd, coriander powder, cumin pwd

1/2 tsp amchoor pwd (dry mango pwd)

Method:

Heat mustard oil until it starts smoking** in a heavy bottomed wok. Turn off the flame. Let the smoke subside. Turn on the flame again. Add hing and the paanch phoran. Let these crackle a bit. Add the cubed potatoes. Stir them around in the oil. Add salt and turmeric. Sauté for 5 mins.

Add all the other dry spices except amchoor powder. Mix well and let the potatoes cook on low flame. Stir them about occasionally. Let them gently crisp up.

I try not to cover the wok when I am making dry version of any veggies. So here too, I haven’t covered the wok with the lid. The potatoes took about 20 mins to cook out completely. They took another 10-12 minutes of cook time to crisp up on low flame and look like what they do! Add the amchoor powder in the end once the potatoes have crisped up.

You can add Garam Masala too in the end along with the amchoor powder but I avoid that in the summers.

**(Use any other oil in the usual way you heat it for everyday use, only mustard oil needs to be heated really well).

These potatoes are best enjoyed piping hot…from the wok to the plate kind of thing…☺☺

On to the Sindhi Kadhi….just the way my Mom makes it.. disclaimer….it may not be authentic but this is how we have been eating it all these years..if any one out there knows a different or a more authentic version, do let us know and we’d  love to try it out too☺️ and probably even publish the same with recipe credits on PolkaPuffs!

Yield: serves 2-3

Equipments: a wok, measuring cups/ spoons, a lid, a ladle.

Ingredients:

1/2 cup chick pea flour (Besan)

water as needed

3 tbsp refined oil

1/2 cup sliced, fried onion

1/2 cup sliced, fried potatoes

1/4 cup sliced, fried okra (bhindi)

salt to taste

1/2 tsp red chilli pwd

4 tbsp fresh tamarind pulp

1/2 tsp turmeric powder

1/4 tsp each methi seeds (fenugreek seeds) and jeera seeds (cumins seeds)

a sprig of curry leaves

a pinch of hing (asafoetida)

2-3 nos. whole dry chillies ( I used ber mirch, the fat, round ones)

Method:

Heat oil in the wok, once it’s hot, add the hing, cumin seeds, fenugreek seeds, whole red chillies and the curry leaves. Once these begin to crackle, add the Besan (chick pea flour) and keep stirring it continuously on low as it may stick at the bottom and burn.

This needs to be roasted with the oil and the other ingredients for a good 6-8 minutes or until the Besan changes it’s colour and gives out an earthy aroma.

Karare Aloo recipe UP style Aloo ki bhujia recipe Sindhi kadhi recipe Polkapuffs recipes Shreya Tiwari recipes

But be careful to keep this on low flame and stir it constantly. Once it has been roasted, add water as per the consistency you’d like to have for this while serving with rice. I added about 1+3/4 cup as this kadhi thickens a lot as it cooks out. Also, season with salt, red chilli pwd and turmeric powder. Mix well. Cover with a lid and let it come to a boil, that will take about 6-7 mins on medium flame.

Open the lid, add the fried veggies and also the tamarind pulp. Add more water if the kadhi has reduced a lot (I added another 1/4 cup at this stage). Cover once again with the lid and let it cook for a further 10 minutes on low flame.

This is what it looks like once ready. Rich colour and an amazing aroma…mmmm…yum!

IMG_6970

That’s it, turn off the flame and serve it piping hot!

Karare Aloo recipe UP style Aloo ki bhujia recipe Sindhi kadhi recipe Polkapuffs recipes Shreya Tiwari recipes

Meals like these are so so good! Go ahead…do try this out and let us know how you liked it☺

Love,

Shreya💗

Sindhi Kadhi | Gluten free Veggie and Chick pea Flour Indian Curry


Kothmir Wadi | Kothambir Wadi – Maharashtrian Delicacy

I am a proper Mumbai (Bombay) girl…born, raised, educated, worked and then married in Mumbai….when I say home, I always mean Mumbai❤….and saying that obviously means I love…just lurrvvvveeee my Mumbaiya (meaning typical) street food and snacks! The hubby and I visit every happening joint, cafe …etc, etc around our city but having some of the most delicious street food is something we can never give up!

Mumbai isn’t only about Wada Pav and Bombay Pav Bhaji in terms of authentic Maharashtrian snacks. If you have ever been to Maharashtra (any part of the state), you’d be familiar with Kothambir Wadi or Kothmir Wadi (spiced, coriander and chickpea flour nuggets). Kothmir or Kothambir literally means fresh coriander leaves in Marathi and Wadi translates to nuggets. Such an easy language… I am almost too proud that I can speak it rather well…(well, I do make grammatical errors here and there but I never quit speaking the language!) 😃

Kothmir Wadi recipe How to make kothambir Wadi at home Maharashtrian recipes Polkapuffs

The flavours are fresh and very earthy, green chillies and ginger along with other spices and ingredients make these Wadis lip smacking. Although, these are available in most local shops that sell Wada Pav or bhajias (batter fried onion or potato fritters), I always wanted to make them at home too. I probably wouldn’t have if my hubby wasn’t so crazy about them…

Kothmir Wadi recipe How to make kothambir Wadi at home Maharashtrian recipes Polkapuffs

So I looked up a few recipes and found one which was easy and sounded a whole lot like what we usually got from outside…and they turn out quite good and crisp! I have been making there for over 2 years now…and a glass of hot lemon tea is all that I need to polish these off!

Kothmir Wadi recipe How to make kothambir Wadi at home Maharashtrian recipes Polkapuffs

Besides, making them is no big task either….it takes less than 15 mins of prepping and just another 30 minutes of cooking! Glutenfree (uses chick pea flour along with rice flour) and vegan (has no clarified butter or yogurt), one can easily include them in their special diets without any fuss. Serve them with a dip if choice or have them on it’s own…delish!

Let’s begin….

Yield: 16 small Wadis (nuggets) using a square baking tin of 5″X 5″

Equipment: a mixing bowl, a whisk, measuring cups/ spoons, a pressure cooker/ large pot, a small metal plate, a frying pan, baking tin or any vessel to use for steaming the Wadis (nuggets), a sharp knife, a pair of tong.

Ingredients:

1/2 cup sifted chick-pea flour (besan) 

2 tbsp sifted rice flour (chawal ka atta)

salt to taste

water as needed

1/4 tsp turmeric powder

1/2 tsp red chilli powder

a pinch of hing (asafoetida)

2 tsp chopped green chillies

1 tsp ginger paste

1 tsp toasted white sesame seeds

1 tsp lemon juice

1/2 cup finely chopped fresh coriander leaves

1/4 tsp baking soda

1 tbsp flavour less oil (like canola or sunflower)

To pan fry: (optional, have it steamed if you wish to avoid pan frying. Also, deep frying is yet another option but I tend to avoid deep frying)

4 tbsp oil

Method:

In a mixing bowl, add the sifted flours. Season with salt. Add hing at this point. Whisk well and add little water to make a thick batter. Add the ginger paste, lemon juice, chillies, red chilli powder, turmeric powder, oil, toasted sesame seeds and chopped coriander leaves, whisk again. Add the baking soda and mix gently (don’t whisk). Grease the baking tin with some oil. Pour the batter into the greased tin and set it aside.

Kothmir Wadi recipe How to make kothambir Wadi at home Maharashtrian recipes Polkapuffs

Heat about 2 cups of water in a large pot or pressure cooker. Keep a metal plate at the bottom of the pot/ cooker to use as a  seperator.

Once the water starts boiling a bit, place the tin with the batter inside the pot/ cooker on the separator plate. Cover with a lid if you are using a pot. In case you are using a pressure cooker, remove the weight (whistle) off the lid and then secure the lid on the pressure cooker.

Kothmir Wadi recipe How to make kothambir Wadi at home Maharashtrian recipes Polkapuffs

Cook on low flame for about 15-18 mins. Then turn off the flame  and open the lid carefully. Remove the tin from the pot/ pressure cooker and using a sharp knife check if the batter has cooked, to do that, simply insert the knife in the centre of the tin, if it comes out clean, the batter has cooked (just aswe do for any cake).

Kothmir Wadi recipe How to make kothambir Wadi at home Maharashtrian recipes Polkapuffs

Let this cool down completely. Once it has cooled, run the knife on all four sides of the tin and gently unmould it on a chopping board. Using the same sharp knife, cut it into squares. Keep them aside.

Kothmir Wadi recipe How to make kothambir Wadi at home Maharashtrian recipes Polkapuffs

This is what it looks like post steaming. Have them just as it is..or pan fry.

To pan fry:

Heat 4 tbsp oil in a frying pan, place the squakes in the pan once the oil is hot, keep turning them around and let them crisp up on all sides. Once done, remove on absorbent kitchen paper. Serve them hot with a dip if your choice!

Kothmir Wadi recipe How to make kothambir Wadi at home Maharashtrian recipes Polkapuffs

They keep fresh for a few hours although I have never tried to store them for very long. These make for a great party snack or even as a side dish to go with your meals!

Love,

Shreya💖

Adapted from Nisha Madhulika

Onion Rawa Masala Dosa – Udupi Style

We rarely make South Indian food at home…my hubby ain’t too fond of it and I can’t just make it for myself even though I love it too much! But then there are days when he happily agrees to his one and only favourite from the cuisine –  Onion Rawa Masala Dosa with spicy, tangy Sambhar…he isn’t too keen on coconut chutney…so I happily skip that! 

Such meals happen over the weekends for brunch…I am not complaining as it’s so easy to put together Rawa Dosa and Sambhar! Making the Masala isn’t difficult too….trust me, I can put them together in under 45 mins start to finish 😃 

Rawa Dosa recipe How to make Rawa dosa Onion Rawa dosa recipe Coconut chutney recipe Udupi style Rawa dosa recipe Udupi style coconut chutney recipe  Breakfast recipes South Indian recipes Onion Rawa Masala Dosa recipe  Polkapuffs recipes Shreya tiwari recipes Udupi style sambhar recipe

Last year I had shared the recipe for plain  Rawa Dosa, now you’d think, what’s the difference…we simply need to add the potato masala and that’s it. No, there is a difference, at least in the way I make it. The batter is different which ensures more crisp dosas that can hold the Masala well without becoming soggy and heavy. 

The batter which I make for onion Rawa Masala Dosa is different in terms of the proportions of the ingredients used. If you follow the recipe properly, you will get crisp, lacy and crunchy Rawa Dosa.

Rawa Dosa recipe How to make Rawa dosa Onion Rawa dosa recipe Coconut chutney recipe Udupi style Rawa dosa recipe Udupi style coconut chutney recipe  Breakfast recipes South Indian recipes Onion Rawa Masala Dosa recipe  Polkapuffs recipes Shreya tiwari recipes Udupi style sambhar recipe

Let’s learn how, do follow the steps properly, it’s very simple.

For the Dosa

Yield: 4-5 Dosas

Equipment: a non stick pan, a spatula, measuring cups/ spoons, a mixing bowl, a ladle.

Ingredients:

1/4 cup Rawa/ sooji (semolina, I have used Bombay rawa)

1/4 cup rice flour

1 tbsp maida (APF)

4 tsp chopped onions

salt to taste

1 tsp crushed peppercorns

1 tsp chopped curry leaves

1 tbsp chopped coriander leaves

1/2 tbsp chopped green chilli

1/2 tsp grated ginger

1/4 tsp sugar

1/4 tsp asafoetida (hing)

1 tsp Jeera (cumin seeds)

water as needed

oil to cook the Dosa

Method:

Take all the dry ingredients in the bowl, stir them well. Then add water and make a runny batter (the batter must not too runny but not thick at all). Let it sit for 5-7 mins.

Rawa Dosa recipe How to make Rawa dosa Onion Rawa dosa recipe Coconut chutney recipe Udupi style Rawa dosa recipe Unduly style coconut chutney recipe  Breakfast recipes South Indian recipes Onion Rawa Masala Dosa recipe  Polkapuffs recipes Shreya tiwari recipes Udupi style sambhar recipe

Heat the pan, lower the flame to medium, sprinkle teaspoon of chopped onions. Let them heat for 30 seconds. Then, spread a ladleful of the batter on the pan…and drizzle some oil around the pan. Cook on low heat for about 5-6 mins…you need to cook it that long as it will crisp up..and there is no need to flip over to cook the other side. Once done, it starts leaving the pan from the edges. That’s it, your Onion Rawa Dosa is ready! Serve it plain or with the Masala stuffed within the Dosa😀

(P.S. Stir the batter well before pouring out the next ladleful!)

Rawa Dosa recipe How to make Rawa dosa Onion Rawa dosa recipe Coconut chutney recipe Udupi style Rawa dosa recipe Unduly style coconut chutney recipe Breakfast recipes South Indian recipes Onion Rawa Masala Dosa recipe Polkapuffs recipes Shreya tiwari recipes Udupi style sambhar recipeimg_6744

For the Masala 

Yield: serves 3-4 Dosas

Equipment: a wok, measuring spoons/ cups, a spatula.

Ingredients:

3 nos. boiled potatoes, cut into small cubes

2 tbsp oil

a handful curry leaves

1 tsp ginger-garlic paste

2 nos. chopped green chillies

1/4 cup chopped onions

a pinch of hing (asafoetida)

salt to taste

1/4 tsp mustard seeds

1/4 tsp turmeric powder

Method:

Heat oil n the wok. Once it’s hot, add mustard seeds, hing. Let these splatter. Then add ginger-garlic paste, curry leaves and chopped green chillies. Cook them for 2-3 minutes. Then add the onions. Cook these till they turn slightly pink. Add salt and turmeric at this stage. Mix well and add the potatoes.  Ash some of the potatoes as they cook. Ensure everything is mixed well. Turn off the flame. Stuff this Masala within the Dosas and serve piping hot!

Rawa Dosa recipe How to make Rawa dosa Onion Rawa dosa recipe Coconut chutney recipe Udupi style Rawa dosa recipe Unduly style coconut chutney recipe Breakfast recipes South Indian recipes Onion Rawa Masala Dosa recipe Polkapuffs recipes Shreya tiwari recipes Udupi style sambhar recipeimg_6741

P.S. you can add green peas and tomatoes too in the Masala but I don’t prefer their flavour in the Masala for Dosa.

For the Sambhar

Yield: serves 2
Equipment: a pressure cooker, a small pan, measuring cups/ spoons, a ladle.

Ingredients:
3/4 cup tuar/ arhar dal (skinned & split pigeon peas)
2+1/2 cup water
Salt to taste
1/2 tsp turmeric pwd
1/2 cup chopped tomato
1/2 cup sliced onions
1/2 cup cubed lauki (bottle gourd, one can add more veggies of your choice)
1/4 cup tamarind pulp
1/2 tsp grated jaggery
2 tsp sambhar pwd (I use MTR)
6-7 curry leaves

For tempering:
3 tbsp oil
1/2 tsp mustard seeds (rai)
A pinch of hing (asafoetida)
2-3 whole red chilli
A few curry leaves

Method:
Wash and soak the dal for 30 mins. Add the soaked dal in the pressure cooker with water, salt, turmeric pwd. Add the tomatoes, curry leaves, onions & bottle gourd too. Cook them together in the pressure for 2-3 whistles. Let the pressure cooker cool down completely before opening the lid. The dal & the veggies must be soft & mushy by now. You can add some water to correct the consistency if needed and boil the dal for about 2-3 mins.

Next, add sambhar pwd and grated jaggery to the tamarind pulp and mix well. Add this mixture to the cooked dal & veggies. Stir well and boil the sambhar for 3-4 mins.

Now to temper the sambhar, heat oil in a small pan. Add all the ingredients listed above ‘for tempering’ to the hot oil and let them splatter for about 2 mins. Add this tempering to the boiled sambhar and mix well. Cover with a lid for a few mins. Serve piping hot with Idli/ Dosa/ boiled rice.

Rawa Dosa recipe How to make Rawa dosa Onion Rawa dosa recipe Coconut chutney recipe Udupi style Rawa dosa recipe Unduly style coconut chutney recipe Breakfast recipes South Indian recipes Onion Rawa Masala Dosa recipe Polkapuffs recipes Shreya tiwari recipes Udupi style sambhar recipe

How many of you are drooling out there!? I know I am ….but I guess I will have wait for a few months until I revisit this platter! Until, my man says he wants some too 😘

Love,

Shreya💝


Khandvi | How to make Khandvi at home | No -Fail Khandvi Recipe

I make a lot of snacks at home…right from Sabudana Wada, Mathri…to Vegetable Croquettes….but never had I dared to try the most popular Gujarati farsan Khandvi at home!! 

I have heard it is very difficult to get the consistency of the batter right and so and so forth….and I love fuss free things as you guys know by now….so making Khandvi was out of the question 😜😂😂

Khandvi recipe Polkapuffs recipes Shreya Tiwari recipes Polkapuffs No fail recipe for khandvi Gujarati snacks recipe

But last month my hubby got some Khandvi from a sweet shop near our home with a big name and all the jazz and honestly we didn’t like how it was – powdery and absolutely tasteless! As opposed to most of the other things available in the shop, this was a complete and utter let down.

So much so, that my dear hubby who knows I’d never make Khandvi at home…kept saying that if I were to make them, I’d nail it! Felt good knowing that he trusts my cooking completely…😍 What next?! Well, I had to nail it…for him. He had so much faith, how would I ever fail.

Khandvi recipe Polkapuffs recipes Shreya Tiwari recipes Polkapuffs No fail recipe for khandvi Gujarati snacks recipe

I called my Mom asking her for the recipe, actually the proportions of the ingredients really, I mean that’s where all the crap happens…measure one ingredient incorrectly and you will never be able to roll even one Khandvi right! 😁

She hasnt made them in years, she said but had a reliable recipe written down somewhere….I couldn’t ask for more!! I diligently noted the recipe with the measures and listened to her explain me how the required consistency will take some time..I’ll need to be patient! Not my strongest virtue but I’ll try I promised😉I tried it that weekend and it was perfect…as told by the man himself! I was happy…hence, made it again a couple of days ago for breakfast…my hubby enjoyed it with a large mug of ginger tea and I with some mint and lemon green tea 👌👌 since it turned out well again…I knew I’d learnt the art of making ‘Khandvi‘ !! 😃

So be patient, go slow, and measure correctly! Let’s get cracking….

Yield: 10-12 rolls

Equipment: measuring cups/ sspoons, knife, a heavy bottomed non-stick pan, a silicon spatula or a wooden spatula, 2 stainless steel plates (optional), a mixing bowl, a small whisk,

Ingredients:

For the Khandvi: 

1/2 cup besan (gram flour)

1 cup thick yogurt (not hung, not Greek)

1 cup water

salt to taste

1 tsp ginger-green chilly paste

1/2 tsp turmeric powder

few drops of oil to grease the plates/ platform

For the tempering:

1 1/2 tsp oil

1/2 tsp mustard seeds

7-8 nos. curry leaves

2-3 nos. slit green chillies

a pinch of hing (asafoetida)

For garnish:

Chopped coriander leaves

some dry garlic chutney 

Method:

In a mixing bowl, seive the besan. Add salt, turmeric, green chilli- ginger paste and yogurt. Whisk well and make sure there are no lumps. Add the water and whisk again.

Khandvi recipe Polkapuffs recipes Shreya Tiwari recipes Polkapuffs No fail recipe for khandvi Gujarati snacks recipeimg_6700

In the meanwhile, grease the backs of the steel plates with some oil. Keep them aside. (If you wish to, you can grease the work platform in the kitchen alternatively).

Heat the pan, keep the flame low and add the batter. Keep stirring it constantly to avoid any lumps. After the first 5 mins of cooking, increase the flame a little bit and cook for another 10-12 minutes. The mixture will have thickened enough. Then again reduce the flame to low. Keep stirring it all the while.

This is what the consistency should be after almost 15-17 mins of cooking. Turn off the flame at this stage.

Khandvi recipe Polkapuffs recipes Shreya Tiwari recipes Polkapuffs No fail recipe for khandvi Gujarati snacks recipe

Tip on how to check if the consistency is correct for the Khandvi – take a little bit of the ready mixture and spread it on the greased plate. Let it cool down for 2 mins, if you are able to roll it off without it sticking to the plate, the mixture is ready. If not, cook the mixture for another 2-3 mins.

Now, that we have affirmed the consistency of the mixture, divide the mixture in two parts for the two plates and spread it evenly as shown below.

Note that the mixture will be still cooking on low flame as you do the test of the consistency.  

Khandvi recipe Polkapuffs recipes Shreya Tiwari recipes Polkapuffs No fail recipe for khandvi Gujarati snacks recipeimg_6703

Let the plates cool down with the mixture for about 10 mins. Then later, using a sharp knife make lines at equal distance and roll the Khandvi very carefully as shown above. Voilà! The Khandvi is ready…easy peasy!!

Now roll all of these similarly and place them on the serving tray/ plate.

Next, for the tempering, heat oil in a small pan, add hing, mustard seeds, curry leaves, green chillies and let these all splatter around for  few minutes. Then pour this tempering on the rolled Khandvi and serve with some dry garlic chutney and green chutney.

Khandvi recipe Polkapuffs recipes Shreya Tiwari recipes Polkapuffs No fail recipe for khandvi Gujarati snacks recipe

These turned out spicy and just how we like them…😍 Do try these…they’ll make you want to make them again and again..!!

Love,

Shreya💗


Matar Kachori | Khasti Matar Kachori

Let’s call it as Kachori Weekends at our place….last weekend it was Aloo ki Kachori and this week, I was keen to make my favourite green peas stuffed Kachoris to devoured with some green Chutney! 👌🏼😁

Mattar ki kachori recipe Mutter ki kachori recipe How to make green peas kachori Polkapuffs recipes Shreyatiwari recipes

The market is flooded with fresh, bright green peas. They so sweet and perfect! I have shelled and cleaned about 4-5 kgs of green peas, frozen them in sterilised Ziplock bags to last me for the entire year….more than enough for the two of us! I do this almost every year as I detest the flavour of the store bought frozen peas, they are quite tasteless.

Mattar ki kachori recipe Mutter ki kachori recipe How to make green peas kachori Polkapuffs recipes Shreyatiwari recipes

Anyhow, with all the green peas around me got me craving for some Nimona (a gravy made with puréed green peas, very famous in Uttar Pradesh and enjoyed with steamed rice and some ghee) with the onset of the winters in December…..I have made it almost every week. And now, with the winter almost on it’s way out…I wanted to make Matar ki Kachori once, as it’s fried..once is more than enough for the entire season 😂

Mattar ki kachori recipe Mutter ki kachori recipe How to make green peas kachori Polkapuffs recipes Shreyatiwari recipes

They turned out so crisp and flaky…just the way I love my kachoris. My Mom’s recipe never fails me….be it her Plyaaz ki Kachori or this …just perfect😋

The stuffing is made with fresh, sweet green peas and some spices tasters tangy, earthy as it uses my home made Garam Masala along with loads of ginger…all the flavours of a perfect Northern winter!  There is no onion or garlic in this recipe. The outer pastry is flaky and very crisp as its fried on slow flame…always fry your kachoris low and slow! They cook well and never turn limp and soggy.

You can pair these Matar ki Kachoris with dubkimaar Aloo Tamatar and chutney or just some imli ki chutney…just so yummy👌

Let’s start…

Yield: 9 large kachoris

Equipment: a heavy bottom wok, a slotted ladle, measuring spoons/ cups, rolling board, rolling board, kitchen paper, a small pan, potato masher, mixing bowls.

Ingredients:

For the outer cover:

2+1/2 cup all purpose flour (Maida)

salt to taste

3 tbsp ghee

water as needed

Method:

Take flour in a  mixing bowl, season it with salt. Add ghee and rub it into the flour until the flour resembles bread crumbs. This ensures that the outer cover of the kachori is crisp and flaky. Next, add sufficient water to make a semi stiff dough. Cover the dough and set it aside to let it rest for a minimum of 30 mins.

For the stuffing: 

1 cup fresh green peas

1 nos. boiled potato

salt to taste

2 tsp mustard oil (use any oil as per your preference)

a pinch of hing (asafoetida)

1 tsp finely chopped green chillies

1/2 tsp cumin seeds

1 tbsp freshly grated ginger

1 tbsp coriander powder

3/4 tsp red chilli powder

1/4 tsp turmeric powder (optional)

1/2 tsp amchoor powder (dry mango powder)

1/2 tsp Garam Masala

chopped coriander leaves as needed

oil to fry

Method:

Mash the boiled potato and set it aside. Potato is used as a binder, if you wish you can avoid it too.

In a pan, heat oil. Once it’s hot, add hing, cumin seeds and green chillies. Let them splatter around for a minute. Then add the grated ginger. Cook it for a minute.

The washed and dried green peas go in next. Season with salt and cook the peas for a few minutes. Then add the turmeric, red chilli powder, coriander powder, Garam Masala powder. Mix well. Add the mashed potato and mix well with the spices and the peas. Cover and cook for 5-7 minutes or until the peas become mushy.

Add the amchoor powder along with chopped coriander leaves next and mix well. Turn off the flame. Cover the pan with the ready stuffing for a few minutes. Then using a potato masher, mash the peas and potato mixtures well. Let some of the peas stay whole, while roughly mashing the others. That’s done.

Assembling:

Divide the dough which was kept aside into 9 equal sized balls.(I could make 9, if you choose to make smaller Kachoris, you can easily make upto 12 kachoris with this much amount of dough). Flatten each ball of dough to a thickness 2-3 mm and diameter about 3″, add 2-3 tsp of the stuffing. Close the dough ball around stuffing tightly and secure the ends so that the stuffing doesn’t spill out while frying. Flatten out the kachori a bit using a rolling board and pin.

Do the same with all the other 8 dough balls as well. Set them aside. Heat oil to fry in a heavy bottomed wok. Once it hot enough, drop 1-2 kachoris at a time and fry on low flame until golfden and crisp on all sides. Remove from oil and drain excess oil on kitchen papers. Fry them all and the serve these piping hot with sides of your choice.

The stuffing keeps well for 2-3 days in the refrigerator if stored in a glass or porcelain bowl. (I avoid plastic)

Mattar ki kachori recipe Mutter ki kachori recipe How to make green peas kachori Polkapuffs recipes Shreyatiwari recipes

I am drooling all over again just as I was typing out this draft 😜 But, seriously, do try this one out soon …..so easy to make and very flavoursome!!! You will be making these again and again.

Love,

Shreya💖


Aloo ki Kachori

Winters are the perfect season to devour everything that’s deep fried and spicy😋😋 I can never say no to anything that’s fried even though I keep promising myself to avoid it as far as possible.

These Aloo ki Kachoris are so so delicious…even if I am saying this myself but you truly need to eat these to believe me! 👌🏼😀 They are crispy, flaky and the filling is absolutely lip smacking!

How to make Aloo ki kachori Aloo kachori recipe Easy recipe for Aloo ki kachori Recipe for Aloo Tamatar for kachori Polkapuffs recipes Shreya tiwari recipes

Dont they look tempting….!? I served these for our Saturday brunch and my hubby couldn’t stop raving about them. I was moving a couple of inches aboveboard the ground for the next few hours 😂😂 The thing is has always enjoyed Aloo ki kachori made in one of the shops in some obscure lane in Kanpur….I’ve tasted that too on one of our trips there, I must confess that it was such a treat 😋 I couldn’t stop at one!

So when my hubby wanted me to make some at home a few weeks ago, I asked my Mom for the recipe and kept my fingers crossed that he’d approve of them. I usually make Pyaaz ki Kachori at home for brunches so I knew I’d nail the outer crisp cover…it was the filling that I wished to perfect.

I served them with every kachori’s favourite accompaniment Dubkimaar Aloo Tamatar ka Rassa and some kacchi kairi Wali chutney…will share the recipe today.

How to make Aloo ki kachori Aloo kachori recipe Easy recipe for Aloo ki kachori Recipe for Aloo Tamatar for kachori Polkapuffs recipes Shreya tiwari recipes

Yield: 8-9 large Kachoris

Equipment: a heavy bottomed wok, rolling pin, rolling board, large mixing bowl, measuring cups/ spoons.

For the outer cover:

Ingredients:

2 1/2 cup Maida (APF)

salt to taste

3 tsp ghee (clarified butter)

water as needed

Method:

In a large bowl, take maida, season with salt. Add the ghee and rub it with the mAida until it resembles bread crumbs. This makes the kachori crispy. Then add little water at a time and make a semi stiff dough. Cover the dough with a kitchen napkin and set aside for 20-30 mins.

For the filling:

Ingredients:

4 nos. large boiled potatoes

salt to taste

chopped green chillies to taste

1 tsp roasted cumin powder

1/2 tsp red chilli powder

a pinch of hing (asafoetida)

2 tsp chopped coriander leaves

1/2 tsp amchur powder

oil to fry the Kachori

Method:

Mash potatoes, add salt, roasted cumin powder, amchur powder, hing, red chilli powder, chillies and coriander leaves. Mix well. Set it aside.

Assembling and Frying the kachori:

Divide the dough in equal sized balls (I made 9). Roll these balls to a flat Roti like shape having a diameter of 3″ or so, stuff with the potato filling. Secure the ball well and flatter the kachori a bit using the rolling pin. Do the same for all the 9 dough balls.

Now heat the oil in a wok til it’s hot enough to fry. Add 1-2 Kachoris at a time and fry them on low flame until golden and crisp on both sides. Don’t fry on high flame as the Kachoris won’t turn crisp.

How to make Aloo ki kachori Aloo kachori recipe Easy recipe for Aloo ki kachori Recipe for Aloo Tamatar for kachori Polkapuffs recipes Shreya tiwari recipesimg_6461

Serve them piping hot.

Ingredients for Kairi Wali Chutney:

2 bunches fresh coriander

3/4 cup chopped kairi (raw mango)

5-6 cloves garlic

3-4 nos. green chillies

salt to taste

water as needed

Method:

Wash and chop the coriander leaves. Add al, the ingredients in a blender jar and make the Chutney using water as needed. Store the Chutney in a porcelain or glass jar, it will stay fresh for 6-7 days.

How to make Aloo ki kachori Aloo kachori recipe Easy recipe for Aloo ki kachori Recipe for Aloo Tamatar for kachori Polkapuffs recipes Shreya tiwari recipes

Hope you enjoy these🤗

Love,

Shreya💖


Suran Ka Bharta | Oal Ka Chokha | Jimikand Ka Chokha | Spicy Mashed Yams

Winter afternoons call for comfort food, a warm, cozy spot on the couch, a good book or maybe a movie marathon … your favourite throw and a long snooze! Did I ever tell you’ll that winters are my favourite time around the year. Not because I can eat to my hearts fill or because I get to bundle up and sit in the same spot for hours…lol…no! I like it because I have the fondest memories from this season…☺️ My Dad’s birthday…followed by Mom’s birthday….and to round it all up…I got married on one super cold night! Yes, weddings in my culture happen in the dead of the night and more often than not, in winters 😂 

Anyways…..I saw elephant foot yams (suran/ oal/ jimikand) flooding the market as it happens every winter and the first thing that occurred to me that I have to make Suran Ka Chokha! 

Suran Ka chokha  Jimikand Ka Bharta  Oal Ka chokha  Vegan recipes Polkapuffs recipes Shreya tiwari  Spicy mashed elephant food yam recipe

It’s a typical winter favourite at my Mom’s place and gladly for me, my hubby too enjoys it! Making it is not all that difficult either…just a very recipe including the most common ingredients from your pantry but the flavours pack such a punch!

I can have this by the bowlful but it is quiet fiery so I limit myself to a couple of spoonfuls during meals…and it’s almost like a pickle, so pungent and yet very flavoursome.

As always I have followed my Mom’s recipe as always… if you’re wondering what will you be pairing this one with…I’d suggest some Dal Sultani, steamed rice, bharwa hari mirch (this you must not miss, I insist!) along with this chokha…and that will be such a splendid spread 👌

Yield: serves 2

Equipment: a large saucepan, measuring cups/ spoons, a mixing bowl.

Ingredients:

300 gms boiled yam (suran)

salt to taste

6-7 tbsp mustard oil

2 tbsp finely chopped green chillies

2 tbsp finely chopped fresh coriander leaves

15-16 cloves of garlic (grated)

1″ piece of ginger (grated)

lemon juice as per taste (I add a little more as the yams tend to absorb the flavours well)

Method:

Wash the yam well, cut it into 2″ chunks.

Boil 7-8 cups of water with a pinch of salt. Add the chunks of yam in the water. Boil these until fork tender. Drain the water and let the yam cool completely.

Peel the yam. Use a fork to mash the yam. Make sure there are no lumps.

Suran Ka chokha Jimikand Ka Bharta Oal Ka chokha Vegan recipes Polkapuffs recipes Shreya tiwari Spicy mashed elephant food yam recipe

Season the mashed yam with salt, add the ginger and garlic, mustard oil, chopped green chillies, chopped coriander and lemon juice. Mix well. Keep it aside for 15-20 mins before serving to let the flavours get absorbed.

This tastes best at room temperature and the flavours are enhanced if served the next day.

This keeps well in a glass or porcelain bowl for about a week under refrigeration.

Suran Ka chokha Jimikand Ka Bharta Oal Ka chokha Vegan recipes Polkapuffs recipes Shreya tiwari Spicy mashed elephant food yam recipe

Hope you enjoy this recipe which is very close to my heart!

Love,

Shreya❤️

Baigan ka Bharta aur Makke ki Roti |Brinjal Mash with Maize Flour Flatbreads | Glutenfree and Vegan

Winter comes with it’s bounty…such fresh veggies and fruits everywhere, I can’t seem to get enough of them! One of my favourite things to make in winters is Makke ki Roti (maize flour flatbreads – they are vegan and gluten free). And to go with these flatbread, I am having my fill of Baigan ka Bharta these days….fresh, spicy and so full of flavours..you’d be wanting more!

I simply follow my Mom’s no-fail recipe for both these delicious things…and it’s finger licking awesome:)

Baigan ka Bharta aur Makke ki Roti |Brinjal Mash with Maize Flour Flatbreads | Glutenfree and Vegan Polkapuffs recipes North Indian recipes Roasted brinjal recipes

I made this combination again just this last weekend and we were in a much happy food-coma! The Makke ki Roti (ahem, please excuse my badly shaped rotis/ flatbread, I find it very difficult to give them any fixed shape or even size as the dough is gluten free and not the easiest to handle…..but I believe it’s the taste that matters in this case🤗😀). However, I try to roll them between two sheetss of cling wraps mostly…but this is the best I can manage!

Baigan ka Bharta aur Makke ki Roti |Brinjal Mash with Maize Flour Flatbreads | Glutenfree and Vegan Polkapuffs recipes North Indian recipes Roasted brinjal recipes

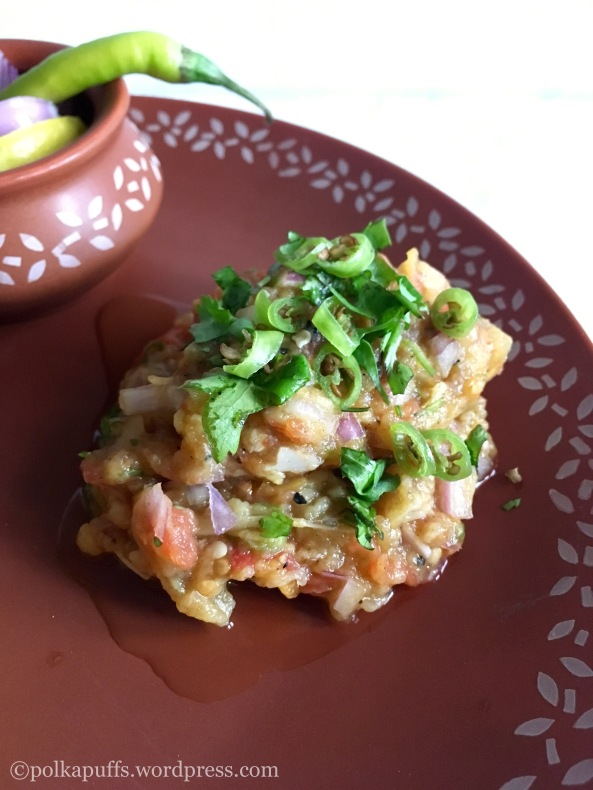
The Bharta or the mash, well it’s a whole different story….I spend all the time to make as perfect as it can get and I nail it every time 😉 Brinjal is roasted to a charred beauty and then everything starts from there.. tip – buy a lighter brinjal as they are perfect and do not have many seeds.

Baigan ka Bharta aur Makke ki Roti |Brinjal Mash with Maize Flour Flatbreads | Glutenfree and Vegan Polkapuffs recipes North Indian recipes Roasted brinjal recipes

Let’s get cracking…it’s not much effort…:)

Yield: serves 2

Equipment: wired roasting stand, measuring cups/ spoons, a mixing bowl, a small bowl, a pair of kitchen tongs, a large mixing  bowl – for the maize dough, rolling pin, cling wraps, a pan, a spatula.

Ingredients:

For the Bharta:

1 nos. medium large, round brinjal (bharte Wala Baigan)

2 nos. medium tomato (choose ripe, juicy tomatoes)

7-8 garlic cloves

1 nos. finely chopped onion

1/4 cup mustard oil (this is what we use traditionally up North)

1 tsp finely chopped green chilli

1 tsp grated ginger

salt to taste

fresh coriander, as needed

For the Makke ke Roti:

2 cup maize flour (Makke ka atta)

salt to taste

1 tsp crushed kasuri methi (dried fenugreek leaves)

water as needed to knead

4-5 tsp oil, for cooking the Roti/ flatbread

Method for the Bharta: 

So, right at the start I will urge you to follow the step wise pictures, they are pretty much self explanatory. I will explain in writing as and when necessary.

Wash and wipe the tomatoes and the brinjal. Set the tomatoes aside.

Keep the brinjal’s stem intact. Make an inch long slit in the brinjal. This slit must be a bit deep. Stuff the garlic cloves in this slit. Massage the entire brinjal with some mustard oil.

Baigan ka Bharta aur Makke ki Roti |Brinjal Mash with Maize Flour Flatbreads | Glutenfree and Vegan Polkapuffs recipes North Indian recipes Roasted brinjal recipesimg_6017

Next, turn on the flame and place the wired roasting stand over the flame. Place the oiled brinjal over it and roast it well on all sides until well charred.

Baigan ka Bharta aur Makke ki Roti |Brinjal Mash with Maize Flour Flatbreads | Glutenfree and Vegan Polkapuffs recipes North Indian recipes Roasted brinjal recipesimg_6020

While the brinjal cools down, massage the tomatoes with some oil, make a couple of small slits on each tomato and roast them too just the way we did for the brinjal.

Baigan ka Bharta aur Makke ki Roti |Brinjal Mash with Maize Flour Flatbreads | Glutenfree and Vegan Polkapuffs recipes North Indian recipes Roasted brinjal recipesimg_6021img_6022

Now, take some water in a small bowl. Dip your fingers in the water and slowly peel the charred skin off the brinjal and tomatoes. Set them aside in a mixing bowl. Mash these together along with the garlic that was roasted within the brinjal as well. Season with salt.

Baigan ka Bharta aur Makke ki Roti |Brinjal Mash with Maize Flour Flatbreads | Glutenfree and Vegan Polkapuffs recipes North Indian recipes Roasted brinjal recipesimg_6025

Next, add the chopped onions, chopped chillies, grated ginger, remaining mustard oil, chopped coriander leaves to the the mashed tomatoes and brinjal. Give everything a good mix! This is done!

Method for the Makke ki Roti:

In a large mixing bow, take the flour, season it with salt and kasuri methi. Mix them well. Add water as you go and knead to make a dough until everything comes together. Cover the dough with a damp kitchen towel for a few minutes before making the Roti/ flatbread.

Baigan ka Bharta aur Makke ki Roti |Brinjal Mash with Maize Flour Flatbreads | Glutenfree and Vegan Polkapuffs recipes North Indian recipes Roasted brinjal recipes

Next, take a lemon sized ball of dough,place it between two cling wrap sheets and using a rolling pin make a roti. (No pictures of these steps, I’d probably need 4 more sets of hands to do that! 😂)

Heat the pan, drizzle some oil on the pan and place the rolled Roti and cook it on both sides until well cooked and charred around the edges. Serve piping hot with Baigan ka Bharta, some pieces of jaggery and a salad.

Baigan ka Bharta aur Makke ki Roti |Brinjal Mash with Maize Flour Flatbreads | Glutenfree and Vegan Polkapuffs recipes North Indian recipes Roasted brinjal recipes

Isn’t that easy and absolutely yum! If you’ve liked this, do try my take on popular Bihari favourite Litti Chokha here. This Baigan Bharta goes so well with some Litti too!

Love,

Shreya 💖

Satpaita | Dal Palak | Mixed Lentils cooked with Spinach | Glutenfree Recipe

Winters call for something warm, delicious and so comforting that it makes you feel all cozy! Yes, winter is my favourite season…😍😍 I would rather have winters all 12 months of the year than any other season The bounties it brings along are something that I wait for all year round 🙂

I can see the freshest produce everywhere I go, the veggies and the fruits tempt me and how!? I end up buying green leafy veggies the most… be it methi (fenugreek greens) or green garlic for making some quick instant pickles…radish (mooli) for making parathas for breakfast….and so much more! But the one thing that I can’t resist is grabbing a few bunches of palak (spinach) almost every alternate day. They are so fresh, organic and extremely healthy. You can make a whole lot of stuff with palak, lIke parathas or palak paneer, add them to pilafs or pulav rice…make soups or some sandwiches. The options are endless when it comes to this super food!

Satpaita recipe How to make dal palak Polkapuffs recipes Shreya tiwari recipes Uttar Pradesh dal palak recipe

Yes, spinach is super food. Although it’s the kale and the chard that take major focus of being a super food, spinach has been providing a host of health benefits even before the concept of ‘super foods’ was invented! ☺️

Spinach is a rich in iron, magnesium, fibre and calcium. It also privides many other vitamins and minerals and is very low in calorie. It’s best consumed either steamed or boiled as these cooking methods help spinach retain most of it’s nutrients.

Since it’s such a healthy veggie, I thought I should share with you guys how I like my spinach the best!! Satpaita or Palak Wali dal is one of my favourite versions of spinach.

Satpaita recipe How to make dal palak Polkapuffs recipes Shreya tiwari recipes Uttar Pradesh dal palak recipe

What is Satpaita? Basically it’s a typical preparation from Uttar Pradesh where two or three kinds of dals (lentils) are mixed together and cooked with chopped spinach over slow flame (these days, we choose to just pressure cook it), seasoned with very little spices and then tempered generously with ghee (clarified butter). Satpaita is very common in almost every other house in Uttar Pradesh, paired with some steamed rice and lots of mooli (radish) salad, some homemade made mango or chilli pickle, a quick stir fry of any veggie is a typical winter lunch.

My Mom, who keeps every tradition alive in our family, introduced us to this dish as kids and we love it to this day…I can have this by the bowl and never tire of it! You can even serve this as a very filling soup too, it’s extremely good for you if you’ve been suffering from cold, cough or have been feeling weak after a bout of viral.

I am sharing my Mom’s version of Satpaita, you can make changes to this as per your liking….

Yield: serves 2

Equipment: a pressure cooker, a large ladle, a small pan, measuring cups/ spoons.

Ingredients:

For the dal:

1/2 cup toor/ arhar dal (split pigeon peas)

1/4 cup tukda kali urad dal (split black lentils)

2 bunch spinach (palak), wash and chopped

1/2 cup chopped tomato

1 tbsp ginger garlic paste

2+1/2 cup water

salt to taste

1/4 tsp turmeric powder

1 tsp coriander powder

2 tsp chopped green chillies

For the tempering:

2 tbsp ghee

1/2 tsp jeera (cumin seeds)

a pinch of hing (asafoetida)

2-3 nos. slit green chillies

5-6 cloves crushed garlic

Method:

For the dal:

Wash the dals (lentils) together and soak them in 2+1/2 cups of water in the pressure cooker for 15 mins.

Satpaita recipe How to make dal palak Polkapuffs recipes Shreya tiwari recipes Uttar Pradesh dal palak recipe

Then add the chopped palak, chopped tomatoes, coriander powder, salt to taste, turmeric, ginger and garlic paste and chopped green chillies to the soaking dals (lentils).

Satpaita recipe How to make dal palak Polkapuffs recipes Shreya tiwari recipes Uttar Pradesh dal palak recipe

Cover the pressure cooker with the lid and place th weight on the lid. Cook on low flame for the first 5 minutes and then turn up the heat until the first two whistles. Then again, lower the heat and let the dal (lentils) cook for a further 10 minutes. Then turn off the heat. Allow the pressure to be released on it’s from the pressure cooker.

Open the pressure cooker, mash the dals (lentils) along with the spinach. Set it aside.

Satpaita recipe How to make dal palak Polkapuffs recipes Shreya tiwari recipes Uttar Pradesh dal palak recipe

For the tempering:

Heat a pan, add ghee. Once it’s hot, add the crushed garlic, hing, jeera (cumin seeds) and the slit chillies. Let these splatter for about a minute, once the garlic turns golden brown, turn off the flame and add the ready tempering to the dal.

Mix well and serve hot with a dash of lemon juice. 

Turn this dal into a vegan option by replacing ghee (clarified butter) with refined oil or olive oil. 

Satpaita recipe How to make dal palak Polkapuffs recipes Shreya tiwari recipes Uttar Pradesh dal palak recipe

Serve with steamed rice, achaari gobhi, bharwaa mirchi and some salad😀

Love,

Shreya💖