Bombay Masala Aloo sandwich recipe Bombay toast sandwich recipe Lunchbox ideas Street food of mumbai Polkapuffs recipes Shreya Tiwari photography

Bombay Aloo Masala Sandwich | Spicy Potato Sandwich

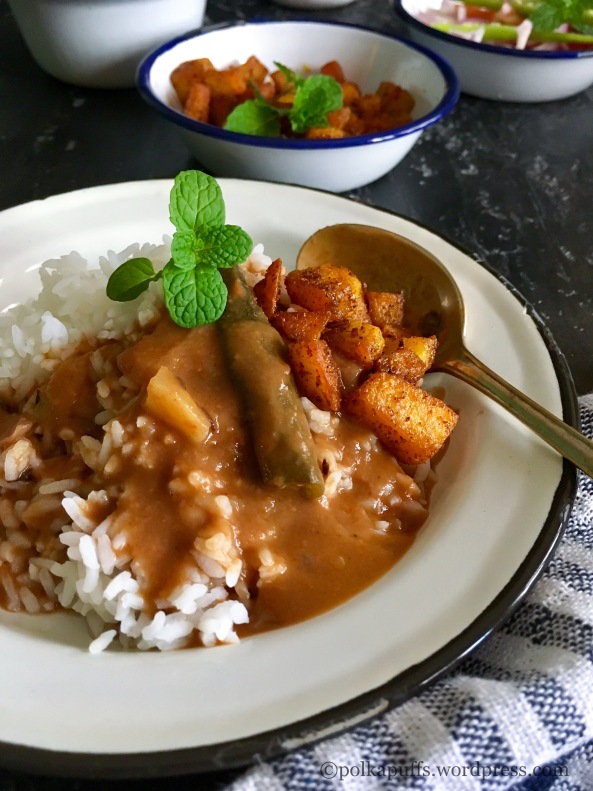
Sandwiches are a staple street food in Amchi Mumbai….be it vegetable toast sandwich or a plain Chutney (salsa) sandwich…the options are endless and oh so yummy! 😍

Bombay Masala Aloo sandwich recipe Bombay toast sandwich recipe Lunchbox ideas Street food of mumbai Polkapuffs recipes Shreya Tiwari photography

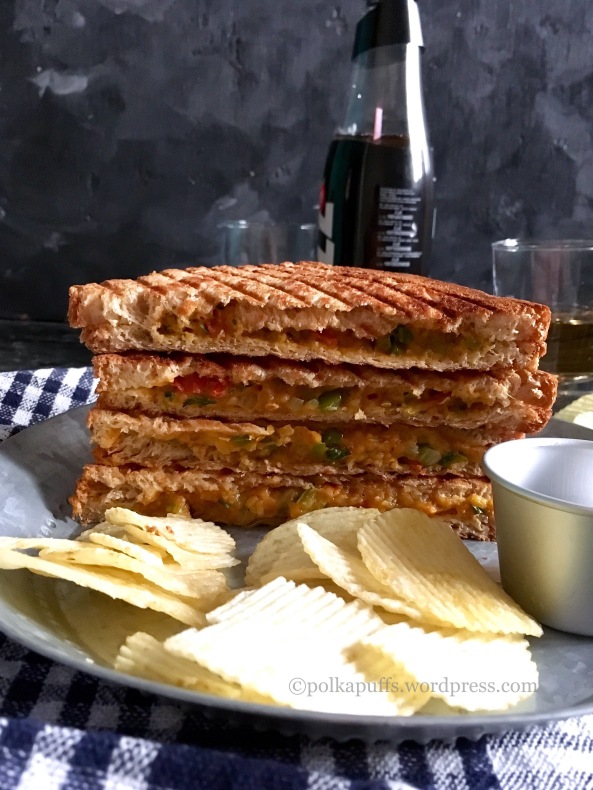
I personally love the vegetable cheese grill sandwich! It’s like the best of both worlds…you get veggies and if you are a cheese lover like me…it’s just so good with that cheese within and on the outside😍😍😍😍….a side of some potato crisps/ chips/ wafers…and some ketchup😋

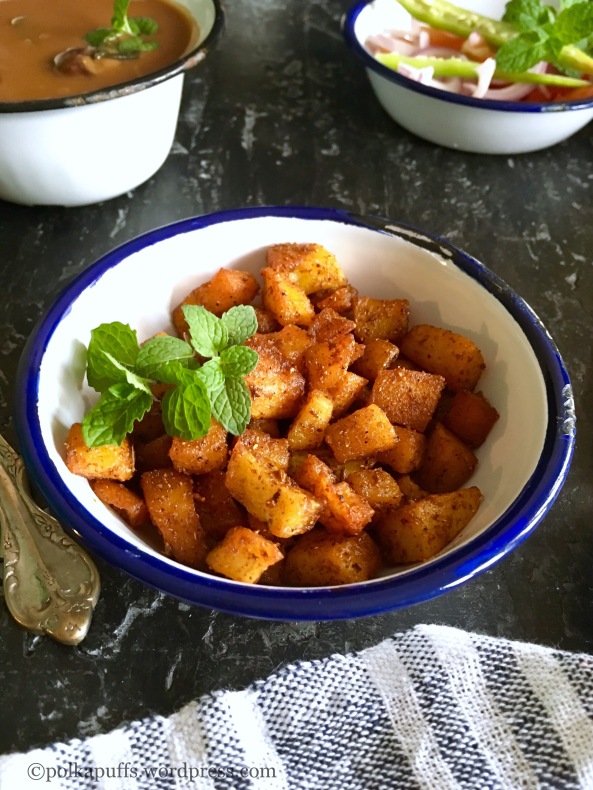
Similarly, there is another hot favourite among most Mumbaikars….the spicy, aromatic and very delicious Bombay Aloo Masala Sandwich…make it as a toast sandwich or a grilled one…it’s amazing! Aaaaannnddd…..it’s my hubby’s favorite 😘

Bombay Masala Aloo sandwich recipe Bombay toast sandwich recipe Lunchbox ideas Street food of mumbai Polkapuffs recipes Shreya Tiwari photography

This is a regular breakfast or evening snack at our place…and my Mom’s recipe for the filling/ Aloo Masala is super duper yum!

I usually use brown bread to make them…you can use regular white sandwich bread or any multigrain bread if your choice. I had once even used a Homemade Herbed Focacia bread for this sandwich and it was so good!

Anyways…let’s get you started on the recipe..

Yield: can be used for upto 6-7 sandwiches with generous amount of the potato filling.

Equipment: a non-stick pan, measuring cups/ spoons, grilled or toaster or a pan to grill or toast the sandwiches, a bread knife to cut the sandwiches into portions.

Ingredients:

5 nos. large potatoes (boiled and mashed)

3 tbsp oil

1 tsp finely chopped green chilli

a pinch of hing (asafoetida)

1/4 tsp cumin seeds (jeera)

1/2 cup finely chopped onions

1/4 cup finely chopped green bell pepper (capsicum)

2 nos. finely chopped tomatoes

salt to taste

1 tsp ginger-garlic paste

1/4 tsp turmeric powder

1/2 tsp red chilli powder

1 tsp Pav bhaji Masala

1/4 tsp amchur powder (raw mango powder)

1-2 tsp water (if needed to correct the consistency)

2 tsp chopped fresh coriander leaves

butter as needed to grill/ toast the sandwiches

Method:

To make the filling:

Heat oil in a non-stick pan. Once the oil is hot, add cumin seeds, hing and chopped green chillie. Sauté for a minute.

Next, add the chopped onions. Sweat them for a few minutes. Then add the capsicum. Sauté again. Tip in the tomatoes followed by the salt, turmeric, red chillie powder, ginger-garlic paste. Mix well and cook these together until the tomatoes turn mushy and the raw smell of the ginger- garlic paste goes away.

Next, add the mashed potatoes along with the Pav bhaji Masala. Also add the amchur powder and mix well. Turn off the flea me. Add chopped coriander leaves and give them all a final mix. That’s your filling done! Keep well in the refrigerator for 3-4 days.

Bombay Masala Aloo sandwich recipe Bombay toast sandwich recipe Lunchbox ideas Street food of mumbai Polkapuffs recipes Shreya Tiwari photography

To make the sandwich:

Take 2 slices of bread. Slather both the slices with butter. Sprinkle some chaat Masala (optional) and spread a thick layer of the potato filling. Heat the griller/ toaster…spread some butter on the griller plate and place the sandwich on it and let it crisp up on both sides. Serve hot with some chips/ crisps and ketchup!

Bombay Masala Aloo sandwich recipe Bombay toast sandwich recipe Lunchbox ideas Street food of mumbai Polkapuffs recipes Shreya Tiwari photography

You can add some veggies to this filling recipe or even minus a few things if you wish. Do try it…it’s lip smacking 😍

Love,

Shreya💖

Sandwiches with Spicy Potato fillng | Bombay Masala Aloo Sandwich | PolkaPuffs


Pressure cooker cake recipe PolkaPuffs recipe Chocolate sponge cake in pressure cooker Eggless chocolate cake in pressure cooker Vegan chocolate cake recipe Bake a cake in the pressure cooker

Eggless Chocolate Sponge Cake in Pressure Cooker | Vegan Chocolate Sponge Cake Recipe

I am back with another easy pressure cooker cake recipe! Yayy! Yayy….because it’s eggless this time! Yup….I know most of my beloved readers out there wanted to learn to bake an eggless cake in the pressure cooker the last time when I’d posted my Mom’s Vanilla Sponge Cake in the Pressure Cooker recipe….. I also know that I am a bit late than I thought I would be…but better late than never, right!? 😄 A ONE BOWL WONDER….

Pressure cooker cake recipe PolkaPuffs recipe Chocolate sponge cake in pressure cooker Eggless chocolate cake in pressure cooker Vegan chocolate cake recipe Bake a cake in the pressure cooker

The best thing about this cake is that it can be baked as well. So, it ain’t necessary that you must bake it in a pressure cooker only. I use the same recipe to bake some muffins in my OTG from the leftover batter as this cake baked in the pressure cooker….and this what it looked like…perfect flat top! You can frost it like a pro!

Pressure cooker cake recipe PolkaPuffs recipe Chocolate sponge cake in pressure cooker Eggless chocolate cake in pressure cooker Vegan chocolate cake recipe Bake a cake in the pressure cooker

It was just perfect…this is my go to recipe whenever I am planning on an eggless, vegan chocolate cake😍 I had discovered this recipe long ago..although it had butter originally but I have been using oil …and it stayed with me. Works like a charm….perfect texture!

Pressure cooker cake recipe PolkaPuffs recipe Chocolate sponge cake in pressure cooker Eggless chocolate cake in pressure cooker Vegan chocolate cake recipe Bake a cake in the pressure cooker

I have used this recipe even for a proper frosted cake. It’s easy to slice in layers and frost well as the crumbs do not just fall off either. It stays fresh for 2-3 days at room temperature too.

Pressure cooker cake recipe PolkaPuffs recipe Chocolate sponge cake in pressure cooker Eggless chocolate cake in pressure cooker Vegan chocolate cake recipe Bake a cake in the pressure cooker

Since I’ve raved so much about it…it’s only fair we look at recipe now😀

Yield: a 6″ square cake (in pressure cooker) and 4 medium cupcakes (baked)

Equipment: a mixing bowl, measuring cups/ spoons, baking tin, a large pressure cooker, a spare steel bowl, a cooling rack, parchment paper/ baking paper.

Ingredients:

1 + 1/2 cup All purpose flour (Maida)

1 cup + 2 tbsp powdered sugar

1/4 cup cocoa powder

1 tsp baking soda

1/4 tsp salt

1 tsp baking powder

1/3 cup oil (I used regular cooking oil)

1 cup warm water

1 tbsp lemon juice / vinegar

1/2 tsp vanilla extract

Method :

Line the cake tin with baking paper/ parchment paper. Dust it with a bit of flour.

Pressure cooker cake recipe PolkaPuffs recipe Chocolate sponge cake in pressure cooker Eggless chocolate cake in pressure cooker Vegan chocolate cake recipe Bake a cake in the pressure cooker

In a large mixing bowl sift together flour, powdered sugar, cocoa powder, baking soda, baking powder, cocoa powder and salt.

Next, add lemon juice, oil, vanilla extract, warm water. Mix everything well but do not over mix the ingredients as that results in a heavy cake.

Heat the pressure cooker on high flame for 10 mins. Place a stand/ bowl or plate inside at the bottom. DON’T ADD WATER IN THE COOKER.

Pressure cooker cake recipe PolkaPuffs recipe Chocolate sponge cake in pressure cooker Eggless chocolate cake in pressure cooker Vegan chocolate cake recipe Bake a cake in the pressure cooker

Fill the batter in the ready tin upto half its capacity and place the tin in the heated pressure cooker on the bowl/ stand kept at the base. Cover the pressure cooker with it lid but remove its gasket and weight. Bake on medium flame for 40-45 mins.

Pressure cooker cake recipe PolkaPuffs recipe Chocolate sponge cake in pressure cooker Eggless chocolate cake in pressure cooker Vegan chocolate cake recipe Bake a cake in the pressure cookerIMG_7011

Do a toothpick test and check if the cake is ready after 40 mins, it should come out with a few moist crumbs, if your cake is ready then remove from the cooker using kitchen tongs and cool the tin on cooling rack for 15-20 mins before unmoulding the cake.

If the cake in undercooked, then let it cook for another 10 mins. It should be ready by then. Slice and serve.

To bake the muffins, fill each muffin mould upto 3/4 th of it’s capacity. Then, I pre-heated the oven @180’c for 10 mins. Next, I  baked the muffins for 20-22 mins @180’c. (Each oven works differently so please adjust the baking time and temperature). Do take a toothpick test. Cool them for 15 mins on a cooling fack before unmoulding. Enjoy!

This cake keeps well in an airtight box for 2-3 days.

Pressure cooker cake recipe PolkaPuffs recipe Chocolate sponge cake in pressure cooker Eggless chocolate cake in pressure cooker Vegan chocolate cake recipe Bake a cake in the pressure cooker

Make this soon…because it hardly takes any time! Sounds cheesy…well…I can’t help it!! 😂

Love,

Shreya💗

Vegan Chocolate Cake in pressure cooker

Rose and Pineapple Cooler

I can live on cool drinks all year long…😉 Being a teetotaller couple, we are constantly looking forward to trying some new flavours of mocktails and coolers…and more often than not we come across great finds👌😚

Speaking of great finds, I also find it interesting to try and make a new flavour combination right in the comfort of my kitchen! Earlier, I have shared the recipe of tropical iced tea which was a total hit! I make it every summer and we can’t get enough of it😀 I keep myself and the hubby hydrated as we sip on some of the most delicious homemade coolers. I have been told by people who have tried my Fruity Green Tea cooler, that it was one of the best ways to enjoy their green tea!

Rose and Pineapple cooler Non alcoholic summer mocktail Pineapple cooler recipe Polkapuffs recipes Shreya tiwari Rose and Pineapple cooler Non alcoholic summer mocktail Pineapple cooler recipe Polkapuffs recipes Shreya tiwari photography Rose mocktail Rose mocktail

Coming to this gorgeous beauty that has gotten you all parched is my take on two amazing flavours…tropical Pineapple and the very exotic Rose. Rose, on it’s own is very cooling. I have combined it’s flavours with the sweet and slightly tangy juices of local Pineapples and added my twist to it….😁 The resulting cooler/ mocktail is a bit spicy, has the freshness of summer mint and is loaded with ice! Just the thing you need in these sweltering afternoons.

Rose and Pineapple cooler Non alcoholic summer mocktail Pineapple cooler recipe Polkapuffs recipes Shreya tiwari photography Rose mocktail

Let’s get started….

Yield: serves 2

Equipment: mortar-pestle, measuring cups/ spoons, mixing spoons, 2 glass/ bottles of your choice to serve the drink.

Ingredients:

1+1/2 cup fresh or canned pineapple juice

4 tsp rose syrup

9-10 fresh mint leaves

1/2 tsp chaat masala (Indian spice mix easily available in Indian Grocery/ Food Stores. If you can’t find chaat Masala, replace this ingredient with some salt and pepper to taste)**

1/4 tsp ginger juice (grate some ginger and squeeze the juice to add to the mocktail)

ice cubes as needed

Method:

Muddle together mint leaves, chaat Masala** and ginger juice together in the mortar-pestle.

Add two tsp rose syrup in each of the 2 serving glasses/ bottles.

Top the rose syrup up with 1-2 tsp of the mint leaves, ginger juice and chaat Masala** mixture.

Add ice cubes. Lastly, pour the Pineapple juice. The flavours will combine on their own, however, you can give them a quick stir. Garnish the drink with a sprig of mint! Enjoy!

Rose and Pineapple cooler Non alcoholic summer mocktail Pineapple cooler recipe Polkapuffs recipes Shreya tiwari photography Rose mocktail

Love,

Shreya❤️

Rose and Pineapple Cooler | Vegan

Spicy Arrabbiata Sauce – Glutenfree and Vegan

It’s always better to have a go to pasta sauce recipe…this one here, happens to be mine😊 Especially during these hot summers days….when cooking up a storm isn’t exactly someone’s dream…having this ready in the refrigerator or the freezer can be a lifesaver! 😄

Spicy Arrabbiata Sauce - Glutenfree and Vegan Recipe for easy arrabbiata sauce Italian arrabbiata sauce recipe Polkapuffs recipes Shreya tiwari food photography Macro I in arrabbiata sauce Glutenfree recipe for arrabbiata sauce Vegan arrabbiata sauce

There are days when I go through the entire ritual of sautéing some exotic veggies like some American sweet corn, broccoli, some snow peas and a bit of bell pepper along with some crushed garlic to go with my pasta…and then are days when all I want to do is dump the sauce with some boiled pasta and give it a quick stir and I serve it without any fancy-shmancy garnishing…just a bit of grated cheese and I am all sorted🤗

And hence, happens my quick macaroni with some spicy, vegan-Glutenfree arrabbiata sauce! Just like that….and obviously it’s one of my favourite meals👌🏼😍

Spicy Arrabbiata Sauce - Glutenfree and Vegan Recipe for easy arrabbiata sauce Italian arrabbiata sauce recipe Polkapuffs recipes Shreya tiwari food photography Macro I in arrabbiata sauce Glutenfree recipe for arrabbiata sauce Vegan arrabbiata sauce

This sauce can also be used for topping up your bruschetta along with some slices of olives or just some crumbled feta cheese…..some capers, if like little bursts of salty..briny flavours….see..I have given you some ideas for your next girls’ night in…or if you’re a dude reading this here…make a bruschetta platter for your buddies as you watch the latest season of IPL ’17….or impress a lady friend with your sauve kitchen moves😉

I use this sauce for my chip-n-dip platters on movie nights with my fella…it’s healthy and definitely delicious! Follow this easy recipe for some healthy Wholewheat crackers to go with this sauce.

**Coming to how you would go about storing this sauce. I make a slightly larger batch and refrigerate it and it stays fresh for almost 10-12 days. I don’t add salt while this sauce especially when the purpose is to store it. To freeze, simply cool the sauce and pack them in small ziplock pouches and freeze them. The freezer sauce needs to be thawed at room temperature for about an hour before using it. Always remember to season it using the stored sauce. When making the sauce for immediate consumption, then do add salt as per taste.

Now, on to the recipe….

Yield: serves 2-3 persons

Equipment: a heavy bottomed saucepan, measuring cups/ spoons, a ladle, hand blender.

Ingredients:

3 cups blanched and roughly chopped tomatoes (choose ripe tomatoes)

3/4 cup finely chopped onions

salt to taste (I used sea salt)

freshly cracked black pepper to taste

4 tbsp olive oil

3-4 cloves of garlic, crushed

a few fresh basil leaves (or use dried)

2 tsp chilli flakes

1 tsp dried oregano

1/2 tsp dried rosemary

some warm water if needed to correct the consistency

Method:

Heat oil in the pan, once it is hot enough, add crushed garlic and onions. Sweat these until the onions turn translucent and the garlic turns a bit golden. Then go in the roughly chopped chopped blanched tomatoes.

Keep the flame on low, season with salt, chilli flakes, cracked black pepper, rosemary and oregano. Keep stirring these together for a few minutes to ensure the flavours blend well. Add some warm water at this stage to correct the consistency (I added about 3/4 cup), mix well and cover with a lid and let the sauce cook for about 10 mins on low flame.

Open the lid after 10 minutes, the sauce should be done by now. Turn off the flame, let the sauce cool off a bit. Then using a hand blender, blend the sauce as much as you prefer. I like my sauce a bit chunky so I don’t go overboard with the blending.

If you are making a pasta dish immediately, just add this entire sauce to about 2 cups of boiled macaroni or penne and give them a good toss. Garnish with some finely chopped fresh basil leaves and some grated cheese!

**scroll above to read about how to store this sauce.

Spicy Arrabbiata Sauce - Glutenfree and Vegan Recipe for easy arrabbiata sauce Italian arrabbiata sauce recipe Polkapuffs recipes Shreya tiwari food photography Macro I in arrabbiata sauce Glutenfree recipe for arrabbiata sauce Vegan arrabbiata sauce

Do try this sauce soon…you know what? This even works as a great pizza sauce😉😉

Love,

Shreya💖

Spicy Arrabbiata Sauce Glutenfree and Vegan


Mango Kulfi | How to make Kulhad Kulfi

An Indian dessert that is loved by everyone and I guess there is rarely anyone who’d say no to Kulfi! This luciously creamy, deliciously sweet and chilled dessert is perfect for summers and compliments any Indian meal when looking for that perfect end to your meal 😍👌🏼 Flavour it with whatever takes your fancy! Mangoes….yes that is what I have used here to make it even more irresistible and delicious.

Mango Kulfi recipe Kulhad kulfi recipe How to make instant kulfi Easy recipe for kulfi Homemade mango kulfi recipe Kesar pista kulfi recipe Polkapuffs recipes Indian ice cream No condensed milk no milk powder Kulfi recipe Shreya Tiwari recipes

Look at the golden colour..and I have used a bit of freshly pounded cardamom powder to elevate the flavour of Alphonso Mangoes….the King of fruits 😍 and garnished it with some pistachio slivers and homemade dried rose petals (organic) ….this recipe also calls for some fresh, thick cream from full fat milk…yes homemade made fresh cream, it makes the Kulfi even more smooth and the taste is very authentic! But then again, you can always use fresh cream from a tetra pack too😋

Mango Kulfi recipe Kulhad kulfi recipe How to make instant kulfi Easy recipe for kulfi Homemade mango kulfi recipe Kesar pista kulfi recipe Polkapuffs recipes Indian ice cream No condensed milk no milk powder Kulfi recipe Shreya Tiwari recipes

Last year I had shared an easy recipe for Kesar Pista Kulfi on the blog and this recipe is another take on that!😀 You can add some chopped pistachios and almonds to this Mango Kulfi recipe and make it a Dry Fruit Mango Kulfi too!

Mango Kulfi recipe Kulhad kulfi recipe How to make instant kulfi Easy recipe for kulfi Homemade mango kulfi recipe Kesar pista kulfi recipe Polkapuffs recipes Indian ice cream No condensed milk no milk powder Kulfi recipe Shreya Tiwari recipes

I used kulhad and matkas (Indian earthenware) of different shapes and sizes to set the Kulfi, you can use simple Kulfi or Popsicle moulds as well or simply use little stainless bowl to set them. Although the kulhad and matkas I have here aren’t actually earthenware, they are all made of porcelain.

Common, let’s make Kulfi!

Yield: 5-6 kulfis

Equipment: a heavy bottomed pan, a ladle, measuring cups/ spoons, kulfi moulds/ Popsicle moulds/ small bowls, ice cream sticks etc.

Ingredients:

500 ml milk (I use Amul toned milk – 2%fat)

pulp of 3 nos. medium Alphonso mangoes

1/4 cup warm milk

2+1/2 tbsp cornflour

1+1/4 cup sugar (adjust as per your preference)

1/2 cup cream (I used homemade cream from full fat milk, you can use tetra packed Amul fresh cream as well)

1/2 tsp cardamom pwd

chopped pistachio & dried rose petals to garnish

Method:

Heat 500 ml milk in the pan, let it boil until the milk reduces a little and becomes thick. Keep stirring so that the milk does not stick at the bottom and burn.

Mix cornflour with 1/4 cup warm milk until it’s lump free. Add this mixture to the reduced milk and keep stirring until the cornflour blends properly with the milk. Add sugar, cardamom powder and the mango pulp. Cook for two mins more. Keep it aside to cool for a few mins.

Next, lightly beat the cream. Add the cooled milk and mango mixture to the beaten cream. Beat again for a few mins (I used a electric beater). Fill this mixture into moulds/ matkas/ bowls and keep it in freezer to set for about 7-8 hours or even overnight.

Mango Kulfi recipe Kulhad kulfi recipe How to make instant kulfi Easy recipe for kulfi Homemade mango kulfi recipe Kesar pista kulfi recipe Polkapuffs recipes Indian ice cream No condensed milk no milk powder Kulfi recipe Shreya Tiwari recipes

Once the Kulfi has set for 3-4 hours, put an ice cream stick in the centre of each mould if using Popsicle mould or traditional Kulfi mould.

Thaw the frozen Kulfi for a few mins, rub the moulds between your palms, tug on the ice cream stick and unmould it gently. That’s it! Your creamy Kulfi is ready☺️ Look at that texture…..yumm!

Mango Kulfi recipe Kulhad kulfi recipe How to make instant kulfi Easy recipe for kulfi Homemade mango kulfi recipe Kesar pista kulfi recipe Polkapuffs recipes Indian ice cream No condensed milk no milk powder Kulfi recipe Shreya Tiwari recipes

Love,

Shreya💗

Mango Kulfi | Mango flavoured Indian Ice Cream | Glutenfree recipe


Sindhi Kadhi and Karare Aloo and a lazy lunch scene

Weekends are for slow starts… we truly believe that! Nothing makes me rush through my weekends…I simply choose not to get fussed and bothered about much. I pretty much hit the snooze button on Fridays…say around noon 😜 and try to finish all my commitments before Friday..😜 Trust me, no one can even catch me on the cell! Besides, it’s just the two of us….the boons of being a couple with no kids ….no responsibilities! I mean, we love kids…but I guess this works for us better👌🏼

Karare Aloo recipe UP style Aloo ki bhujia recipe Sindhi kadhi recipe Polkapuffs recipes Shreya Tiwari recipes

So when I decide to cook on a weekend…that’s if I do plan on cooking on weekends..I look for comfort food apart from being quick and absolutely fuss-free. Yes, I am not a kitchen person when I am on the snooze-mode. More of a couch potato…..who literally loves her potatoes 😍 Hence, I will share a very delicious recipe from my Mom’s kitchen of Aloo ki Bhujia or as my hubby chooses to call it, Karare Aloo 👌 (No onion no garlic). Such basic ingredients with absolutely stunning flavours. I can practically live on this! This recipe is typically a U.P. Style of preparation…but one can find variants of the same being made across India.

Karare Aloo recipe UP style Aloo ki bhujia recipe Sindhi kadhi recipe Polkapuffs recipes Shreya Tiwari recipes

Sindhi Kadhi….again a personal favourite since childhood, I can have it by the gallon! Give me some steamed rice …a bit of my Mom’s Karare Aloo along with a few ladlefuls of her lip smacking, tangy Sindhi Kadhi…and I’ll probably love you forever! 😂…yeah…my love sounds cheap…but it’s really difficult to make a teeny space in my heart…..so it’s not a bad deal actually!

Karare Aloo recipe UP style Aloo ki bhujia recipe Sindhi kadhi recipe Polkapuffs recipes Shreya Tiwari recipes

Look how luscious this kadhi looks….a roasted chickpea flour base is given lots of flavour using tamarind pulp, some whole seeds and dried red chillies add to the punch…..the best part it again had no garlic ….onion, yes, but that is a must for the sweet aRoma that it gives to the kadhi (curry).

A side of some home style onion and tomato salad with lots of lemon juice and a dash of salt along with a glass full of chilled Masala Chaas (not in the pictures above…as I’d already chugged that down while I shot for this post 😉) completes this meal!

Let’s start with the Karare Aloo…

Yield : serves 2

Equipments: a heavy bottom wok, measuring cups/ spoons, a spatula.

Ingredients:

3 nos. large potatoes (peeled, washed and cubed)

4 tbsp mustard oil (this tastes best in mustard but feel free to use any oil of your choice)

a pinch of hing (asafoetida)

1/2 tsp paanch phoran (mixed seeds) 

salt to taste

1/2 tsp turmeric pwd

1 tsp each of red chilli pwd, coriander powder, cumin pwd

1/2 tsp amchoor pwd (dry mango pwd)

Method:

Heat mustard oil until it starts smoking** in a heavy bottomed wok. Turn off the flame. Let the smoke subside. Turn on the flame again. Add hing and the paanch phoran. Let these crackle a bit. Add the cubed potatoes. Stir them around in the oil. Add salt and turmeric. Sauté for 5 mins.

Add all the other dry spices except amchoor powder. Mix well and let the potatoes cook on low flame. Stir them about occasionally. Let them gently crisp up.

I try not to cover the wok when I am making dry version of any veggies. So here too, I haven’t covered the wok with the lid. The potatoes took about 20 mins to cook out completely. They took another 10-12 minutes of cook time to crisp up on low flame and look like what they do! Add the amchoor powder in the end once the potatoes have crisped up.

You can add Garam Masala too in the end along with the amchoor powder but I avoid that in the summers.

**(Use any other oil in the usual way you heat it for everyday use, only mustard oil needs to be heated really well).

These potatoes are best enjoyed piping hot…from the wok to the plate kind of thing…☺☺

On to the Sindhi Kadhi….just the way my Mom makes it.. disclaimer….it may not be authentic but this is how we have been eating it all these years..if any one out there knows a different or a more authentic version, do let us know and we’d  love to try it out too☺️ and probably even publish the same with recipe credits on PolkaPuffs!

Yield: serves 2-3

Equipments: a wok, measuring cups/ spoons, a lid, a ladle.

Ingredients:

1/2 cup chick pea flour (Besan)

water as needed

3 tbsp refined oil

1/2 cup sliced, fried onion

1/2 cup sliced, fried potatoes

1/4 cup sliced, fried okra (bhindi)

salt to taste

1/2 tsp red chilli pwd

4 tbsp fresh tamarind pulp

1/2 tsp turmeric powder

1/4 tsp each methi seeds (fenugreek seeds) and jeera seeds (cumins seeds)

a sprig of curry leaves

a pinch of hing (asafoetida)

2-3 nos. whole dry chillies ( I used ber mirch, the fat, round ones)

Method:

Heat oil in the wok, once it’s hot, add the hing, cumin seeds, fenugreek seeds, whole red chillies and the curry leaves. Once these begin to crackle, add the Besan (chick pea flour) and keep stirring it continuously on low as it may stick at the bottom and burn.

This needs to be roasted with the oil and the other ingredients for a good 6-8 minutes or until the Besan changes it’s colour and gives out an earthy aroma.

Karare Aloo recipe UP style Aloo ki bhujia recipe Sindhi kadhi recipe Polkapuffs recipes Shreya Tiwari recipes

But be careful to keep this on low flame and stir it constantly. Once it has been roasted, add water as per the consistency you’d like to have for this while serving with rice. I added about 1+3/4 cup as this kadhi thickens a lot as it cooks out. Also, season with salt, red chilli pwd and turmeric powder. Mix well. Cover with a lid and let it come to a boil, that will take about 6-7 mins on medium flame.

Open the lid, add the fried veggies and also the tamarind pulp. Add more water if the kadhi has reduced a lot (I added another 1/4 cup at this stage). Cover once again with the lid and let it cook for a further 10 minutes on low flame.

This is what it looks like once ready. Rich colour and an amazing aroma…mmmm…yum!

IMG_6970

That’s it, turn off the flame and serve it piping hot!

Karare Aloo recipe UP style Aloo ki bhujia recipe Sindhi kadhi recipe Polkapuffs recipes Shreya Tiwari recipes

Meals like these are so so good! Go ahead…do try this out and let us know how you liked it☺

Love,

Shreya💗

Sindhi Kadhi | Gluten free Veggie and Chick pea Flour Indian Curry