Garlic cheese smashed potatoes Gluten free meals in 30 mins Polkapuffs recipe Polkapuffs Shreya Tiwari recipe Shreya Tiwari Photography Vegetarian appetisers

Garlic Cheese Smashed Potatoes | GF meals in 30 minutes

You guys know I love potatoes….I do! I may not share too many recipes with potatoes in them, but the Lord above knows my love for these spuds….and my love for them is shared by my hubby!! Talk about marriages being made in heaven…..for us, it’s more like a spud-farm 🤣🤣🤣😂

Breakfast to dinner, I can live on them. Start your day with some scrumptious Aloo ke Parathe (potato stuffed Indian flatbreads). These are are absolutely awesome and very mildly spiced to start your day with these parathe and you will full almost up to lunch time…I serve them with some home made yogurt, some mango pickle and a lot of butter on top of these….the butter melts all over these piping hot beauties 😍…Mmmmm!
IMG_7670

Not looking for something so heavy early in the morning….then you can try my super-yum….brilliant beyond brilliant Baked Potato Wedges 😉 We, the spud-lovers are particularly partial to it and can never share it…hence we make ourselves two whole trays of them, beauties……one for him and one for yours truly 😜

Next, if your looking something Indian…curry style for a proper supper, just go with the Aloo Dum, pair it with some Pooris (fried flatbreads) or Laccha Paratha or even some rice, a quick home style salad (sliced red onions + chopped tomatoes + chopped cucumber + salt + a bit of lime juice) on the side and just step into the food coma …..it’s that good 😍  For something a bit less spicy…look out for my Rassedaar Aloo (potatoes and tomatoes simmered in a thin gravy with little spices),  just a few easy ingredients and it’s ready in under 30 minutes?

Garlic cheese smashed potatoes Gluten free meals in 30 mins Polkapuffs recipe Polkapuffs Shreya Tiwari recipe Shreya Tiwari Photography Vegetarian appetisers

You must also try my Aloo Ki Kachori if you love a good North Indian fare 😉 It’s easy to put together and works well for brunches!

Anyways…..that’s a whole lotta potatoes recipes for you guys…not to mention that I’ve not even included a few  here…they are all there in the blog archives ➡️➡️ …go, look them up!

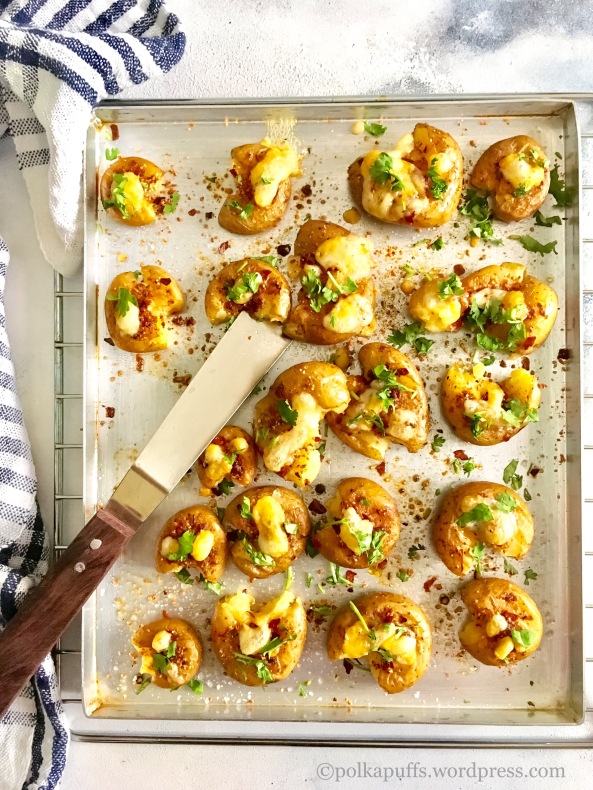
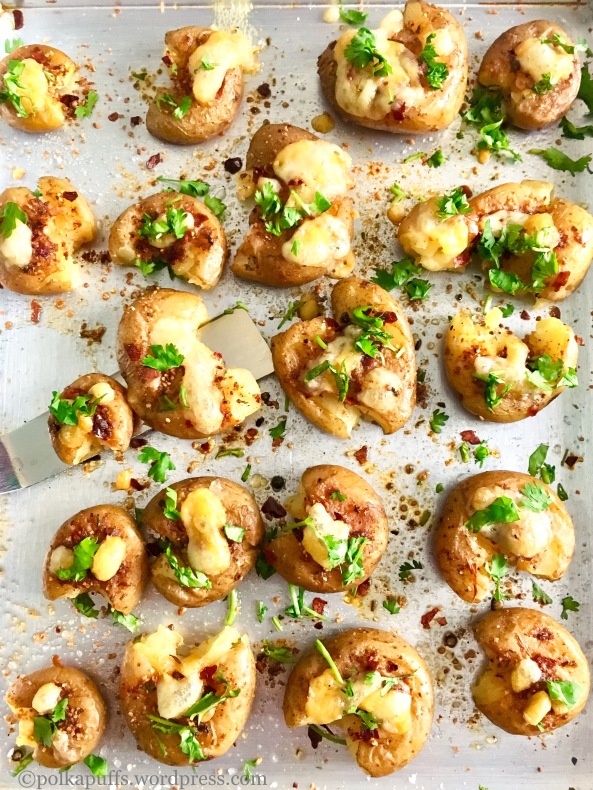
So…about these crisp, gorgeous looking smashed potatoes…well, I have been meaning to share this recipe for a while…I have many other variations for these, but the one which I’ve here today, is like the best way to have potatoes 😍😍 they are just everything one looks for in a side dish … a bit of spice from the chilli flakes (or, you could use smoked paprika), that comforting warmth from the garlic, a bit smokiness as I’ve used smoked sea salt (you could always use regular salt or even plain sea salt)…..spicy becaaaaaause…I’ve added my favourite spice mix in the whole wide world….yeah! Peri Peri spice powder and that last bit off oozing good in the form of Mexican blend cheese  😋 Yes please!!!

Let’s see how can we get you to make these babies….

Yield: serves 2

Equipment: baking tray, measuring cups/ spoons, pressure cooker, cooling rack.

Ingredients:

300 gms baby potatoes

sea salt to taste

1 tsp peri peri spice mix (store bought)

1/2 tsp chilli flakes

1 tsp garlic powder (use fresh minced garlic if you don’t have garlic powder)

3 tbsp oil

1/4 cup Mexican cheese mix (store bought, easily available in any supermarket or hyper stores)

some fresh green coriander to garnish

Method:

Take 2 cups of water in a pressure cooker, add a pinch of regular salt to it along with washed baby potatoes. Cook them for about 10 minutes or one whistle is good enough. We need to soften them but not turn them into a watery mush!

Once cooked, drain the water and let the potatoes cool down a bit. Then, grease the baking tray with about a tbsp of oil. Roll the boiled potatoes in the oil on the tray. Spread out the potatoes and use a fork to smash them a bit.

Pre-heat the oven @200’c.

Garlic cheese smashed potatoes Gluten free meals in 30 mins Polkapuffs recipe Polkapuffs Shreya Tiwari recipe Shreya Tiwari Photography Vegetarian appetisers

Now, drizzle some more of the remaining oil over the smashed potatoes. Sprinkle sea salt, garlic powder, peri peri spice mix, chilli flakes and the cheese and some oil if you like.

Garlic cheese smashed potatoes Gluten free meals in 30 mins Polkapuffs recipe Polkapuffs Shreya Tiwari recipe Shreya Tiwari Photography Vegetarian appetisers

Bake these at 200’c for 12-15 mins or until the cheese bubbles and the top of these potatoes turns a bit crisp using both the upper and the lower heating rods/ elements.

Garnish with some chopped coriander and sprinkle some more cheese if you like 😉 Serve these piping hot with some drinks or just as it is!
IMG_7668

They will melt in your mouth😋😋😋😋 so tempting…and so easy to put together!

Love,

Shreya💕

For more such deliciousness, follow me on –

Pinterest ID : https://www.pinterest.com/emarald_icon123/

Facebook page : https://www.facebook.com/pages/PolkaPuffs/334992336689991

Instagram : https://instagram.com/polkapuffs/

Garlic Cheese Smash Potatoes | gluten free meals in 30 mins


Spicy Arrabbiata Sauce – Glutenfree and Vegan

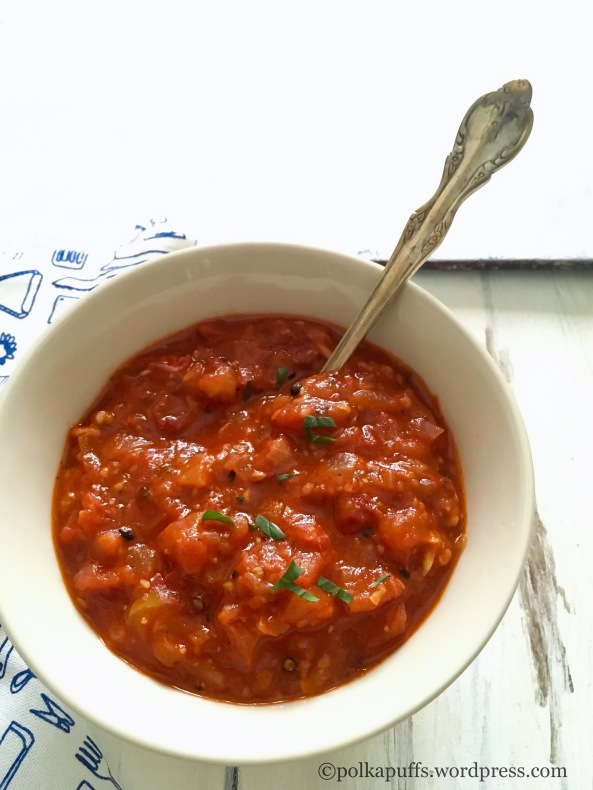
It’s always better to have a go to pasta sauce recipe…this one here, happens to be mine😊 Especially during these hot summers days….when cooking up a storm isn’t exactly someone’s dream…having this ready in the refrigerator or the freezer can be a lifesaver! 😄

Spicy Arrabbiata Sauce - Glutenfree and Vegan Recipe for easy arrabbiata sauce Italian arrabbiata sauce recipe Polkapuffs recipes Shreya tiwari food photography Macro I in arrabbiata sauce Glutenfree recipe for arrabbiata sauce Vegan arrabbiata sauce

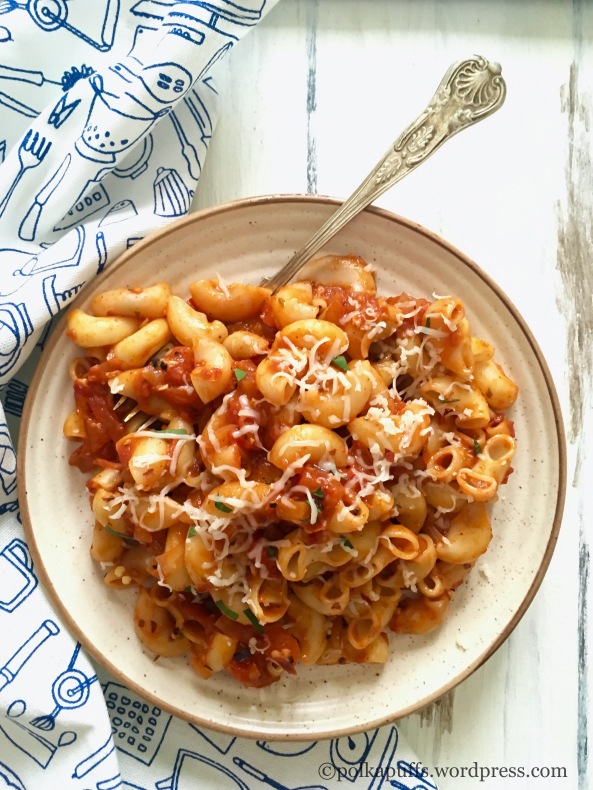
There are days when I go through the entire ritual of sautéing some exotic veggies like some American sweet corn, broccoli, some snow peas and a bit of bell pepper along with some crushed garlic to go with my pasta…and then are days when all I want to do is dump the sauce with some boiled pasta and give it a quick stir and I serve it without any fancy-shmancy garnishing…just a bit of grated cheese and I am all sorted🤗

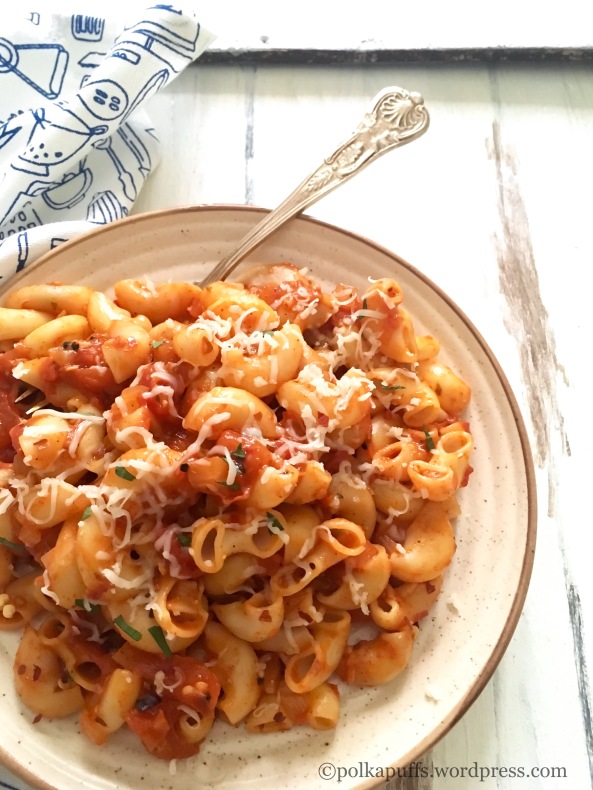
And hence, happens my quick macaroni with some spicy, vegan-Glutenfree arrabbiata sauce! Just like that….and obviously it’s one of my favourite meals👌🏼😍

Spicy Arrabbiata Sauce - Glutenfree and Vegan Recipe for easy arrabbiata sauce Italian arrabbiata sauce recipe Polkapuffs recipes Shreya tiwari food photography Macro I in arrabbiata sauce Glutenfree recipe for arrabbiata sauce Vegan arrabbiata sauce

This sauce can also be used for topping up your bruschetta along with some slices of olives or just some crumbled feta cheese…..some capers, if like little bursts of salty..briny flavours….see..I have given you some ideas for your next girls’ night in…or if you’re a dude reading this here…make a bruschetta platter for your buddies as you watch the latest season of IPL ’17….or impress a lady friend with your sauve kitchen moves😉

I use this sauce for my chip-n-dip platters on movie nights with my fella…it’s healthy and definitely delicious! Follow this easy recipe for some healthy Wholewheat crackers to go with this sauce.

**Coming to how you would go about storing this sauce. I make a slightly larger batch and refrigerate it and it stays fresh for almost 10-12 days. I don’t add salt while this sauce especially when the purpose is to store it. To freeze, simply cool the sauce and pack them in small ziplock pouches and freeze them. The freezer sauce needs to be thawed at room temperature for about an hour before using it. Always remember to season it using the stored sauce. When making the sauce for immediate consumption, then do add salt as per taste.

Now, on to the recipe….

Yield: serves 2-3 persons

Equipment: a heavy bottomed saucepan, measuring cups/ spoons, a ladle, hand blender.

Ingredients:

3 cups blanched and roughly chopped tomatoes (choose ripe tomatoes)

3/4 cup finely chopped onions

salt to taste (I used sea salt)

freshly cracked black pepper to taste

4 tbsp olive oil

3-4 cloves of garlic, crushed

a few fresh basil leaves (or use dried)

2 tsp chilli flakes

1 tsp dried oregano

1/2 tsp dried rosemary

some warm water if needed to correct the consistency

Method:

Heat oil in the pan, once it is hot enough, add crushed garlic and onions. Sweat these until the onions turn translucent and the garlic turns a bit golden. Then go in the roughly chopped chopped blanched tomatoes.

Keep the flame on low, season with salt, chilli flakes, cracked black pepper, rosemary and oregano. Keep stirring these together for a few minutes to ensure the flavours blend well. Add some warm water at this stage to correct the consistency (I added about 3/4 cup), mix well and cover with a lid and let the sauce cook for about 10 mins on low flame.

Open the lid after 10 minutes, the sauce should be done by now. Turn off the flame, let the sauce cool off a bit. Then using a hand blender, blend the sauce as much as you prefer. I like my sauce a bit chunky so I don’t go overboard with the blending.

If you are making a pasta dish immediately, just add this entire sauce to about 2 cups of boiled macaroni or penne and give them a good toss. Garnish with some finely chopped fresh basil leaves and some grated cheese!

**scroll above to read about how to store this sauce.

Spicy Arrabbiata Sauce - Glutenfree and Vegan Recipe for easy arrabbiata sauce Italian arrabbiata sauce recipe Polkapuffs recipes Shreya tiwari food photography Macro I in arrabbiata sauce Glutenfree recipe for arrabbiata sauce Vegan arrabbiata sauce

Do try this sauce soon…you know what? This even works as a great pizza sauce😉😉

Love,

Shreya💖

Spicy Arrabbiata Sauce Glutenfree and Vegan


Kothmir Wadi | Kothambir Wadi – Maharashtrian Delicacy

I am a proper Mumbai (Bombay) girl…born, raised, educated, worked and then married in Mumbai….when I say home, I always mean Mumbai❤….and saying that obviously means I love…just lurrvvvveeee my Mumbaiya (meaning typical) street food and snacks! The hubby and I visit every happening joint, cafe …etc, etc around our city but having some of the most delicious street food is something we can never give up!

Mumbai isn’t only about Wada Pav and Bombay Pav Bhaji in terms of authentic Maharashtrian snacks. If you have ever been to Maharashtra (any part of the state), you’d be familiar with Kothambir Wadi or Kothmir Wadi (spiced, coriander and chickpea flour nuggets). Kothmir or Kothambir literally means fresh coriander leaves in Marathi and Wadi translates to nuggets. Such an easy language… I am almost too proud that I can speak it rather well…(well, I do make grammatical errors here and there but I never quit speaking the language!) 😃

Kothmir Wadi recipe How to make kothambir Wadi at home Maharashtrian recipes Polkapuffs

The flavours are fresh and very earthy, green chillies and ginger along with other spices and ingredients make these Wadis lip smacking. Although, these are available in most local shops that sell Wada Pav or bhajias (batter fried onion or potato fritters), I always wanted to make them at home too. I probably wouldn’t have if my hubby wasn’t so crazy about them…

Kothmir Wadi recipe How to make kothambir Wadi at home Maharashtrian recipes Polkapuffs

So I looked up a few recipes and found one which was easy and sounded a whole lot like what we usually got from outside…and they turn out quite good and crisp! I have been making there for over 2 years now…and a glass of hot lemon tea is all that I need to polish these off!

Kothmir Wadi recipe How to make kothambir Wadi at home Maharashtrian recipes Polkapuffs

Besides, making them is no big task either….it takes less than 15 mins of prepping and just another 30 minutes of cooking! Glutenfree (uses chick pea flour along with rice flour) and vegan (has no clarified butter or yogurt), one can easily include them in their special diets without any fuss. Serve them with a dip if choice or have them on it’s own…delish!

Let’s begin….

Yield: 16 small Wadis (nuggets) using a square baking tin of 5″X 5″

Equipment: a mixing bowl, a whisk, measuring cups/ spoons, a pressure cooker/ large pot, a small metal plate, a frying pan, baking tin or any vessel to use for steaming the Wadis (nuggets), a sharp knife, a pair of tong.

Ingredients:

1/2 cup sifted chick-pea flour (besan) 

2 tbsp sifted rice flour (chawal ka atta)

salt to taste

water as needed

1/4 tsp turmeric powder

1/2 tsp red chilli powder

a pinch of hing (asafoetida)

2 tsp chopped green chillies

1 tsp ginger paste

1 tsp toasted white sesame seeds

1 tsp lemon juice

1/2 cup finely chopped fresh coriander leaves

1/4 tsp baking soda

1 tbsp flavour less oil (like canola or sunflower)

To pan fry: (optional, have it steamed if you wish to avoid pan frying. Also, deep frying is yet another option but I tend to avoid deep frying)

4 tbsp oil

Method:

In a mixing bowl, add the sifted flours. Season with salt. Add hing at this point. Whisk well and add little water to make a thick batter. Add the ginger paste, lemon juice, chillies, red chilli powder, turmeric powder, oil, toasted sesame seeds and chopped coriander leaves, whisk again. Add the baking soda and mix gently (don’t whisk). Grease the baking tin with some oil. Pour the batter into the greased tin and set it aside.

Kothmir Wadi recipe How to make kothambir Wadi at home Maharashtrian recipes Polkapuffs

Heat about 2 cups of water in a large pot or pressure cooker. Keep a metal plate at the bottom of the pot/ cooker to use as a  seperator.

Once the water starts boiling a bit, place the tin with the batter inside the pot/ cooker on the separator plate. Cover with a lid if you are using a pot. In case you are using a pressure cooker, remove the weight (whistle) off the lid and then secure the lid on the pressure cooker.

Kothmir Wadi recipe How to make kothambir Wadi at home Maharashtrian recipes Polkapuffs

Cook on low flame for about 15-18 mins. Then turn off the flame  and open the lid carefully. Remove the tin from the pot/ pressure cooker and using a sharp knife check if the batter has cooked, to do that, simply insert the knife in the centre of the tin, if it comes out clean, the batter has cooked (just aswe do for any cake).

Kothmir Wadi recipe How to make kothambir Wadi at home Maharashtrian recipes Polkapuffs

Let this cool down completely. Once it has cooled, run the knife on all four sides of the tin and gently unmould it on a chopping board. Using the same sharp knife, cut it into squares. Keep them aside.

Kothmir Wadi recipe How to make kothambir Wadi at home Maharashtrian recipes Polkapuffs

This is what it looks like post steaming. Have them just as it is..or pan fry.

To pan fry:

Heat 4 tbsp oil in a frying pan, place the squakes in the pan once the oil is hot, keep turning them around and let them crisp up on all sides. Once done, remove on absorbent kitchen paper. Serve them hot with a dip if your choice!

Kothmir Wadi recipe How to make kothambir Wadi at home Maharashtrian recipes Polkapuffs

They keep fresh for a few hours although I have never tried to store them for very long. These make for a great party snack or even as a side dish to go with your meals!

Love,

Shreya💖

Adapted from Nisha Madhulika

Khandvi | How to make Khandvi at home | No -Fail Khandvi Recipe

I make a lot of snacks at home…right from Sabudana Wada, Mathri…to Vegetable Croquettes….but never had I dared to try the most popular Gujarati farsan Khandvi at home!! 

I have heard it is very difficult to get the consistency of the batter right and so and so forth….and I love fuss free things as you guys know by now….so making Khandvi was out of the question 😜😂😂

Khandvi recipe Polkapuffs recipes Shreya Tiwari recipes Polkapuffs No fail recipe for khandvi Gujarati snacks recipe

But last month my hubby got some Khandvi from a sweet shop near our home with a big name and all the jazz and honestly we didn’t like how it was – powdery and absolutely tasteless! As opposed to most of the other things available in the shop, this was a complete and utter let down.

So much so, that my dear hubby who knows I’d never make Khandvi at home…kept saying that if I were to make them, I’d nail it! Felt good knowing that he trusts my cooking completely…😍 What next?! Well, I had to nail it…for him. He had so much faith, how would I ever fail.

Khandvi recipe Polkapuffs recipes Shreya Tiwari recipes Polkapuffs No fail recipe for khandvi Gujarati snacks recipe

I called my Mom asking her for the recipe, actually the proportions of the ingredients really, I mean that’s where all the crap happens…measure one ingredient incorrectly and you will never be able to roll even one Khandvi right! 😁

She hasnt made them in years, she said but had a reliable recipe written down somewhere….I couldn’t ask for more!! I diligently noted the recipe with the measures and listened to her explain me how the required consistency will take some time..I’ll need to be patient! Not my strongest virtue but I’ll try I promised😉I tried it that weekend and it was perfect…as told by the man himself! I was happy…hence, made it again a couple of days ago for breakfast…my hubby enjoyed it with a large mug of ginger tea and I with some mint and lemon green tea 👌👌 since it turned out well again…I knew I’d learnt the art of making ‘Khandvi‘ !! 😃

So be patient, go slow, and measure correctly! Let’s get cracking….

Yield: 10-12 rolls

Equipment: measuring cups/ sspoons, knife, a heavy bottomed non-stick pan, a silicon spatula or a wooden spatula, 2 stainless steel plates (optional), a mixing bowl, a small whisk,

Ingredients:

For the Khandvi: 

1/2 cup besan (gram flour)

1 cup thick yogurt (not hung, not Greek)

1 cup water

salt to taste

1 tsp ginger-green chilly paste

1/2 tsp turmeric powder

few drops of oil to grease the plates/ platform

For the tempering:

1 1/2 tsp oil

1/2 tsp mustard seeds

7-8 nos. curry leaves

2-3 nos. slit green chillies

a pinch of hing (asafoetida)

For garnish:

Chopped coriander leaves

some dry garlic chutney 

Method:

In a mixing bowl, seive the besan. Add salt, turmeric, green chilli- ginger paste and yogurt. Whisk well and make sure there are no lumps. Add the water and whisk again.

Khandvi recipe Polkapuffs recipes Shreya Tiwari recipes Polkapuffs No fail recipe for khandvi Gujarati snacks recipeimg_6700

In the meanwhile, grease the backs of the steel plates with some oil. Keep them aside. (If you wish to, you can grease the work platform in the kitchen alternatively).

Heat the pan, keep the flame low and add the batter. Keep stirring it constantly to avoid any lumps. After the first 5 mins of cooking, increase the flame a little bit and cook for another 10-12 minutes. The mixture will have thickened enough. Then again reduce the flame to low. Keep stirring it all the while.

This is what the consistency should be after almost 15-17 mins of cooking. Turn off the flame at this stage.

Khandvi recipe Polkapuffs recipes Shreya Tiwari recipes Polkapuffs No fail recipe for khandvi Gujarati snacks recipe

Tip on how to check if the consistency is correct for the Khandvi – take a little bit of the ready mixture and spread it on the greased plate. Let it cool down for 2 mins, if you are able to roll it off without it sticking to the plate, the mixture is ready. If not, cook the mixture for another 2-3 mins.

Now, that we have affirmed the consistency of the mixture, divide the mixture in two parts for the two plates and spread it evenly as shown below.

Note that the mixture will be still cooking on low flame as you do the test of the consistency.  

Khandvi recipe Polkapuffs recipes Shreya Tiwari recipes Polkapuffs No fail recipe for khandvi Gujarati snacks recipeimg_6703

Let the plates cool down with the mixture for about 10 mins. Then later, using a sharp knife make lines at equal distance and roll the Khandvi very carefully as shown above. Voilà! The Khandvi is ready…easy peasy!!

Now roll all of these similarly and place them on the serving tray/ plate.

Next, for the tempering, heat oil in a small pan, add hing, mustard seeds, curry leaves, green chillies and let these all splatter around for  few minutes. Then pour this tempering on the rolled Khandvi and serve with some dry garlic chutney and green chutney.

Khandvi recipe Polkapuffs recipes Shreya Tiwari recipes Polkapuffs No fail recipe for khandvi Gujarati snacks recipe

These turned out spicy and just how we like them…😍 Do try these…they’ll make you want to make them again and again..!!

Love,

Shreya💗


Matar Kachori | Khasti Matar Kachori

Let’s call it as Kachori Weekends at our place….last weekend it was Aloo ki Kachori and this week, I was keen to make my favourite green peas stuffed Kachoris to devoured with some green Chutney! 👌🏼😁

Mattar ki kachori recipe Mutter ki kachori recipe How to make green peas kachori Polkapuffs recipes Shreyatiwari recipes

The market is flooded with fresh, bright green peas. They so sweet and perfect! I have shelled and cleaned about 4-5 kgs of green peas, frozen them in sterilised Ziplock bags to last me for the entire year….more than enough for the two of us! I do this almost every year as I detest the flavour of the store bought frozen peas, they are quite tasteless.

Mattar ki kachori recipe Mutter ki kachori recipe How to make green peas kachori Polkapuffs recipes Shreyatiwari recipes

Anyhow, with all the green peas around me got me craving for some Nimona (a gravy made with puréed green peas, very famous in Uttar Pradesh and enjoyed with steamed rice and some ghee) with the onset of the winters in December…..I have made it almost every week. And now, with the winter almost on it’s way out…I wanted to make Matar ki Kachori once, as it’s fried..once is more than enough for the entire season 😂

Mattar ki kachori recipe Mutter ki kachori recipe How to make green peas kachori Polkapuffs recipes Shreyatiwari recipes

They turned out so crisp and flaky…just the way I love my kachoris. My Mom’s recipe never fails me….be it her Plyaaz ki Kachori or this …just perfect😋

The stuffing is made with fresh, sweet green peas and some spices tasters tangy, earthy as it uses my home made Garam Masala along with loads of ginger…all the flavours of a perfect Northern winter!  There is no onion or garlic in this recipe. The outer pastry is flaky and very crisp as its fried on slow flame…always fry your kachoris low and slow! They cook well and never turn limp and soggy.

You can pair these Matar ki Kachoris with dubkimaar Aloo Tamatar and chutney or just some imli ki chutney…just so yummy👌

Let’s start…

Yield: 9 large kachoris

Equipment: a heavy bottom wok, a slotted ladle, measuring spoons/ cups, rolling board, rolling board, kitchen paper, a small pan, potato masher, mixing bowls.

Ingredients:

For the outer cover:

2+1/2 cup all purpose flour (Maida)

salt to taste

3 tbsp ghee

water as needed

Method:

Take flour in a  mixing bowl, season it with salt. Add ghee and rub it into the flour until the flour resembles bread crumbs. This ensures that the outer cover of the kachori is crisp and flaky. Next, add sufficient water to make a semi stiff dough. Cover the dough and set it aside to let it rest for a minimum of 30 mins.

For the stuffing: 

1 cup fresh green peas

1 nos. boiled potato

salt to taste

2 tsp mustard oil (use any oil as per your preference)

a pinch of hing (asafoetida)

1 tsp finely chopped green chillies

1/2 tsp cumin seeds

1 tbsp freshly grated ginger

1 tbsp coriander powder

3/4 tsp red chilli powder

1/4 tsp turmeric powder (optional)

1/2 tsp amchoor powder (dry mango powder)

1/2 tsp Garam Masala

chopped coriander leaves as needed

oil to fry

Method:

Mash the boiled potato and set it aside. Potato is used as a binder, if you wish you can avoid it too.

In a pan, heat oil. Once it’s hot, add hing, cumin seeds and green chillies. Let them splatter around for a minute. Then add the grated ginger. Cook it for a minute.

The washed and dried green peas go in next. Season with salt and cook the peas for a few minutes. Then add the turmeric, red chilli powder, coriander powder, Garam Masala powder. Mix well. Add the mashed potato and mix well with the spices and the peas. Cover and cook for 5-7 minutes or until the peas become mushy.

Add the amchoor powder along with chopped coriander leaves next and mix well. Turn off the flame. Cover the pan with the ready stuffing for a few minutes. Then using a potato masher, mash the peas and potato mixtures well. Let some of the peas stay whole, while roughly mashing the others. That’s done.

Assembling:

Divide the dough which was kept aside into 9 equal sized balls.(I could make 9, if you choose to make smaller Kachoris, you can easily make upto 12 kachoris with this much amount of dough). Flatten each ball of dough to a thickness 2-3 mm and diameter about 3″, add 2-3 tsp of the stuffing. Close the dough ball around stuffing tightly and secure the ends so that the stuffing doesn’t spill out while frying. Flatten out the kachori a bit using a rolling board and pin.

Do the same with all the other 8 dough balls as well. Set them aside. Heat oil to fry in a heavy bottomed wok. Once it hot enough, drop 1-2 kachoris at a time and fry on low flame until golfden and crisp on all sides. Remove from oil and drain excess oil on kitchen papers. Fry them all and the serve these piping hot with sides of your choice.

The stuffing keeps well for 2-3 days in the refrigerator if stored in a glass or porcelain bowl. (I avoid plastic)

Mattar ki kachori recipe Mutter ki kachori recipe How to make green peas kachori Polkapuffs recipes Shreyatiwari recipes

I am drooling all over again just as I was typing out this draft 😜 But, seriously, do try this one out soon …..so easy to make and very flavoursome!!! You will be making these again and again.

Love,

Shreya💖


Mexican Vegetable Soup | Vegan and Glutenfree

So…here we are in 2017 and this bright, colourful soup was destined to be the first post of the year😁….why ‘was’?? Because this was made sometime during the last couple of days of the year gone by…..it was our healthy and light meal before binged in the name of making merry!!

Anyhooooo….so how have the first few days of the new year been treating you!? Honestly, I feel no different. The dates have changed no doubt, but that is where I think it ends. I am not one who makes resolutions and stuff….it’s been that way all my life. Do you? Have any of you actually seen your resolution through the year and then made notes about it later? I’d love to know! I mean, many break their resolutions the very next morning of making them….seems like such a waste..moot point, no?!

How to make Mexican vegetable soup  Polkapuffs recipes  Shreya tiwari recipes  Healthy diets friendly soup recipe  Soup recipes

So coming to this soup….it’s as healthy as healthy gets..no cornflour or APF or any ingredient to thicken the broth. It has a ton of veggies…like literally! Plenty of spices and the tang….that’s just perfect!!

Obviously you could add a bit of meat like sliced sausages or some boiled eggs. I was thinking maybe some seafood, like prawns or even squids! The possibilities are endless…. but I keep this one as veg…always. It’s one of our favourite go-to soups to do at home. It’s the quickest too, you’ll see!

How to make Mexican vegetable soup  Polkapuffs recipes  Shreya tiwari recipes  Healthy diets friendly soup recipe  Soup recipes

Everyone has a favourite soup….this is my current favourite, has been for sometime now. I usually even like Manchow soup…a personal favourite or some Thai Noodle soup, I’d probably share that recipe here too sometime….could make for a ideal summer lunch! ☺️

Anyways….let’s first learn to make us some healthy Mexican Vegetable Soup….

Yield: serves 2

Equipment: a heavy bottomed pan, measuring cups/ spoons, a ladle.

Ingredients:

2 tbsp oil

5-6 cloves of garlic

1/4 cup finely chopped red bell pepper

1/4 cup finely chopped yellow bell pepper

1/4 cup finely chopped green bell pepper

1/4 cup finely chopped carrots

1/4 cup sweet corn

1/4 cup finely chopped French beans

1/2 cup finely chopped red onion

3 nos. large ripe tomatoes

salt & pepper to taste

3/4 tsp cumin powder

1 tsp red chilli powder

1/2 tsp dried oregano

1 tsp peri peri spice mix (store bought)

2 cups water

3 tbsp chopped fresh coriander leaves

juice of half a lemon

nacho chips to serve on the side (optional)

Method:

Heat oil in the pan, add crushed garlic and chopped onions. Sweat the onions for about 2-3 minutes. Then add the chopped bell peppers, carrots, beans, sweet corn. Stir well and season with salt & pepper. Cook the veggies for about 5-6 mins.

Then add the oregano, cumin powder, red chilli powder and the peri peri spice mix. Stir well, add tomatoes. Cook these together for another 5-6 mins or until the tomatoes turns soft and mushy. Add water (I add about 2 cups, you can add more or less).

Let the soup come to a boil, takes about 12-13 mins. Once the consistency is right, add chopped coriander and lemon juice. Serve the soup piping hot with some nacho chips.

How to make Mexican vegetable soup Polkapuffs recipes Shreya tiwari recipes Healthy diets friendly soup recipe Soup recipes

Such a filling meal….I’d say do try it once.

Love,

Shreya 💝

Adapted from cooking classy


Dal ka Phara | Dal Fara | Glutenfree and Vegan Lentil Stuffed Steamed Rice Cakes

Dal ka Phara or Fara is a very popular snack if your visiting eastern Uttar Pradesh or Bihar. The ‘pithii’ or the filling is made of ‘chana dal’ a.k.a split chick peas. Alternatively, this filling can also be made with ‘urad dal’ a.k.a skinless white lentils. However, it’s  always made using the former in our house. The outer covering that holds the filling in place is made with rice flour a.k.a ‘Chawal ka atta’. These along with some spices and condiments makes for an delicious and tempting dish which is vegan and also gluten free. 🤗

Dal ka Phara | Dal Faara recipe Polkapuffs recipes Steamed dal Phara recipe

The Phara is then either steamed or boiled in some salted water. Some people even choose to shallow or deep fry these dumplings once they are steamed or boiled. However, I do not do that. I feel the actual taste lies in keeping it as it is and thus making it much more healthier than the fried ones! That’s how my Mom makes them…and they taste divine 😘 Yes…most of these traditional recipes that I make come from her kitchen…stuff that I have grown up eating and savour the most!

What I like with these personally is my Mom’s spicy, tangy Pudine aur Dhaniye ki Imli Wali Chutney!  Doesn’t the sound of it make you drool….it’s one of my favourite dips/ chutneys to go with anything savory and I always have a little porcelain potful sitting in my refrigerator 😉

Dal ka Phara | Dal Faara recipe Polkapuffs recipes Steamed dal Phara recipe

So this time when my Mom was visiting us, I told her to teach me how to make these Pharas the traditional way and She did! She made the first couple of them as I watched her closely and then she guided me to make the rest….which obviously don’t look too perfect but I managed!! It’s a little lengthy procedure no doubt, but not very difficult if you follow the little tips.

The filling which is made with chana dal needs to be organised first by soaking the dal for at least 5-6 hours and then so on and so forth…..every bit worth the effort!

I will also share the recipe of the delicious Chutney that you see in the pictures! But that’s not even the best part, the best part is that my Mom modelled for me again…..this is her experienced hand which you had also seen in Vanilla Sponge Cake made in a Pressure Cooker, again her recipe!

So let’s get started….read carefully. It’s simply but a little technical….

Yield: 7-8 pharas

Equipment: a large open mouthed pot, measuring cups/ spoons, a large mixing bowl, a small mixing bowl, a slotted spoon, a basic blender.

Ingredients:

For the outer covering:

1+1/2 cup rice flour (I use store bought)

salt to taste (season carefully, as we will season the filling too)

2 tsp refined oil

warm water as needed to knead a dough

Method:

In a large mixing bowl, take rice flour and season with some salt. Then add oil. Slowly, add the warm water a little at a time and make a dough. This is a Glutenfree flour, hence the dough will break if much pressure is applied. Once the dough comes together, cover it with damp kitchen napkin for 15-20 mins so that the dough absorbs enough moisture.

Dal ka Phara | Dal Faara recipe Polkapuffs recipes Steamed dal Phara recipe

For the filling:

3/4 cup chana Dal (split chick pea)

2″ piece fresh ginger

1/4 cup fresh coriander leaves

salt to taste

2-3 nos. green chillies

1/2 tsp cumin seeds (jeera dana)

a pinch of hing (asafoetida)

Method:

Wash the dal well and soak in about 2 cups of water for 5-6 hours.

Next, drain all the water from the soaked dal.

Place the dal in a blender jar. Add very little water, season with salt, ginger, green chillies, coriander leaves, cumin seeds and hing. Grind them together until you have a smooth paste.

Remove the paste in a small bowl.

Assembling the Phara: 

Keep a small bowl of water handy and weyor fingers and palms well. Take a lemon sized ball of the dough. Using your fingers and palms flatten the dough to a circle of 3″ diameter. The thickness should be approximately 1/2 a cm but not more as they won’t cook well otherwise.

Dal ka Phara | Dal Faara recipe Polkapuffs recipes Steamed dal Phara recipeimg_5564img_5565

Then place about 1-2 tbsp of the filling in the centre of the flattened dough and gently fold over the dough to cover the filling and pinch the edges to secure the filling within.

Do the same for the entire dough and keep the uncooked pharas ready on a plate.

Now, heat about 2 litres of water in a large pot, season it with some salt. Once it comes to a rolling boil, drop 3-4 pharas at a time. Let them boil on medium flame for about 5-8 mins. They will float on the top once they are cooked.

Using a slotted spoon, carefully remove the boiled Pharas from the water and place them on a plate. Cut one of them to see if they are cooked, if the dal is set and looks dry, it means the dal and the rice dough are both cooked well.

img_5566img_5567

Do the same with the remaining uncooked pharas too, serve them hot with Chutney.

If you wish to steam them, do steam them as you steam Idlis in a idli cooker. Cook time will be 12-15 mins and cut them to check if they are cooked.

For Chutney:

1 cup fresh coriander leaves

1/2 cup fresh mint leaves

4-5 cloves garlic

2 nos. green chillies chopped

1 nos. small onion sliced

4-5 tbsp fresh tamarind pulp

salt to taste

water as needed

Method:

Take all the ingredients in a blender jar and blend until smooth. Adjust the consistency by adding more or less water. This Chutney keeps well for 10-12 days in a porcelain or steel or glass jar under refrigeration.

Dal ka Phara | Dal Faara recipe Polkapuffs recipes Steamed dal Phara recipe

This is one of my favorite versions of Dal-Chawal if you ask me! Healthy, filling and delicious 😘

Love,

Shreya💕


Chawal ke Namak Paare

Diwali is just around the corner….and I am sure everyone’s planning what to make for our families and friends, to gift and to enjoy! Delicious, obviously everything must be delicious…and I think they ought to be healthy too….I mean as far as possible😄

So today, I am sharing a glutenfree recipe of our very famous North Indian ‘namak paare‘ (savory crisps). I don’t really think there is anyone out there who’d not like the taste and the texture of some ‘namak paare’…😋

1476694470239

These ‘Chawal ke namak paare’ are very crisp and light, I was almost surprised with the flavours. To be honest, these are the result of small blunder in my kitchen from this weekend 😂..yeah!! I had to make something else with APF (Maida) and I accidentally measured out the rice flour and only when I’d started kneading the dough did I realise my mistake…well..it was quick thinking from there and I just made these crisp treats in the next half an hour! My Mom loved them…and I know so did my hubby. These taste just yum with some hot ginger tea or even as a munchy while you watch your favourite show on the television….😉

Although, these are fried…rice flour on its own absorbs very little to almost no oil and stays crisp for at least 3-4 days. I am hooked!

Let’s make them…they’re fast, easy and absolutely mess free!! So barely any cleaning up after you are done👌🏼

Yield: serves 2-3

Equipment: measurging cups/ spoons, a large wok, a slotted ladle, a chakli press/ kitchen press, some kitchen tissues.

Ingredients:

1 cup rice flour (Chawal ka atta)

salt to taste

a pinch of baking soda (soda bicarb)

1/2 tsp black pepper powder

5 tbsp ghee

water as needed

oil to fry

Method:

Seive rice flour in a large mixing bowl, add salt black pepper, soda bicarb and ghee.

Keep rubbing these together until the flour resembles a bread crumb like texture and it holds it’s shape when held in a fist (I do it for about 20 mins to get a crisp texture later).

img_5476img_5477img_5478img_5479

Then using little water make a hard dough. Cover the dough and let it rest for 15 mins.

Next, fill the dough in the kitchen and use the plate shown in the second picture above to make the shapes of the namak paare (as the dough is glutenfree, I wasn’t comfortable rolling it and cutting it into small diamonds, you can do so if you are able to manage to roll the dough).

Heat sufficient oil in a wok, once it’s hot, turn the flame to low. Now drop the pressed pieces of dough into the oil and fry on both sides. Remember to fry on low flame so that they cook evenly and turn crisp.

img_5480

This is what it looks like after frying ⬆️

Once done, remove from the oil and place on kitchen tissue to absorb excess oil. Let them cool off completely before storing them in airtight containers.

1476694668497

If you are looking for more ideas for savory treats this Diwali, click here for crispy Rawa Chakli recipe, click here for Masala Sev recipe, click here for Khasti Mathri recipe.

Love,

Shreya💝

Vrat ke Pakode | Phalhari Pakode ki recipe | Glutenfree Fritters

I am a Northern Indian and having spent many winters up there, I love everything that the winters have to offer in terms of the local fresh produce! I particularly enjoy roasted or sautéed Singhara (water chestnut or water caltrop). The flavour is very earthy and not many spices are needed to enhance it further 🙂 They are commonly seen in green or brown colour…I’ve heard about the pink ones but haven’t come across any yet. Although, the green ones do have a light pinkish hue around the skin. I wish I had a few fresh ones at hand to show it’s beauty! 

img_1210

So, as I was saying…it’s available up North…usually you will find local vendors selling these on small stalls. These Singharas or water chestnuts are usually roasted on coal embers and are sold hot. The earthiness (‘sondhapan’ in Hindi) is something that grows on you and you will want to enjoy them even more! Usually paired with the evening tea, they make for a toothsome snacking option.

Since it’s a fruit, it can be enjoyed during the Vrat (fasting) season in Navratri or Mahashivratri. It can be enjoyed raw,boiled or sautéed or even roasted as I mentioned above wth some Vrat ka namak.

Vrat ke pakode recipe Polkapuffs recipes Navratri up was ka khana Vrat recipes Fasting recipes 

The Singhara is dried and powdered to make Glutenfree flour which too can be used for recipes during Vrat (fasting). It’s full nutritional properties and almost no fats!

So, today I am going to be sharing my favorite Vrat (fasting) dish, Vrat ke Pakode! Anyone who knows me well, know that’s I am not too fond of sweets…(Yes!! My blog archives tell a different story…but that’s courtesy my hubby😘😂). This is my Mom’s recipe…and I freak out over them. So much so, I refuse to share any when these are on the menu. Luckily enough, my hubby has become fond of them so he wants a share even though he isn’t fasting….so obviously I make a large batch!!

Let’s see how…

Yield: serves 1

Equipment: a large wok, a mixing bowl, measuring cups/ spoons, a slotted spoon, kitchen paper.

2 nos. large potatoes

1/4 cup Singhara ka atta (water chestnut flour or any other Glutenfree flour like buckwheat or finger millet but I always use water chestnut flour)

vrat ka namak (or regular salt) to taste

1 tsp grated ginger

1 tsp chopped green chillies

1/4 tsp black pepper powder

1/4 tsp degi mirch (optional, use it for the colour)

2 tbsp chopped coriander leaves and some extra to garnish

water as needed

oil to fry

Method:

Peel the potatoes, wash and pat dry them.

Then cut the potatoes into small cubes. Set them aside.

In a mixing bowl, add the cubed potatoes, degi mirch, black pepper pwd, chopped green chillies, chopped coriander leaves and grated ginger.

Vrat ke pakode recipe Polkapuffs recipes Navratri up was ka khana Vrat recipes Fasting recipesVrat ke pakode recipe Polkapuffs recipes Navratri up was ka khana Vrat recipes Fasting recipes

Mix these well. Add the Singhara flour/ atta. Mix well again. Do not add salt right now. (If you do, the mixture will leave a lot of water and the fritters/ pakode won’t be crisp). 

Heat oil in the wok. Once it’s hot enough, reduce the flame to medium.

Now season the mixture with salt and add a little water to it and mix well. Do not let the this mixture rest, drop spoonfuls of it into hot oil and fry them evenly until golden and crisp on all sides. Remove from the oil and place them on absorbent kitchen paper to get rid of any excess oil.

That’s it, serve them piping hot with tea and some Phalhari chutney. 

Vrat ke pakode recipe Polkapuffs recipes Navratri up was ka khana Vrat recipes Fasting recipes

Also try my Roasted Phool Makhane (spiced foxnuts), click here for recipe...makes for a great fat free snacking option as you fast!

Love,

Shreya💝

Chatpate Saunfia Aloo No onion no garlic recipes Polkapuffs Aloo Recipe Recipes for Navratri

Chatpate Saunfia Aloo (no onion no garlic recipe)

I love potatoes! I can have them in any form except sweet 😱😱 Potatoes got to be spicy and delicious….can’t be bland and sad…! That’s what I am sharing today…awesome, spicy and so easy to make too!

Besides, it’s without any onion and garlic too…so perfect for the upcoming Indian festivals like Navratri when most of us eat food sans the onion and garlic element for 10 whole days. I won’t get into giving you the background of the festivals and the why’s and the how’s!

Chatpate Saunfia Aloo No onion no garlic recipes Polkapuffs Aloo Recipe Recipes for Navratri

This recipe can be made in many ways and enjoyed in many more too! My Mom usually makes another kind of Aloo without onion and garlic, this is inspired from her basic recipe..which by the way has way too many fans out there 😍

I have mentioned the spices that I have used, but you can always change them slightly to your preference. These potatoes can be served as starters, along with dal and some steamed rice or you can add them to any curry/ gravy and enjoy it with Phulkas (Indian flatbread).

Yield: serves 2

Equipment: a heavy bottom skillet or pan, a large pot, measuring cups/ spoons.

Ingredients:

300 gms baby potatoes (I have used the smallest kind, you can also use regular potatoes and cut them into cubes for this recipe)

salt to taste

3 cups water

1 tbsp refined oil

a pinch of asafoetida (hing)

1 tsp fennel seeds (saunf)

2-3 nos. green cardamom (choti Elaichi)

1 tsp roasted cumin pwd (bhuna jeera pwd)

1/4 tsp turmeric pwd

1/2 tsp red chilly pwd (I used degi mirch)

1/2 tsp crushed anardaana seeds

1/4 tsp chaat masala (optional)

a pinch of Garam masala 

chopped coriander to garnish

Method:

Wash the baby potatoes well, do not peel them.

In a large pot, boil water with salt. Add these potatoes in boil until 80 percent cooked. They must not be mushy in texture. Drain the water and let the potatoes cool (skip the boiling bit if using large potatoes cut into cubes).

img_5228

Now, heat oil in the skillet. Add hing and saunf along with cardamom. Let them crackle. Next, add the dry spicies mentioned above except anardana pwd and chaat masala. Sauté them together for 2 mins. Next, tip in the potatoes and check the seasoning, add more salt if needed. Mix well and cook for about 5-8 mins (I let the skin crisp up a bit). Finally, add the anardaana pwd and/ or chaat masala (I always add a bit, tastes so good!). Turn off the heat and garnish with some chopped coriander leaves. Serve them piping hot!

img_5230

Also, try my dahi aloo (no onion garlic), phalhari Kadhai paneer (no onion garlic), Phalhari chutney (no onion garlic) or see my collection of Navratri Recipes here.

Happy Cooking folks!

Love,

Shreya💝