Kaju Katli recipe Cashew thins Recipe for Indian sweets Kaju Katli for diwali diwali sweets

Kaju Katli

Kaju Katli! I can just go on eating too many of them 😬 Ever since I was a child, these were undoubtedly my favourite ‘mithaai‘. I would never share these with anyone! πŸ˜‰

Kaju Katli recipe  Cashew thins Recipe for Indian sweets  Kaju Katli for diwali  diwali sweets

My mother too indulged me & kept getting these often. Although, I don’t remember her making them….or maybe she did, I don’t really recollect.

So, when I got married, I wanted to make them at home, because the ones you get outside in shops aren’t healthy. They add rice flour & cornflour to the mixture before setting the katlis. So I referred to some YouTube videos for assistance πŸ˜‰ and ever since then, I make them so often…they always turn out moist & delicious πŸ‘ŒπŸ‘

Kaju Katli recipe Cashew thins Recipe for Indian sweets Kaju Katli for diwali diwali sweets

So much so, that my hubby says they taste better than store-bought ones πŸ’ƒπŸ’ƒπŸ˜˜ Wow….that’s such a great compliment! Because, he can be a bit hard please at times..πŸ˜›

I am sharing this today as the festive season has begun…Raksha Bandhan being the first occasion around the corner…so make them for your beloved brother and celebrate this joyous festival πŸ˜‡ also, try my Anjeer burfi or Khoya burfi…my Doodh Peda recipe is instant! And we know how our dear brothers love their Besan Laddoos! You can even go a little overboard and indulge in some Zaffrani Phirni πŸ˜‹ you can try these for Diwali too….it’s not too far 😊

Kaju Katli recipe  Cashew thins Recipe for Indian sweets  Kaju Katli for diwali  diwali sweets

My recipe is very easy, I took 4 ingredients & less than 30 mins to serve these from start to finish..! Let’s get started!

Yield: 15-17 katlis

Equipment: a non stick pan, a wooden spoon, measuring cups/ spoons, a knife, a plate, a rolling pin.

Ingredients:

1 cup cashew nuts

1/2 cup sugar

4 tbsp water

1 tsp ghee (for greasing)

Method:

Use a blender and dry grind the cashews to a fine texture. Make sure the cashews were at room temperature before grinding.

Heat the non stick pan, add the sugar & water. Melt the sugar into the water on a low flame. Keep stirring. Once the sugar has melted, cook for another 2-3 mins on low flame. To check if the sugar syrup is ready, take some water in a bowl and add a drop of the syrup. The drop should not mix in the water. This is one thread consistency (ek taar ki chashni). My syrup was ready in 5 mins approximately.

image

Once the syrup is ready, add the cashew powder & keep stirring constantly & cook on low flame for 5 mins, until you achieve a dough like consistency. To check the consistency of the Katli dough, take some mixture in your hands and make a ball, if the shape holds, it’s ready. Remove this dough like mixture on a greased plate and let it cool for 5 min. Grease your palms and knead this mixture carefully until it’s smooth.

image

Now, roll this dough with a rolling on the back of a greased plate. The thickness should be about 6mm or a bit more. Don’t roll it too thin. Set this plate in the refrigerator for 8-10 mins. They will set really quickly, once set, you can cut them in any shape as you prefer, however I prefer the traditional diamond shape for these katlis … That’s it! They are ready πŸ˜„ you can store them in an airtight container for 2-3 day in the refrigerator.

Kaju Katli recipe  Cashew thins Recipe for Indian sweets  Kaju Katli for diwali  diwali sweets

Enjoy them soon! ☺️

Love,

Shreya πŸ’•

Sabudana Khichadi Sabudane ki Khichadi Tempered sago pearls Indian style sago pearls Easy, no-fail sabudane ki Khichadi Navratri fasting recipes Vrat Ka khana Indian recipe

Sabudane ki Khichadi

A nutritious and delicious breakfast makes for a great start to our day! I make it a point to serve something that’s filling and keeps you going for the first half of the day ☺️ Somedays it’s Parathas with some pickle/ curd…on others it can be oats & fruits…to name a few!Β 

image

Sabudana/ Tapioca Sago Pearls give you energy and are easy to digest. Also, being rich in carbohydrates, they are perfect to start your day. The husband & I, both enjoy Sabudana in almost all forms πŸ‘ŒπŸ˜€ you can even try my Sabudana Wadas 😊

As for my sabudane ki Khichadi, I follow my mom’s easy, no-fail recipe. It’s delicious, quick and each pearl is beautifully separate and still so moist! πŸ‘ŒπŸ‘Œβ˜ΊοΈ and you can follow the same recipe for your fasting menu too!

Sabudana Khichadi Sabudane ki Khichadi Tempered sago pearls Indian style sago pearls Easy, no-fail sabudane ki Khichadi Navratri fasting recipes Vrat Ka khana Indian recipe

When making it for fasting menu, simply replace the regular salt with fasting salt/ Phalhari namak. Just 20 mins is all you need to prepare it.

Yield: serves 2-3

Equipment: A deep vessel, measuring cups/ spoons, a wok, a spatula.

Ingredients:

150 gms Sabudana/ sago pearls

1/4 tsp cumin/ jeera seeds

2 nos chopped green chilly

1/4 cup roasted & roughly crushed peanuts without the peel

1/2 tsp red chilli pwd

a pinch of hing

2 tbsp ghee/ clarified butter

2 tsp lemon juice

salt to taste

some chopped fresh coriander leaves to garnish

Method:

Firstly, we need to soak the Sabudana overnight, so for that take the Sabudana/ sago pearls in a deep vessel, and wash it under running water at least 2-3 times, until the water runs clear. Then add some water to the washed Sabudana in the vessel, the level of water should just be enough to cover the Sabudana and not over it at all. If you add too much water, you will end up with a sticky lump. So be a little cautious while soaking it. Soak for a minimum for 5 hours, overnight soaking is ideal.

Next morning, or whenever you are cooking it, fluff the soaked Sabudana using a fork with light hands. Now, heat the wok, add the ghee. Once it’s hot enough, add the cumin seeds, chopped green chilli & hing. Let these crackle well, (if you like, add a boiled, peeled and cubed potato at this stage and sautΓ© for a min) next add the soaked Sabudana & season with salt & red chilli pwd. Stir well. Add the crushed peanuts and mix it nicely so that the Sabudana gets coated properly with the peanuts & the seasonings. Cover and cook for about 7-8 mins.

Open the lid and check the Sabudana and stir again. They will have gone a little translucent. That’s it, they are done. Squeeze in some lemon juice and garnish with chopped coriander leaves. Serve hot with curd if you are fasting 😊😊 quick & easy! Not to forget, so delicious.

Sabudana Khichadi Sabudane ki Khichadi Tempered sago pearls Indian style sago pearls Easy, no-fail sabudane ki Khichadi Navratri fasting recipes Vrat Ka khana Indian recipe

Try this recipe, it won’t fail you! Perfect results every time! πŸ˜„

Love,

Shreya πŸ’“

Paneer mattar recipe Easy mattar paneer recipe Indian mattar paneer Paneer recipes Polkapuffs Easy mattar paneer Restaurant style mattar paneer

Mattar Paneer / Indian Curried Fresh Green Peas with Cottage Cheese

What do I do when I run out of veggies & absolutely don’t want to step out of my home?! But wish to serve a delicious and nutritious meal….😬 I go the easy way…!!Β 

Paneer mattar recipe Easy mattar paneer recipe Indian mattar paneer Paneer recipes Polkapuffs Easy mattar paneer Restaurant style mattar paneer

I always…always make it a point to have a slab of cottage cheese/ paneer and some frozen peas handy in my refrigerator! It never fails me. Week nights can often turn hectic and I, by no means wish to spend hours in the kitchen….that’s where my stashed goodies come into playπŸ˜‰

As every other Indian, the hubby and I, too love are Mattar Paneer! We have it with rotis or rice! Nothing could taste better…some earthy, whole spices with a smooth, luscious gravy studded with golden nuggets of paneer and juicy green pea-pearls! Ya! Restaurant style description πŸ˜› If you are a big fan of paneer like we are, then do have a look my Dhaba style Palak Paneer & Reshmi Paneer πŸ’—

Paneer mattar recipe Easy mattar paneer recipe Indian mattar paneer Paneer recipes Polkapuffs Easy mattar paneer Restaurant style mattar paneer

This recipe is fast, easy & absolutely lip-smacking πŸ‘Œ I took barely 45 mins to get this on the table with soft rotis & a salad…such a basic meal with amazing flavours!!

Yield: serves 2

Equipment: a non pan pan / wok, a spatula, measuring cups/ spoons, a blender.

Ingredients:

200 gms fresh paneer cut into cubes

150 gms green peas (thaw them if using frozen)

2 nos. medium onions sliced

2 nos. medium tomatoes cubed

7-8 nos. garlic cloves

2″ pc ginger

1 nos. green chilly

1 nos. black cardamom (Badi elaichi)

2″ pc cinnamon stick (dalchini)

1/2 tsp cumin seeds

1 tbsp cumin pwd (jeera)

1 tbsp coriander pwd (dhaniya)

1/4 tsp turmeric pwd

1/2 tbsp red chilly pwd

1/2 tsp Garam MasalaΒ 

Salt to taste

2 tsp oil for the gravy

1 tsp oil to sautΓ© the paneer cubes

some coriander leaves to garnish

Method:

Heat the wok/ pan with 1 tsp of oil, once it’s hot, add the paneer cubes & sautΓ© them well on both sides until they turn golden brown. Once that’s done, remove them from the oil & set aside. Blanch the green peas in some hot water for 6-8 mins. Drain & set that aside too.

In a blender, grind together onion, garlic, ginger & green chilly. Set them aside. Also grind the tomatoes separately & set it aside.

In the same pan/ wok, add 2 tsp oil and heat it well. Add cumin seeds, black cardamom & cinnamon stick. Sauté for a minute. Next add the onion, ginger, garlic & green chilly paste. Cook on medium flame until the oil separates from the masala & it turns rich golden in colour (about 5-6 mins approx). Season with salt. Add the dry spices now, turmeric pwd, red chilly pwd, cumin pwd & coriander pwd. Cook for 10 mins until the oil floats on top of the masala. Next goes in the tomato purée & blanched green peas, mix and cook until the oil floats on top (approx 7-8 mins). Lastly add the Garam masala pwd & the sautéed paneer cubes, cover the pan with a lid and cook for 5-7 mins. Once done, garnish with some coriander leaves & serve piping hot 😊

Paneer mattar recipe Easy mattar paneer recipe  Indian mattar paneer Paneer recipes  Polkapuffs  Easy mattar paneer  Restaurant style mattar paneer

Hope you will try it soon…trust me it’s a keeper ☺️

Love,

Shreya πŸ’–

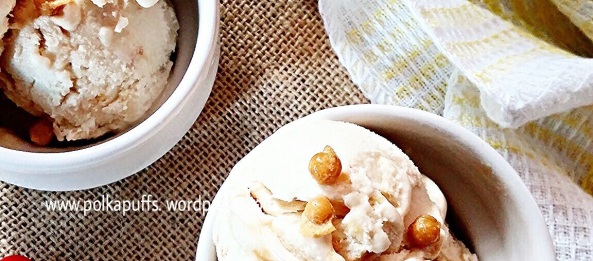
Butterscotch ice cream Easy homemade ice cream Recipe for delicious ice cream Honey & Butterscotch Ice cream No churn ice cream Eggless butterscotch ice cream

Honey & Butterscotch Ice Cream (Eggless)

I love making ice creams at home! It’s such a lot of fun!! The texture amazes me every time when I scoop out some ice cream!! πŸ˜πŸ‘Œ Creamy and so smooth…it’s a delight!Β 

Have a a look at my quick & easy recipes for No Churn Orange Ice Cream & an absolutely winning 2 Ingredient Banana Ice Cream 😍

This ice cream just happened because my hubby simply loves honey with anything & everything, so while chomping on some store bought vanilla ice cream…he says “can you make an ice cream with honey?!” πŸ˜‹ I was amazed! I was like….absolutely! I can…it sounds delicious. I will definitely do that…in combination with Butterscotch! Hence, my Honey & Butterscotch Ice Cream πŸ‘Œβ˜ΊοΈ andΒ it obviously has to be eggless!

In the past, when I was experimenting with homemade ice creams, I had some help from here….you guys can have a look too. My recipe is adapted from it with some changes to suit our palate. You can say it’s pretty simplified…no fussing over it..no churning at all!Β Just look at the texture…just like the ones you buy at your favourite ice cream parlour!

Butterscotch ice cream Easy homemade ice cream Recipe for delicious ice cream Honey & Butterscotch Ice cream No churn ice cream Eggless butterscotch ice cream

I always use basic ingredients for making ice creams…so it’s really a matter of 20-25 mins of prepping & just let the freezer do its job πŸ‘ŒπŸ˜‰ it goes like this…

Yield: serves 4-5 persons

Equipment: a non stick pan, a whisk/ electric whisk, measuring cups/ spoons, a ladle, an airtight container to set the ice cream, a large mixing bowl.

Ingredients:

110 ml milk (I have used Amul 3% milk, you can use skimmed milk or full fat milk)

200 ml chilled cream (I have used Amul fresh cream, NOT whipping cream)

1tbsp + 1 tsp cornflour (cornstarch)

7 tbsp honey

2 drops of butterscotch essence (can be replaced with vanilla essence)

4 tbsp crushed butterscotch chips (I have used store bought butterscotch chips. These can be replaced with chocolate chips/ nuts)

Method:

Heat the pan over low heat, add the milk and cornflour, keep whisking as it cooks on low heat and make a smooth and thick custard (the custard should coat the back of a spoon). It too me about 5 mins to make the custard. Cool this custard in the refrigerator. Once cooled in about 10 mins, pour the custard in the mixing bowl, add chilled cream & the honey to the custard and whisk well for 7-10mins to mix everything well (I used an electric whisk hence took just 4-5 mins to mix these well). We do not need stiff peaks, just whisk to add some air into the mixture. Next add the crushed butterscotch chips & butterscotch essence. Whisk again for a min only. Immediately pour the ice cream in the airtight container and freeze for 8-10 hours. That’s it! Thaw the ice cream at room temperature for a few mins before scooping, I added some butterscotch chips while serving ☺️ You can pour some honey too!! Delicious !🍨🍦

Butterscotch ice cream Easy homemade ice cream Recipe for delicious ice cream Honey & Butterscotch Ice cream No churn ice cream Eggless butterscotch ice cream

Making an ice cream doesn’t get easier than this! My hubby went all ga-ga over the flavours! Since it has no sugar, it’s healthy too πŸ˜‰

Love,

Shreya ❀️

Khoya burfi, recipe for easy burfi, mawa burfi recipe, Indian traditional sweets, diwali sweets, recipe for Diwali

Khoya / Mawa Burfi

I had some ‘Khoya’ (milk solids) sitting in my fridge from the time I had made my Anjeer BurfiΒ and I wanted to use it up soon. Besides, there were no desserts at home & I know my hubby would love to have some after dinner 😘 

Khoya burfi, recipe for easy burfi, mawa burfi recipe, Indian traditional sweets, diwali sweets, recipe for Diwali

I asked my mom if she knows a fool-proof recipe for a basic white Khoya/ Mawa Burfi... She wasn’t sure as she hadn’t made any for ages πŸ˜› So what next!? Google to my rescue…referred to the recipeΒ hereΒ and here too for the proportions and adjusted it according to my taste & the ingredients available in my pantry. My hubby isn’t a fan of coconut usually so eliminated it altogether πŸ˜‰ it tasted delicious & perfect for any celebrations too or for festivals like Diwali / Raksha Bandhan πŸ˜‡

Khoya burfi, recipe for easy burfi, mawa burfi recipe, Indian traditional sweets, diwali sweets, recipe for Diwali

I had kept the leftover Khoya in the freezer, hence I thawed it for 1 hour. Once it came to room temperature, I grated it. Let’s have a look at this recipe, it’s very easy to prepare. It took me just 5 ingredients & 15 mins to prepare it!

Yield: 9-10 burfis

Equipment: a non slick pan, a spatula, a tray, a knife, measuring cups/ spoons.

Ingredients:

150 gms grated khoya /Mawa / milk solids

6 tbsp pwd sugar

1/4 tsp cardamom pwd

a few strands of saffron /kesar soaked in a tsp of warm milk

1 tbsp pistachios slivers (for garnishing)

Method:

Grease a tray/ plate & set aside.

Heat the non stick pan, add the grated khoya and sautΓ© for 2-3 mins on low flame. Once it melts a little bit, add the powdered sugar & cardamom pwd. Mix well and sautΓ© on low flame. The khoya will melt completely due to the sugar, keep stirring the mixture until it thickens & starts leaving the sides of the pan. This will take 5 mins. When the mixture comes together to form a dough in the pan, immediately pour this mixture on the greased tray and spread it neatly & flatten the top. Try to make a square shape while doing this so that we can get neat burfis later. Garnish it with slivered pistachio and some saffron. Refrigerate for 30 mins.

Khoya burfi, recipe for easy burfi, mawa burfi recipe, Indian traditional sweets, diwali sweets, recipe for Diwali

After 30 mins, cut the burfis and serve 😊 That was quick!! Β Hope you make these soon…πŸ˜„

Khoya burfi, recipe for easy burfi, mawa burfi recipe, Indian traditional sweets, diwali sweets, recipe for Diwali

Love,

Shreya πŸ’•

Besan ke Laddoo / Besan Laddoo

As a child, I never really liked Besan ke Laddoo. I found it too heavy for my palate. And, back in those days, I wasn’t a fan of Indian sweets. Chocolates were my only choice of ‘mithaai‘. I was a child after all!Β 

Remember my love for Cadbury Nutties! You should have a look at these Brownies I made using Nutties πŸ˜‰ They were better than what I had expected them to be, given I was experimenting!

image

I developed a taste for Indian sweets at a much later stage in life…& Besan ke Laddoo were first in the list! I love their slightly coarse texture, melting in my mouth just as I bit into one…wow! The nuttiness of the roasted besan/ gram flour is so rustic. Once I fell for it, I was irrevocably in love with these Laddoos! And as always mom would make them during festivals…and I’d wait for them ☺️ but never learnt how to make these. I always knew it was a tedious task 😯

The first time I tried making these one afternoon after I got married, I was near tears!! I had made a blunder. A big lump of ghee, sugar & partially cooked besan sat in the wok in front of me…looking like everything except what I had envisioned πŸ˜’ I trashed everything! Once my hubby got home, I told about the disaster, he asked what were the proportions I had used?! I was like, ‘Mmmm…I am not sure I followed what mom told me’. He being an IHM grad, instantly got where I might have gone wrong & told me not to worry as proportions matter a lot alongside the cooking time and some such more things. I was quiet. Mentally making a note to self to give it another shot next week! And I did, results were slightly better but cooking the ghee along with the besan was making me nervous & edgy. I wanted to be calm but I simply couldn’t stop panicking all the time. I knew I had added too much ghee! Common, there had to be another way to do this!!? 😐😐

image

The next time I tried after a couple of months, I had a strategy in my mind! I had asked my mom about it and she approved & encouraged me to do it as I was comfortable doing it. I had decided to roast the besan separately and then add warm ghee slowly into it …mix & then add the nuts, sugar, etc. and that’s exactly what I did about two years ago! Those were so much better than my first two trials and the microwave Laddoos that I had tried seeing someone post a recipe in some food group. I was happy! My hubby approved it! πŸ’ƒπŸ‘ woohoo! And to this day I have stuck to my method, which I am sure many must be following, but for me it was a discovery of sorts πŸ˜› and look at my Besan ke Laddoo now….I am proud!

The ones you see in the pictures were made a few nights ago, and packed for an Independence Day potluck lunch at hubby’s work! I shot these before packing them the next morning for him to take them to work πŸ˜‡ Yes! They are good enough to flaunt…LoL! But, proportions matter…they do. That’s exactly what this recipe is about.

️Yield: 35 small/ 25 medium/ 20 large Laddoos

Equipment: a large wok, a mixing bowl, a blender, 1-2 plates, measuring cups/ spoons, a spatula.

Ingredients:

3 cups besan/ gram flour (I used a coarse variety, use any variety you get)

1/2 cup semolina (barik sooji/ rava)

1 cup + 2 tbsp powdered sugar (adjust the sweetness as per your taste)

1 cup melted ghee (approximately, may need less or more)

1/2 tsp cardamom pwd

5 tbsp crushed almonds

Method:

Heat the wok, dry roast the besan until it gives a rich nutty aroma & turns slightly dark brown in colour on medium flame only. Keep stirring continuously to avoid burning (took me 30 mins on medium to low flame). Once done, remove it & spread the dry roasted besan on a plate to cool. In the same wok which is still warm, dry roast the crushed almonds and semolina for 5-6 mins on low flame. Remove from the wok & add the semolina, almonds & powdered sugar to the cooling besan and mix well with your fingers. Mix in the cardamom pwd as well. That’s the tough part done.

Pls ensure you follow the next couple of steps correctly to get prefect Laddoos ☺️ Now, ensure that the melted ghee is at room temperature. Adding very hot ghee to the dry mixture which ruin the texture. Slowly, add tablespoon fulls of melted ghee into the dry mixture of besan, sugar, semolina, cardamom pwd & nuts and keeping mixing with your hands (Add the ghee slowly, don’t add all in one go, as we may not need all the ghee in a cup). As you feel the mixture is coming together to form a Laddoo, stop adding ghee & take some mixture in your palms and make a Laddoo, if the Laddoo is holding a tight shape, your mixture is ready. Just add 1 tsp of ghee to it finally & start making the Laddoos one by one. Ensure you press each Laddoo tightly so that they do not fall apart. Trust me, they won’t!! (I used approximately 3/4 cup ghee, isn’t that healthy?!) Arrange them in a on airtight box, they will last upto 5-6 days without refrigeration.

Besan ke Laddoo / gram flour fudge, Indian sweets, easy Laddoo recipes

Your melt in the mouth kinda Besan ke Laddoos are ready!

Love,

ShreyaπŸ’—

Kurkuri Masala Puri / Paapdi

“Mummy ..ek aur kha loon?!” …means “Mom, can I have another one?!” She’d look at me sternly & go..”No, you’re going to ruin your dinner/ lunch”.. But eventually give in as I’d give the ‘puppy’ eyes! πŸ˜‰ & me?! Well, I’d munch on a couple more happily πŸ‘Œ

image

I know that this episode has happened to each of us as kids…specially when our mothers prepare something which only she can make…and we call it our favourite! I have many such ‘favourites‘ from my mom’s kitchen… Kurkuri Masala Puri or Paapdi as she fondly calls being one of the many!

Kurkuri masala puri

She’d make this often but not as often as I’d want her to make….they would make appearances a few times in a year, specially around Diwali, Holi or summer vacations 😊 and when I’d insist, she’d make them for me. And I just couldn’t stop munching until there would be none left. So crispy they’d be, who could resist!? So simple in her culinary approach even to this day…she’d make them in a breeze. And now when I make them, I spend an entire afternoon….or so did she, but I was too ignorant to pay attention. I wish I could back in time & make them along with her…that’d be so much fun!

Kurkuri masala puri

Needless to say that I’ve learnt them from her…over the telephone! LoL! Yes, she teaches me everything over a call…patiently, while I keep repeating it back to her so that I am well versed…then I try it out and send her a picture…she obviously replies back with appreciation and encouragement 😬😬 Thank heavens for WhatsApp! I share whatever I cook with her πŸ˜‡ Well…enough chatting!! I could go on when it comes to me and my mom… Another thing that’s great is that my hubby likes them too…so I know that I make these…they’ll be over soonπŸ‘Œ… Let’s start with the recipe …

️Yield: 38 puris (exactly, whenever I make. You could get a few more or less)

Equipment: a large mixing bowl, a rolling board, a rolling pin, a knife, a wok, a slotted ladle, measuring cups/ spoons, kitchen tissue, a kitchen towel.

Ingredients:

2 cups wholewheat flour

1/2 cup gram flour (besan)

2 tbsp crushed kasoori methi (dried fenugreek leaves)

1 tsp turmeric pwd

1 1/2 tsp red chilly pwd

1 tsp cumin seeds (jeera)

salt to taste

1 tbsp ghee

a pinch of hing (asafoetida, optional. I used it as we have added gram flour)

oil to fry

water for kneading as required

Method:

Take all the dry ingredients mentioned above in a mixing bowl and stir everything together. Next add the ghee and rub it with the flour using your fingertips for 3-4 mins. We don’t need to do it anymore than that. Now, Β add water, little by little and make a very stiff dough. Cover it with a damp kitchen towel and set aside for 20 mins.

After 20 mins, grease your palms with some oil & divide the dough into playing marble sized balls ( I could make 38 balls). Next, using a rolling board and a rolling pin, roll these balls in circular shapes, thickness should be as thin as a roti/ chapati & the diameter of about 2 – 2 1/2″. Using a knife, prick every puri well (refer the picture below)

image

Do this for all the balls and keep them on a plate. Now, heat oil for frying in a wok, once it’s hot enough, reduce the flame to medium to low, start frying these puris 2-3 at a time on low or medium flame only. If we fry it too quickly on a higher heat, it won’t be crispy and the insides will remain raw. Once each puri turns a rich golden colour, remove from the wok & drain it well on kitchen tissues. Do the same for the entire lot. Once they have cooled, you can store them up to 5-6 days in an airtight container 😊

image

Enjoy these with a cup of tea or simply munch away….tastes great with some pickle or spicy chutney too πŸ‘Œ

Love,

Shreya ❀️

Crispy Baked Potato Wedges

Who doesn’t like munching on some crispy, fried potatoes, I know I do! I love everything fried…it’s my happy place in heaven πŸ˜› but I needed to stop eating fried stuff for a bit …had too much recently!Β 

But I still believe fried food takes to me to heaven…LoL! Sabudana Wadas for my fasts and Pyaaz ki Kachori over the weekend kept me in my happy place for a good few days! But, now it was high time I behaved ☺️

baked potato wedges

Now seriously, look at these golden wedges! Don’t they look divine…?! All crispy and spicy on the outside…and perfectly mushy inside. That’s how I would like them had I fried them. But then again…I couldn’t let myself do that. And besides, hubby dearest had told me after his third kachori,Β “These are great and everything 😘 …. but quit feeding me fried food for a bit!”

I laughed! I knew it was a warning…I was wavering from my promise to avoid fried food πŸ˜‡ so yesterday, I was craving for something crispy for munching a bit…and also a great ‘healthy’ cook-off has been happening in one of the food groups that I am a part of …so thought of baking some potato wedges ..perfect excuse for participating & going the healthy way ❀️ But just in case you want to bake something that screams ‘heavenly’ …have a look at my Loaded Potato Skins πŸ˜‹

Baked potato wedges

Too easy to do…just a few ingredients that are available in the pantry..& these humble potatoes won’t look all that humble anymore! I first made these last year after having tried some baked wedges at ChilisΒ long back..Looked them up at Pinterest and I just knew what I had to do and immediately wanted to try them at home…so added the flavours basis whatever I could taste and they turned out very well! The recipe goes like this…

Yield: serves 2

Equipment: 2 mixing bowls, 2 baking trays, parchment paper/ baking paper/ aluminium sheet, a cooling rack, measuring cups/ spoons.

Ingredients:

3 nos large potato

sea salt to taste (you can use regular salt)

1/2 tsp red chilly pwd

1 tsp garlic pwd (use fresh garlic paste if pwd is unavailable)

1/4 tsp black pepper pwd

1 tsp mixed Italian spice

a pinch of nutmeg pwd

2 tbsp refined oil (I ran out of olive oil)

1/2 tsp peri-peri spice mix (optional)

1 tbsp chopped fresh coriander (optional)

Method:

Wash the potatoes well. DO NOT peel them. Cut each potato into halves lengthwise and then cut each halve into 4 wedges. Soak these wedges in chilled water in a large bowl for about 30 mins.

After 30 mins, drain the water & pat them dry. Preheat the oven @ 230’C. Line a baking tray with parchment paper/ aluminium sheet. Set aside.

In another mixing bowl, add all the above ingredients except the peri-peri spice mix and coriander. Give it a mix and add the potato wedges. Mix well so that the oil & spice mix coats each potato wedge well. Now place the wedges separately on 1 baking tray and spread any remaining oil & spice mix over it.

Bake these @ 230’C for approximately 35 mins. I used the lower rods for the first 15 mins and both upper & lower for the last 20 mins while baking in the middle rack. Also, I placed another baking tray on the lower rack to avoid direct heat from charring/ burning the underside of these wedges. Once done, toss them in some peri-peri spice mix and chopped coriander leaves if you like.. & serve immediately with ketchup or any dip so that they are crisp.

Baked potato wedges

That was easy…& trust me they are too delicious to resist πŸ˜‰

Love,

Shreya πŸ’–

Pyaaz ki Kachori

I became a huge fan of these Pyaaz ki Kachori, when I visited Jaipur almost a decade ago and stopped by Rawat’s…. These Kachoris were crisp on the outside and perfectly moist within..and such a burst of flavour with every mouthful! Can’t remember how many I must’ve eaten back then!! 😬 

image

They were always on my mind… I mean I wanted to replicate these forever… And I finally made up my mind that I’d give it a go with whatever flavour I still got in my mouth when I thought of them & obviously..my ever obliging mom asked one of friends for a general idea as to what would go into making these.. My mom’s friend spent a good couple of years in Jaipur very recently and luckily had a fair idea about the ingredients! Lucky me! πŸ˜‡

image

That’s what they looked like from inside…although I didn’t make very large ones..we loved the overall flavour & they did come pretty close to original Rawat’s famous Pyaaz ki Kachori. It’s pretty easy and doesn’t need too much prepping!! Let’s get on with the recipe…Β 

️Yield: 7-8 medium Kachori

Equipment: a large heavy bottom wok, a slotted spatula, a large mixing bowl, measuring cups/ spoons, a blender, some tissues/ absorbent kitchen paper, a small pan

Ingredients:

For the the outer cover:

2 cups APF (Maida)

1 tbsp warm ghee

water as needed

1/2 tsp ajwain (carom seeds)

salt to taste

Method:

Take the flour in a large mixing bowl, add warm ghee and rub the flour with your fingertips for 7-8 mins, then season with salt & carom seeds. Add adequate water to make a medium stiff dough. Cover it with a damp cloth and set aside.

For the filling:

5 nos medium onions peeled & finely chopped

1 tbsp coriander seeds (dhaniya)

1 tsp jeera seeds (cumin)

1 tsp saunf seeds (fennel)

5-6 nos peppercorns (sabut Kali mirch)

2 nos whole dry red chilly

1 tsp ginger paste

1 tsp garlic paste

1 tsp green chilli paste

salt to taste

1/2 tsp Garam masalaΒ 

1/4 tsp turmeric pwd

2 tsp oil

1 pinch sugar

2 tbsp chopped coriander leaves

1/2 tsp amchur pwd (dry mango pwd)

For Frying:

oil as required.

Method:

Heat a pan & dry roast coriander seeds, fennel seeds, peppercorns, cumin seeds & whole dry red hollies for 5-6 mins. Turn off heat the heat and let them cool for a few mins. Next, grind these coarsely in a blender. Set aside.

Heat oil in the same pan, add chopped onions & a pinch of sugar and sautΓ© till they turn a bit brown. Next add the fresh spice pwd, turmeric pwd and give them a mix. Also add the ginger, garlic & green chilli pastes and sautΓ© for 3-4 mins. Let the oil separate from the spices…it will take about 4-5 mins. Season with salt & add the Garam masala. Cook for another 5 mins. Add amchur pwd and chopped coriander leaves. Stir and turn off the heat and set it aside.

Assembling:

Knead the dough once again and make small balls of equal size. Flatten each out with your fingers and your palm or rolling pin. The diameter can about 3″ or less & thickness should be a little more than that of a puri. Then add a tbsp or so of the filling and close the ball well so that the filling doesn’t come out while frying.

Now, heat oil in a large, heavy bottomed wok. Once it’s enough, drop 2-3 Kachoris in the oil and fry well from both side until they turn a rich golden colour. Drain well on a tissue paper/ absorbent kitchen paper. That’s it! Done πŸ˜‰ I served these hot with some fried green chillies & imli ki khatti meethi chutney πŸ‘ŒπŸ‘ŒπŸ˜€

Pyaaz ki Kachori

The filling, if kept in the refrigerator can last for 2-3 days. Hope you enjoy these soon!

Love,

Shreya πŸ’ž

Anjeer ki Burfi

Anjeer /Figs….I adore them in any form..fresh or dried…cooked or just as they come! ☺️ so making a Anjeer Burfi post was just a matter of time!! Sweet and slightly fudgy…they’ll leave you wanting more πŸ‘ŒΒ 

And what’s more is that figs /anjeer are so healthy…I hardly added any sugar to make these beauties. Being a super-food, it’s full of vitamins, magnesium, potassium , calcium…iron to name a few of its infinite benefits 😊 diabetic friendly too…and cures issues such and indigestion, etc. (Note: pls consult your doctor before including these in your diet if you are suffering from an ailment which expects you to follow a strict diet)

image

I make these during Sravan /Sawan/ NavratriΒ fasting /vrat /upwas every year. They are delicious and disappear really quickly too 😁…and they can easily make an appearance on any other day too..like Diwali or raksha-bandhan. TheyΒ were ready in about 45 mins!! Perfect for when you have guests around and want to serve something traditional and easy!

This recipe is a mix of inputs from my mom and some tips from the internet.

Just 5 ingredients is all you need for these burfis..lets see how.

️Yield: 9 burfis

Equipment: a non stick pan, a spatula, a knife, a plate /tray, measuring cups/ spoons, a blender, a grater.

Ingredients:

1/2 cup grated mawa /khoya / milk solids (if you are using frozen, then thaw it for 30 mins before you start)

1/2 cup dried anjeer /figs (approx 8-9 pieces of dried figs)

1 tbsp sugar

1 tsp ghee

1 tbsp almond slivers

1 tbsp pistachio slivers (optional ingredient for garnishing)

Method:

Take a small bowl with some hot water and soak the dried anjeer /figs in it for 10 mins. After 10 mins, they’ll be soft. Discard the water, pat dry the figs/ anjeer and use the blender to grind them coarsely. Set it aside. Grate the mawa/ khoya/ milk solids and set aside. Grease a tray /plate with some ghee and keep it ready to set the burfi.

image

Now, heat a nonstick pan, add the ground anjeer /figs and the sugar. Add 1 tsp of water and cook on medium flame for 3-4 mins. Next you have to add the grated khoya / mawa / milk solids, slivered almonds and ghee. Give it a good mix and keep cooking for 5-7 mins on low flame.

Once this mixture leaves the sides of the pan and makes a smooth ball on its own, turn off the flame. Put this mixture on the greased tray/ plate and flatten it out a bit. Try to shape it as a square so that you get square burfis when you cut them out. You can garnish with some pistachio slivers and press them down a bit.

Refrigerate this tray/ plate with the mixture for 20 min or so and then you can cut it into burfis and serve. πŸ˜€ that simple!

image

Go impress your loved ones…πŸ˜‡

Love,

ShreyaπŸ’—

Adapted from Tarla DalalΒ 

Also, you can have a look at a similar recipe onΒ Indian Khana