Vegetarian lo mein recipe Chow-mien recipe How to make street style Schezwan noodles Polkapuffs recipes Shreya Tiwari photography Vegan noodle recipe Schezwan noodle recipe

Schezwan Noodles | Indo Chinese Street Food

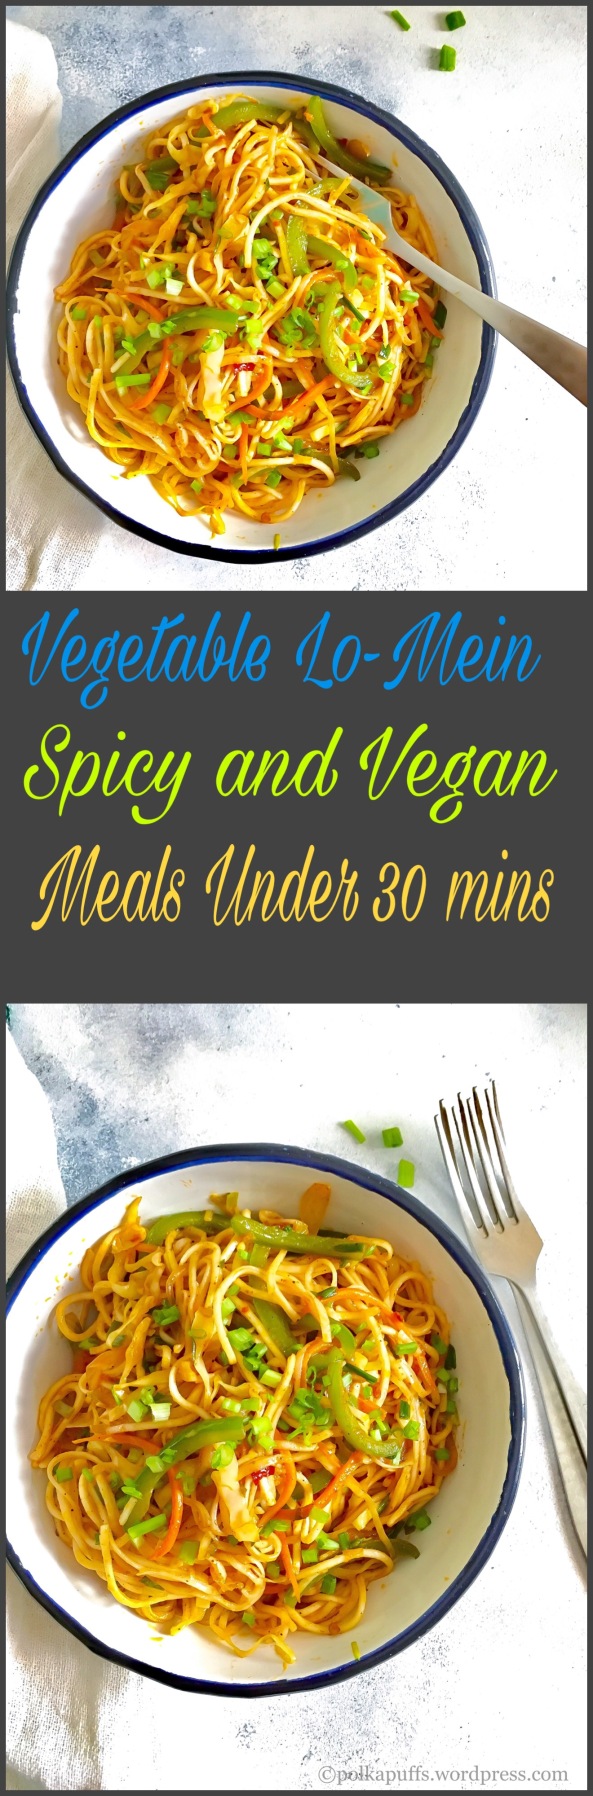
We Indians love our ‘desi’ Indo-Chinese….we may pretend to apprecite the gourmet, Asian-style spreads at the most sought after restaurants…but you’ll find us literally stuffing our faces with these street style noodles…or fried rice and some cornflour laden, soy sauce soaked manchurian gravies more often than not😍😍😍😂 and I am no different, I am in love with our ‘desi’ Chinese which is absolutely no where close to the authentic cuisine but what the heck?! It’s just too yummy to part with….and it’s one of my favourite things in the whole wide world 🤗 There! I said it!

Vegetarian lo mein recipe Chow-mien recipe How to make street style Schezwan noodles Polkapuffs recipes Shreya Tiwari photography Vegan noodle recipe Schezwan noodle recipe

So, having said that…what would you expect from me if I have a few packets of Hakka noodles sitting in my pantry and one hungry husband on a weekend ….with no plans to step out because the man ain’t in the mood to drive 😩 I make some street vendor style Schezwan Noodles…spicy….loaded with veggies…full of flavours and absolutely lip-smacking good😍😍😍 besides, it gets done in about 30 minutes…what’s not to love👌🏼

Vegetarian lo mein recipe Chow-mien recipe How to make street style Schezwan noodles Polkapuffs recipes Shreya Tiwari photography Vegan noodle recipe Schezwan noodle recipe

Actually, it’s better than your favourite take-out as this is healthier because of the veggies and I’ve added very little oil. Spicese, yes…added a whole lot of spices while making it as we prefer it to be hot! 😁 So, if you’ve been a person who starts sneezing and coughing at the first bite of anything spicy…tone this recipe down a couple of notches and you’ll survive 😉 I have used my homemade Schezwan sauce here and I did serve this with some quick Schezwan paneer….basically, everything was Schezwan 😑🤔 how’d that happen?! 😜

Enough said! Start cooking…pronto!

Yield: serves 2-3

Equipment: a large heavy bottomed wok, measuring cup/ spoons, a pair of tongs.

Ingredients:

2 packets of Hakka Noodles (boiled as per the instructions on the package)

1+1/2 cups julienned carrots

1 cup julienned cabbage

1 cup julienned capsicum

1 cup finely sliced red onion

1/2 cup finely chopped spring onion whites

1/2 cup finely chopped spring onion greens

salt to taste

1/4 cup Schezwan sauce

3 tbsp oil

1 tsp noodle Masala (Indian grocery stores carry it, else skip it and add black pepper powder)

3 tsp finely chopped garlic

1 tsp finely chopped ginger

2 tbsp soy sauce

1 tbsp red chilli sauce

1 tsp vinegar

3 nos. whole red chillies

1 tbsp tomato ketchup (optional)

Method:

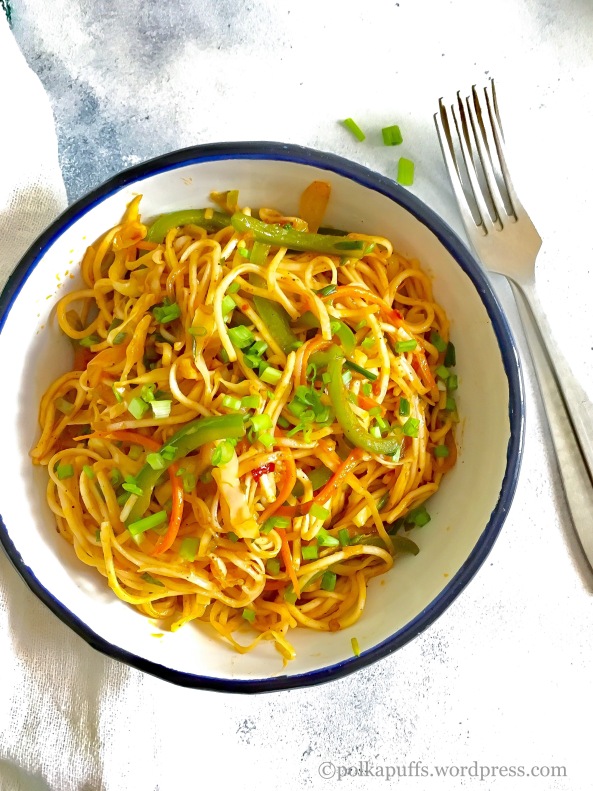
In the wok, heat oil until nice and hot. Then add the ginger, garlic, whole red chillies and spring onion whites. Sauté these on high flame until the garlic turns golden. Then add all the veggies along with salt and noodle Masala (black pepper). Keep mixing well and sautéing on high flame for the next 2-3 minutes.

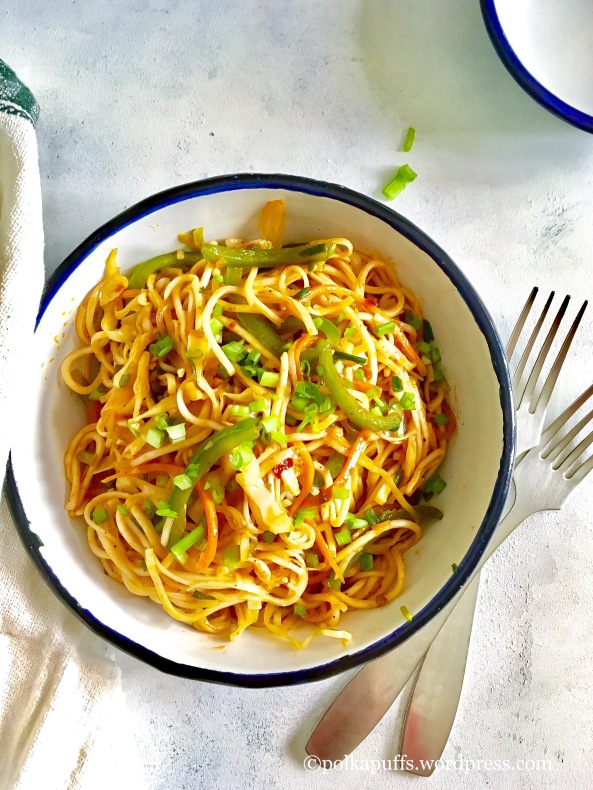
Next, add the sauces – Schezwan, soy, chilli. Add vinegar and ketchup too. Sauté for another 2 minutes. Now tip in the boiled noodles (ensure that the noodles are al-dentè). Use tongs to mix the veggies with the noodles and be gentle. You don’t want to break any of those gorgeous noodles. Once everything is looking good, add the spring onion greens and give them a last mix. That’s it, serve them piping hot! Done😉

You can add any veggies if your choice or add Proteins of your choice…like shredded chicken or some sautéed prawns if you like seafood.

Vegetarian lo mein recipe Chow-mien recipe How to make street style Schezwan noodles Polkapuffs recipes Shreya Tiwari photography Vegan noodle recipe Schezwan noodle recipe

Doesn’t that make you drool?! 😃 …you should make some👆🏼

Love,

Shreya💖


For more such deliciousness, follow me on –

Pinterest ID : https://www.pinterest.com/emarald_icon123/

Facebook page : https://www.facebook.com/pages/PolkaPuffs/334992336689991

Instagram : https://instagram.com/polkapuffs/

Vegetable Lo-Mein spicy and Vegan Meals under 30 mins Asian noodle recipe Polkapuffs

Bombay Masala Aloo sandwich recipe Bombay toast sandwich recipe Lunchbox ideas Street food of mumbai Polkapuffs recipes Shreya Tiwari photography

Bombay Aloo Masala Sandwich | Spicy Potato Sandwich

Sandwiches are a staple street food in Amchi Mumbai….be it vegetable toast sandwich or a plain Chutney (salsa) sandwich…the options are endless and oh so yummy! 😍

Bombay Masala Aloo sandwich recipe Bombay toast sandwich recipe Lunchbox ideas Street food of mumbai Polkapuffs recipes Shreya Tiwari photography

I personally love the vegetable cheese grill sandwich! It’s like the best of both worlds…you get veggies and if you are a cheese lover like me…it’s just so good with that cheese within and on the outside😍😍😍😍….a side of some potato crisps/ chips/ wafers…and some ketchup😋

Similarly, there is another hot favourite among most Mumbaikars….the spicy, aromatic and very delicious Bombay Aloo Masala Sandwich…make it as a toast sandwich or a grilled one…it’s amazing! Aaaaannnddd…..it’s my hubby’s favorite 😘

Bombay Masala Aloo sandwich recipe Bombay toast sandwich recipe Lunchbox ideas Street food of mumbai Polkapuffs recipes Shreya Tiwari photography

This is a regular breakfast or evening snack at our place…and my Mom’s recipe for the filling/ Aloo Masala is super duper yum!

I usually use brown bread to make them…you can use regular white sandwich bread or any multigrain bread if your choice. I had once even used a Homemade Herbed Focacia bread for this sandwich and it was so good!

Anyways…let’s get you started on the recipe..

Yield: can be used for upto 6-7 sandwiches with generous amount of the potato filling.

Equipment: a non-stick pan, measuring cups/ spoons, grilled or toaster or a pan to grill or toast the sandwiches, a bread knife to cut the sandwiches into portions.

Ingredients:

5 nos. large potatoes (boiled and mashed)

3 tbsp oil

1 tsp finely chopped green chilli

a pinch of hing (asafoetida)

1/4 tsp cumin seeds (jeera)

1/2 cup finely chopped onions

1/4 cup finely chopped green bell pepper (capsicum)

2 nos. finely chopped tomatoes

salt to taste

1 tsp ginger-garlic paste

1/4 tsp turmeric powder

1/2 tsp red chilli powder

1 tsp Pav bhaji Masala

1/4 tsp amchur powder (raw mango powder)

1-2 tsp water (if needed to correct the consistency)

2 tsp chopped fresh coriander leaves

butter as needed to grill/ toast the sandwiches

Method:

To make the filling:

Heat oil in a non-stick pan. Once the oil is hot, add cumin seeds, hing and chopped green chillie. Sauté for a minute.

Next, add the chopped onions. Sweat them for a few minutes. Then add the capsicum. Sauté again. Tip in the tomatoes followed by the salt, turmeric, red chillie powder, ginger-garlic paste. Mix well and cook these together until the tomatoes turn mushy and the raw smell of the ginger- garlic paste goes away.

Next, add the mashed potatoes along with the Pav bhaji Masala. Also add the amchur powder and mix well. Turn off the flea me. Add chopped coriander leaves and give them all a final mix. That’s your filling done! Keep well in the refrigerator for 3-4 days.

Bombay Masala Aloo sandwich recipe Bombay toast sandwich recipe Lunchbox ideas Street food of mumbai Polkapuffs recipes Shreya Tiwari photography

To make the sandwich:

Take 2 slices of bread. Slather both the slices with butter. Sprinkle some chaat Masala (optional) and spread a thick layer of the potato filling. Heat the griller/ toaster…spread some butter on the griller plate and place the sandwich on it and let it crisp up on both sides. Serve hot with some chips/ crisps and ketchup!

Bombay Masala Aloo sandwich recipe Bombay toast sandwich recipe Lunchbox ideas Street food of mumbai Polkapuffs recipes Shreya Tiwari photography

You can add some veggies to this filling recipe or even minus a few things if you wish. Do try it…it’s lip smacking 😍

Love,

Shreya💖

Sandwiches with Spicy Potato fillng | Bombay Masala Aloo Sandwich | PolkaPuffs


Mango Kulfi | How to make Kulhad Kulfi

An Indian dessert that is loved by everyone and I guess there is rarely anyone who’d say no to Kulfi! This luciously creamy, deliciously sweet and chilled dessert is perfect for summers and compliments any Indian meal when looking for that perfect end to your meal 😍👌🏼 Flavour it with whatever takes your fancy! Mangoes….yes that is what I have used here to make it even more irresistible and delicious.

Mango Kulfi recipe Kulhad kulfi recipe How to make instant kulfi Easy recipe for kulfi Homemade mango kulfi recipe Kesar pista kulfi recipe Polkapuffs recipes Indian ice cream No condensed milk no milk powder Kulfi recipe Shreya Tiwari recipes

Look at the golden colour..and I have used a bit of freshly pounded cardamom powder to elevate the flavour of Alphonso Mangoes….the King of fruits 😍 and garnished it with some pistachio slivers and homemade dried rose petals (organic) ….this recipe also calls for some fresh, thick cream from full fat milk…yes homemade made fresh cream, it makes the Kulfi even more smooth and the taste is very authentic! But then again, you can always use fresh cream from a tetra pack too😋

Mango Kulfi recipe Kulhad kulfi recipe How to make instant kulfi Easy recipe for kulfi Homemade mango kulfi recipe Kesar pista kulfi recipe Polkapuffs recipes Indian ice cream No condensed milk no milk powder Kulfi recipe Shreya Tiwari recipes

Last year I had shared an easy recipe for Kesar Pista Kulfi on the blog and this recipe is another take on that!😀 You can add some chopped pistachios and almonds to this Mango Kulfi recipe and make it a Dry Fruit Mango Kulfi too!

Mango Kulfi recipe Kulhad kulfi recipe How to make instant kulfi Easy recipe for kulfi Homemade mango kulfi recipe Kesar pista kulfi recipe Polkapuffs recipes Indian ice cream No condensed milk no milk powder Kulfi recipe Shreya Tiwari recipes

I used kulhad and matkas (Indian earthenware) of different shapes and sizes to set the Kulfi, you can use simple Kulfi or Popsicle moulds as well or simply use little stainless bowl to set them. Although the kulhad and matkas I have here aren’t actually earthenware, they are all made of porcelain.

Common, let’s make Kulfi!

Yield: 5-6 kulfis

Equipment: a heavy bottomed pan, a ladle, measuring cups/ spoons, kulfi moulds/ Popsicle moulds/ small bowls, ice cream sticks etc.

Ingredients:

500 ml milk (I use Amul toned milk – 2%fat)

pulp of 3 nos. medium Alphonso mangoes

1/4 cup warm milk

2+1/2 tbsp cornflour

1+1/4 cup sugar (adjust as per your preference)

1/2 cup cream (I used homemade cream from full fat milk, you can use tetra packed Amul fresh cream as well)

1/2 tsp cardamom pwd

chopped pistachio & dried rose petals to garnish

Method:

Heat 500 ml milk in the pan, let it boil until the milk reduces a little and becomes thick. Keep stirring so that the milk does not stick at the bottom and burn.

Mix cornflour with 1/4 cup warm milk until it’s lump free. Add this mixture to the reduced milk and keep stirring until the cornflour blends properly with the milk. Add sugar, cardamom powder and the mango pulp. Cook for two mins more. Keep it aside to cool for a few mins.

Next, lightly beat the cream. Add the cooled milk and mango mixture to the beaten cream. Beat again for a few mins (I used a electric beater). Fill this mixture into moulds/ matkas/ bowls and keep it in freezer to set for about 7-8 hours or even overnight.

Mango Kulfi recipe Kulhad kulfi recipe How to make instant kulfi Easy recipe for kulfi Homemade mango kulfi recipe Kesar pista kulfi recipe Polkapuffs recipes Indian ice cream No condensed milk no milk powder Kulfi recipe Shreya Tiwari recipes

Once the Kulfi has set for 3-4 hours, put an ice cream stick in the centre of each mould if using Popsicle mould or traditional Kulfi mould.

Thaw the frozen Kulfi for a few mins, rub the moulds between your palms, tug on the ice cream stick and unmould it gently. That’s it! Your creamy Kulfi is ready☺️ Look at that texture…..yumm!

Mango Kulfi recipe Kulhad kulfi recipe How to make instant kulfi Easy recipe for kulfi Homemade mango kulfi recipe Kesar pista kulfi recipe Polkapuffs recipes Indian ice cream No condensed milk no milk powder Kulfi recipe Shreya Tiwari recipes

Love,

Shreya💗

Mango Kulfi | Mango flavoured Indian Ice Cream | Glutenfree recipe


Volcano Popsicles | Strawberry and Orange Popsicles

Yes, I am absolutely obsessed with Popsicles of any and every kind…actually anything icy! I loved chilled things, even in the dead of cold, I could never pass a chance of enjoying a Popsicle! Not ice-cream though, although my blog has many recipes for both, I am more of a Popsicle girl😋😋😍

If you ask me why not ice-creams…I don’t really have a reason. I just love the juicy and watery flavours of fruit based Popsicles! Always have….always will! They do give me bad throat infections at times but I think they worth every course of anti-biotics I’ve had over the years 😜😜😂

How to make strawberry orange popsicle Volcano Popsicle recipe Summer treat Popsicles with glucose recipe Polkapuffs recipes Food photo by Shreya Tiwari

Don’t they look llike your best mate for every summer afternoon!? I can have them for breakfast, lunch ….dinner!! 😉 Besides, making them is a breeze! Just pick whatever flavours you like or if you are like me…choose your fruits….summer fruits like mango, kiwis or even oranges work very well!

How to make strawberry orange popsicle Volcano Popsicle recipe Summer treat Popsicles with glucose recipe Polkapuffs recipes Food photo by Shreya Tiwari

But with this recipe, I will teach you how to make perfect store bought-like texture for these Popsicles. Yes, store bought Popsicles are not full of icicles in them. They are more smooth and have a very even texture, almost like a sorbet but firmer. However, if you wish can follow simple juice and freeze method tooand make Popsicles but they will have icy bits (icicles) in them. I don’t like icicles in my Popsicles and hence this recipe is good for me…I was keen to understand what ingredients goes into the store bought Popsicles, and just on the cover of each popsicle, it is mentioned ‘glucose’….so I’ve done exactly that! Liquid glucose worked so well. Obviously, I adjusted the measurements as the cover never mentioned the proportion and alongside the store bought ones have a fair bit of preservatives too. But I have used just 4 ingredients to make them!

Yield: 4 Popsicles

Equipments: a sauce pan, a juicer (if using homemade juice), measuring cups/ spoons, Popsicle mould, ice cream sticks.

Ingredients:

1/2 cup pulp of fresh strawberries (I did not add sugar, you may if the berries aren’t sweet enough)

200 ml freshly squeezed orange juice (juice of approximately 5-6 oranges)

2 tbsp sugar (I used some for the orange juice as the oranges were a bit tart)

2 tbsp glucose syrup (sweetened, it’s available in any store that stocks all the baking related ingredients) or even corn syrup.

Method:

Keep the mould ready.

In a saucepan, heat orange juice for a few mins. Once it has come to a gentle boil, add the sugar. Mix well using a whisk. Next add the glucose syrup and whisk quickly. Make sure the syrup is mixed very well. Now, turn off the flame and let the orange juice cook down for a few minutes.

Next, fill about 3/4th (approximately 50 ml) of each popsicle mould with the orange juice- glucose mixture. Place the moulds in the freezer and let them set for about 2-3 hours. Remove from the freezer and insert ice-cream sticks in the center of each mould. Freeze again for about 1 hour.

Remove the moulds again from the freezer after an hour, fill each mould to it’s brim with the strawberry pulp. (I didn’t treat the strawberry pulp with the glucose syrup as the pulp doesn’t really have any icicles after freezing).

Freeze the moulds for another 3-4 hours or until the Popsicles are frozen well. To serve, dip the mould in some lukewarm water for 2 mins, gently tug the ice cream sticks and pull out the popsicle from the moulds! Voilà!!! 😍😍 enjoy!!

(Note- adding glucose syrup is optional, we can omit that as well and make basic Popsicles)

How to make strawberry orange popsicle Volcano Popsicle recipe Summer treat Popsicles with glucose recipe Polkapuffs recipes Food photo by Shreya Tiwari

You can follow this recipe for any fruit juice/ pulp in any combination…they are so delicious and absolutely preservative free. They keep well in the freezer for upto a week, but I suggest try to finish them and make fresh batches every few days. It’s so easy 😄

Love,

Shreya💗

Volcano Popsicles Vegan & Glutenfree | Strawberry & Orange Popsicles

Kothmir Wadi | Kothambir Wadi – Maharashtrian Delicacy

I am a proper Mumbai (Bombay) girl…born, raised, educated, worked and then married in Mumbai….when I say home, I always mean Mumbai❤….and saying that obviously means I love…just lurrvvvveeee my Mumbaiya (meaning typical) street food and snacks! The hubby and I visit every happening joint, cafe …etc, etc around our city but having some of the most delicious street food is something we can never give up!

Mumbai isn’t only about Wada Pav and Bombay Pav Bhaji in terms of authentic Maharashtrian snacks. If you have ever been to Maharashtra (any part of the state), you’d be familiar with Kothambir Wadi or Kothmir Wadi (spiced, coriander and chickpea flour nuggets). Kothmir or Kothambir literally means fresh coriander leaves in Marathi and Wadi translates to nuggets. Such an easy language… I am almost too proud that I can speak it rather well…(well, I do make grammatical errors here and there but I never quit speaking the language!) 😃

Kothmir Wadi recipe How to make kothambir Wadi at home Maharashtrian recipes Polkapuffs

The flavours are fresh and very earthy, green chillies and ginger along with other spices and ingredients make these Wadis lip smacking. Although, these are available in most local shops that sell Wada Pav or bhajias (batter fried onion or potato fritters), I always wanted to make them at home too. I probably wouldn’t have if my hubby wasn’t so crazy about them…

Kothmir Wadi recipe How to make kothambir Wadi at home Maharashtrian recipes Polkapuffs

So I looked up a few recipes and found one which was easy and sounded a whole lot like what we usually got from outside…and they turn out quite good and crisp! I have been making there for over 2 years now…and a glass of hot lemon tea is all that I need to polish these off!

Kothmir Wadi recipe How to make kothambir Wadi at home Maharashtrian recipes Polkapuffs

Besides, making them is no big task either….it takes less than 15 mins of prepping and just another 30 minutes of cooking! Glutenfree (uses chick pea flour along with rice flour) and vegan (has no clarified butter or yogurt), one can easily include them in their special diets without any fuss. Serve them with a dip if choice or have them on it’s own…delish!

Let’s begin….

Yield: 16 small Wadis (nuggets) using a square baking tin of 5″X 5″

Equipment: a mixing bowl, a whisk, measuring cups/ spoons, a pressure cooker/ large pot, a small metal plate, a frying pan, baking tin or any vessel to use for steaming the Wadis (nuggets), a sharp knife, a pair of tong.

Ingredients:

1/2 cup sifted chick-pea flour (besan) 

2 tbsp sifted rice flour (chawal ka atta)

salt to taste

water as needed

1/4 tsp turmeric powder

1/2 tsp red chilli powder

a pinch of hing (asafoetida)

2 tsp chopped green chillies

1 tsp ginger paste

1 tsp toasted white sesame seeds

1 tsp lemon juice

1/2 cup finely chopped fresh coriander leaves

1/4 tsp baking soda

1 tbsp flavour less oil (like canola or sunflower)

To pan fry: (optional, have it steamed if you wish to avoid pan frying. Also, deep frying is yet another option but I tend to avoid deep frying)

4 tbsp oil

Method:

In a mixing bowl, add the sifted flours. Season with salt. Add hing at this point. Whisk well and add little water to make a thick batter. Add the ginger paste, lemon juice, chillies, red chilli powder, turmeric powder, oil, toasted sesame seeds and chopped coriander leaves, whisk again. Add the baking soda and mix gently (don’t whisk). Grease the baking tin with some oil. Pour the batter into the greased tin and set it aside.

Kothmir Wadi recipe How to make kothambir Wadi at home Maharashtrian recipes Polkapuffs

Heat about 2 cups of water in a large pot or pressure cooker. Keep a metal plate at the bottom of the pot/ cooker to use as a  seperator.

Once the water starts boiling a bit, place the tin with the batter inside the pot/ cooker on the separator plate. Cover with a lid if you are using a pot. In case you are using a pressure cooker, remove the weight (whistle) off the lid and then secure the lid on the pressure cooker.

Kothmir Wadi recipe How to make kothambir Wadi at home Maharashtrian recipes Polkapuffs

Cook on low flame for about 15-18 mins. Then turn off the flame  and open the lid carefully. Remove the tin from the pot/ pressure cooker and using a sharp knife check if the batter has cooked, to do that, simply insert the knife in the centre of the tin, if it comes out clean, the batter has cooked (just aswe do for any cake).

Kothmir Wadi recipe How to make kothambir Wadi at home Maharashtrian recipes Polkapuffs

Let this cool down completely. Once it has cooled, run the knife on all four sides of the tin and gently unmould it on a chopping board. Using the same sharp knife, cut it into squares. Keep them aside.

Kothmir Wadi recipe How to make kothambir Wadi at home Maharashtrian recipes Polkapuffs

This is what it looks like post steaming. Have them just as it is..or pan fry.

To pan fry:

Heat 4 tbsp oil in a frying pan, place the squakes in the pan once the oil is hot, keep turning them around and let them crisp up on all sides. Once done, remove on absorbent kitchen paper. Serve them hot with a dip if your choice!

Kothmir Wadi recipe How to make kothambir Wadi at home Maharashtrian recipes Polkapuffs

They keep fresh for a few hours although I have never tried to store them for very long. These make for a great party snack or even as a side dish to go with your meals!

Love,

Shreya💖

Adapted from Nisha Madhulika

Onion Rawa Masala Dosa – Udupi Style

We rarely make South Indian food at home…my hubby ain’t too fond of it and I can’t just make it for myself even though I love it too much! But then there are days when he happily agrees to his one and only favourite from the cuisine –  Onion Rawa Masala Dosa with spicy, tangy Sambhar…he isn’t too keen on coconut chutney…so I happily skip that! 

Such meals happen over the weekends for brunch…I am not complaining as it’s so easy to put together Rawa Dosa and Sambhar! Making the Masala isn’t difficult too….trust me, I can put them together in under 45 mins start to finish 😃 

Rawa Dosa recipe How to make Rawa dosa Onion Rawa dosa recipe Coconut chutney recipe Udupi style Rawa dosa recipe Udupi style coconut chutney recipe  Breakfast recipes South Indian recipes Onion Rawa Masala Dosa recipe  Polkapuffs recipes Shreya tiwari recipes Udupi style sambhar recipe

Last year I had shared the recipe for plain  Rawa Dosa, now you’d think, what’s the difference…we simply need to add the potato masala and that’s it. No, there is a difference, at least in the way I make it. The batter is different which ensures more crisp dosas that can hold the Masala well without becoming soggy and heavy. 

The batter which I make for onion Rawa Masala Dosa is different in terms of the proportions of the ingredients used. If you follow the recipe properly, you will get crisp, lacy and crunchy Rawa Dosa.

Rawa Dosa recipe How to make Rawa dosa Onion Rawa dosa recipe Coconut chutney recipe Udupi style Rawa dosa recipe Udupi style coconut chutney recipe  Breakfast recipes South Indian recipes Onion Rawa Masala Dosa recipe  Polkapuffs recipes Shreya tiwari recipes Udupi style sambhar recipe

Let’s learn how, do follow the steps properly, it’s very simple.

For the Dosa

Yield: 4-5 Dosas

Equipment: a non stick pan, a spatula, measuring cups/ spoons, a mixing bowl, a ladle.

Ingredients:

1/4 cup Rawa/ sooji (semolina, I have used Bombay rawa)

1/4 cup rice flour

1 tbsp maida (APF)

4 tsp chopped onions

salt to taste

1 tsp crushed peppercorns

1 tsp chopped curry leaves

1 tbsp chopped coriander leaves

1/2 tbsp chopped green chilli

1/2 tsp grated ginger

1/4 tsp sugar

1/4 tsp asafoetida (hing)

1 tsp Jeera (cumin seeds)

water as needed

oil to cook the Dosa

Method:

Take all the dry ingredients in the bowl, stir them well. Then add water and make a runny batter (the batter must not too runny but not thick at all). Let it sit for 5-7 mins.

Rawa Dosa recipe How to make Rawa dosa Onion Rawa dosa recipe Coconut chutney recipe Udupi style Rawa dosa recipe Unduly style coconut chutney recipe  Breakfast recipes South Indian recipes Onion Rawa Masala Dosa recipe  Polkapuffs recipes Shreya tiwari recipes Udupi style sambhar recipe

Heat the pan, lower the flame to medium, sprinkle teaspoon of chopped onions. Let them heat for 30 seconds. Then, spread a ladleful of the batter on the pan…and drizzle some oil around the pan. Cook on low heat for about 5-6 mins…you need to cook it that long as it will crisp up..and there is no need to flip over to cook the other side. Once done, it starts leaving the pan from the edges. That’s it, your Onion Rawa Dosa is ready! Serve it plain or with the Masala stuffed within the Dosa😀

(P.S. Stir the batter well before pouring out the next ladleful!)

Rawa Dosa recipe How to make Rawa dosa Onion Rawa dosa recipe Coconut chutney recipe Udupi style Rawa dosa recipe Unduly style coconut chutney recipe Breakfast recipes South Indian recipes Onion Rawa Masala Dosa recipe Polkapuffs recipes Shreya tiwari recipes Udupi style sambhar recipeimg_6744

For the Masala 

Yield: serves 3-4 Dosas

Equipment: a wok, measuring spoons/ cups, a spatula.

Ingredients:

3 nos. boiled potatoes, cut into small cubes

2 tbsp oil

a handful curry leaves

1 tsp ginger-garlic paste

2 nos. chopped green chillies

1/4 cup chopped onions

a pinch of hing (asafoetida)

salt to taste

1/4 tsp mustard seeds

1/4 tsp turmeric powder

Method:

Heat oil n the wok. Once it’s hot, add mustard seeds, hing. Let these splatter. Then add ginger-garlic paste, curry leaves and chopped green chillies. Cook them for 2-3 minutes. Then add the onions. Cook these till they turn slightly pink. Add salt and turmeric at this stage. Mix well and add the potatoes.  Ash some of the potatoes as they cook. Ensure everything is mixed well. Turn off the flame. Stuff this Masala within the Dosas and serve piping hot!

Rawa Dosa recipe How to make Rawa dosa Onion Rawa dosa recipe Coconut chutney recipe Udupi style Rawa dosa recipe Unduly style coconut chutney recipe Breakfast recipes South Indian recipes Onion Rawa Masala Dosa recipe Polkapuffs recipes Shreya tiwari recipes Udupi style sambhar recipeimg_6741

P.S. you can add green peas and tomatoes too in the Masala but I don’t prefer their flavour in the Masala for Dosa.

For the Sambhar

Yield: serves 2
Equipment: a pressure cooker, a small pan, measuring cups/ spoons, a ladle.

Ingredients:
3/4 cup tuar/ arhar dal (skinned & split pigeon peas)
2+1/2 cup water
Salt to taste
1/2 tsp turmeric pwd
1/2 cup chopped tomato
1/2 cup sliced onions
1/2 cup cubed lauki (bottle gourd, one can add more veggies of your choice)
1/4 cup tamarind pulp
1/2 tsp grated jaggery
2 tsp sambhar pwd (I use MTR)
6-7 curry leaves

For tempering:
3 tbsp oil
1/2 tsp mustard seeds (rai)
A pinch of hing (asafoetida)
2-3 whole red chilli
A few curry leaves

Method:
Wash and soak the dal for 30 mins. Add the soaked dal in the pressure cooker with water, salt, turmeric pwd. Add the tomatoes, curry leaves, onions & bottle gourd too. Cook them together in the pressure for 2-3 whistles. Let the pressure cooker cool down completely before opening the lid. The dal & the veggies must be soft & mushy by now. You can add some water to correct the consistency if needed and boil the dal for about 2-3 mins.

Next, add sambhar pwd and grated jaggery to the tamarind pulp and mix well. Add this mixture to the cooked dal & veggies. Stir well and boil the sambhar for 3-4 mins.

Now to temper the sambhar, heat oil in a small pan. Add all the ingredients listed above ‘for tempering’ to the hot oil and let them splatter for about 2 mins. Add this tempering to the boiled sambhar and mix well. Cover with a lid for a few mins. Serve piping hot with Idli/ Dosa/ boiled rice.

Rawa Dosa recipe How to make Rawa dosa Onion Rawa dosa recipe Coconut chutney recipe Udupi style Rawa dosa recipe Unduly style coconut chutney recipe Breakfast recipes South Indian recipes Onion Rawa Masala Dosa recipe Polkapuffs recipes Shreya tiwari recipes Udupi style sambhar recipe

How many of you are drooling out there!? I know I am ….but I guess I will have wait for a few months until I revisit this platter! Until, my man says he wants some too 😘

Love,

Shreya💝


Bharwa Hari Mirch | Spicy Stuffed Green Chillies | GF vegan recipe

So, now that Diwali is done and dusted with…and having gorged on like a ton of sweets and chocolates..I don’t think I will be having anything sweet for a while!! Lol! My otherwise sweet and ‘meetha’ loving hubby too agrees with me on this😂 Now that’s a serious relief for at least a few days…no more worrying about dessert every night! He will be wanting light, non greasy but spicy food…as will I!!!!!! 

Bharwa hari mirch recipe How to make instant Bharwa hari mirch Polkapuffs recipe

So coming to today’s recipe…Bharwa Hari Mirch. This can be made in so many different ways, some are stuffed with spicy potato filling, coated with gram flour mixture and then deep fried or baked (baking them is the latest fad to keep things healthy, but for me it tastes no where close to the authentic version). Some recipes call for a sweet and spicy filling of lentils as a filling and then they are later shallow fried in the pan until the green chillies char a bit on the outside! Wow…all of them are absolutely yum and bring a balance of flavours to any platter.

There is another version of these stuffed Hari Mirch which I will be sharing soon…😍

Bharwa hari mirch recipe How to make instant Bharwa hari mirch Polkapuffs recipe

These, as you can see aren’t filled with anything even remotely complicated. I think Diwali prepping took care of that for a while😂….these are filled…and generously at that, with the most basic spice mix that one can find in any pantry and they are my Mom’s signature instant Bharwa Mirchi. I can assure you that these will get you hooked! They have the correct balance of tang and heat…nothing sweet! I mean, you can add some sugar to the filling but that won’t be as delicious as having them in their original avatar! Besides, these are a must make during winters…when instant pickles are enjoyed with parathasdal Chawal or practically any meal. …yummm!

Anyways, for these I have used organic green chillies, the thick variety, easily available with the onset of winters. They were pretty hot but I let the seeds stay intact. You can discard them if you feel they will be too much handle. Let’s make them, shall we?!

Yield: serves 3-4

Equipment: a kitchen towel, a pointed knife, measuring spoons, a skillet, a clean and dry glass/porcelain jar to store them.

Ingredients:

10-12 organic green chillies (the thicker variety which is usually available during winters)

2 tsp amchur powder  (dry mango)

salt to taste

a pinch of asafoetida (hing)

3-4 tbsp refined oil

Method:

Wash the whole chillies under running water but carefully as we don’t want to loose the stems.

Wipe them dry. Let them air dry as well for 15-20 mins. They must be absolutely free of any moisture.

Tip: These chillies are usually medium hot. Therefore, I always let the seeds stay intact. However, if they are very hot or you cannot handle the heat, feel free to de-seed them after they ha e dried completely.

To make the incision, keep the chillies straight on a board or hold them and using a pointed knife, cut them down the centre from the top to the bottom edge, carefully not to split them as you do so. See the picture below.

Bharwa hari mirch recipe How to make instant Bharwa hari mirch Polkapuffs recipe

For the filling: Mix together amchur powder, salt and asafoetida in a bowl.

To stuff: Using a spoon fill each chilly with generous quantities of the filling mix but ensure that the stem and the entire chilly stays intact as you stuff them.

Heat oil in a skillet, once it’s hot, add the stuffed chillies and toss them in the oil for about 8-10 mins. They will shrink as they cook and the filling will ooze out in places. That’s it, remove them from the skillet and serve them hot or cold with your meal. These keep well in the refrigerator for upto a week in a glass or porcelain jar.

Pair them up with my Benarasi Samosas for that lip smacking evening snack!

Bharwa hari mirch recipe How to make instant Bharwa hari mirch Polkapuffs recipe

Do try these soon…

Love,

Shreya💖

No onion no garlic potato wrap

Spicy Potato and Wholewheat Wrap (no onion no garlic)

Most of us have been avoiding the consumption of onion and garlic during Navratris and stick to eating home cooked and light meals. I feel that doesn’t need to be restricted to Aloo Tamatar ka Rassa (potato tomato curry) or Sabudana Wada (sago fritters) for every other meal.. this perception has to change! We can easily incorporate so many flavours to make a whole new and exciting meal even as we abstain from some key ingredients ☺️ 

No onion no garlic potato wrap

Some people do not consume whole grains like wheat, they can easily make Buckwheat (kuttu ki Roti) flatbreads for this recipe. I have used a spicy version of potatoes for the filling and some veggies like carrots and cucumber for the salad. The dressing or the sauce is very exciting….read until the end to know more!! 😀

No onion no garlic potato wrap

Lets begin spicing up the festivities!..

Yield: 2-3 wraps

Equipments: measuring cups/ spoons, a pan, a wok, a large mixing bowl.

Ingredients for the the ww wrap:

1 cup wholewheat flour (I used Aashirwad Select)

salt to taste (regular or vrat ka namak)

2 tsp oil

water a needed to knead a dough

Method:

Take flour, salt and oil in a large mixing bowl. Add water little by little as you go on kneading a soft dough. Once the dough comes together, cover it with a kitchen towel and set aside for 30 mins.

Then take a Orange sized portion of the dough and make a thick Roti and cook it on the pan until crisp on both sides. Click here to see pictures.  Make 3-4 ww wraps and set them aside in a hot case/ casserole.

Ingredients for the potato filling:

250 gms baby potatoes (boiled) or use regular cubed potatoes

salt to taste (regular or Vrat ka namak)

2 tsp oil

1/2 tsp red chilli pwd

1 tsp ginger paste

1/4 tsp cumin powder

1/4 tsp lemon juice

Method:

Heat oil in a wok, add the boiled potatoes. Sauté well until slightly crisp and golden brown on all sides. Season with salt, red chilli pwd. Sauté for another 2 mins. Add ginger paste along with cumin pwd. Mix well, cover and cook for about 5-7 mins. Turn off the flame and set aside to cool the filling. Add the lemon juice once it cools down and mix it well.

Ingredients for Salad:

a few juliennes of carrot and cucumber and beetroot (optional)

Ingredients for the sauce:

1/2 cup chilled hung curd

1/4 tsp roasted cumin pwd

salt to taste (regular or Vrat ka namak)

Method:

Mix these ingredients together and set it aside.

Assemble the wrap:

Place a ww wrap, smash some potatoes and place them on the wrap. Top them with some salad and sauce! What more!?? Some chopped coriander too 👌👌

No onion no garlic potato wrap

Exciting…tempting…you crave these!? Go, make some 😋➡️

Also try my Phalhari Kadhai Paneer (click here for recipe) as the filling for these wraps.

Love,

Shreya💗

Chatpate Saunfia Aloo No onion no garlic recipes Polkapuffs Aloo Recipe Recipes for Navratri

Chatpate Saunfia Aloo (no onion no garlic recipe)

I love potatoes! I can have them in any form except sweet 😱😱 Potatoes got to be spicy and delicious….can’t be bland and sad…! That’s what I am sharing today…awesome, spicy and so easy to make too!

Besides, it’s without any onion and garlic too…so perfect for the upcoming Indian festivals like Navratri when most of us eat food sans the onion and garlic element for 10 whole days. I won’t get into giving you the background of the festivals and the why’s and the how’s!

Chatpate Saunfia Aloo No onion no garlic recipes Polkapuffs Aloo Recipe Recipes for Navratri

This recipe can be made in many ways and enjoyed in many more too! My Mom usually makes another kind of Aloo without onion and garlic, this is inspired from her basic recipe..which by the way has way too many fans out there 😍

I have mentioned the spices that I have used, but you can always change them slightly to your preference. These potatoes can be served as starters, along with dal and some steamed rice or you can add them to any curry/ gravy and enjoy it with Phulkas (Indian flatbread).

Yield: serves 2

Equipment: a heavy bottom skillet or pan, a large pot, measuring cups/ spoons.

Ingredients:

300 gms baby potatoes (I have used the smallest kind, you can also use regular potatoes and cut them into cubes for this recipe)

salt to taste

3 cups water

1 tbsp refined oil

a pinch of asafoetida (hing)

1 tsp fennel seeds (saunf)

2-3 nos. green cardamom (choti Elaichi)

1 tsp roasted cumin pwd (bhuna jeera pwd)

1/4 tsp turmeric pwd

1/2 tsp red chilly pwd (I used degi mirch)

1/2 tsp crushed anardaana seeds

1/4 tsp chaat masala (optional)

a pinch of Garam masala 

chopped coriander to garnish

Method:

Wash the baby potatoes well, do not peel them.

In a large pot, boil water with salt. Add these potatoes in boil until 80 percent cooked. They must not be mushy in texture. Drain the water and let the potatoes cool (skip the boiling bit if using large potatoes cut into cubes).

img_5228

Now, heat oil in the skillet. Add hing and saunf along with cardamom. Let them crackle. Next, add the dry spicies mentioned above except anardana pwd and chaat masala. Sauté them together for 2 mins. Next, tip in the potatoes and check the seasoning, add more salt if needed. Mix well and cook for about 5-8 mins (I let the skin crisp up a bit). Finally, add the anardaana pwd and/ or chaat masala (I always add a bit, tastes so good!). Turn off the heat and garnish with some chopped coriander leaves. Serve them piping hot!

img_5230

Also, try my dahi aloo (no onion garlic), phalhari Kadhai paneer (no onion garlic), Phalhari chutney (no onion garlic) or see my collection of Navratri Recipes here.

Happy Cooking folks!

Love,

Shreya💝

How to make Pav at home Easy recipe for dinner rolls Pav recipe Pau recipe Polkapuffs recipe

Homemade Pav | Pav Buns | Dinner Rolls

Pav Bhaji on my mind….like for the last entire week I am unable to think beyond it. Every veggie that I glance at reminds me that it could go into my Bombay Pav Bhaji 😂😂 no, I am very serious! I so didn’t want to order any…because those are just not my kind of Bhaji…hence tonight is going to be it:) {happy dance}

Anyways…so I planned to make some Pav ahead of making the Bhaji. It’s beyond easy if you ask me…one bowl magic I call it😊

How to make Pav at home Easy recipe for dinner rolls Pav recipe Pau recipe Polkapuffs recipe

Once you learn to handle the yeast well, making a bread or Pav bread isn’t difficult at all. For me, it’s always been more of the technical part that I concentrate on rather than the recipe itself. The ratios are no doubt very important, I can’t stress enough on that here. One needs to measure them out correctly else things could go horribly wrong! So pay attention to every detail when making a Pav or Bread dough.

How to make Pav at home Easy recipe for dinner rolls Pav recipe Pau recipe Polkapuffs recipe

Let’s learn how..

Yield: 6 Pav (depends on the size of the Pav)

Equipment: measuring cups/ spoons, baking tin, cooling rack, a large mixing bowl.

Ingredients:

2+1/2 cups Maida (all purpose flour) + extra Maida (APF) to dust the dough while kneading (I used appropriately 1/2 cup)

5 tbsp oil + extra to grease the tin & to brush on top of the Pav

salt to taste

1/2 cup lukewarm water (comfortable enough to dip your finger)

3 tsp yeast (I used active dry yeast)

2+1/2 tsp sugar

Method:

Take 1/2 cup of lukewarm water in a glass or bowl, add the yeast & sugar. Stir it lightly. Set it aside for 10 to let the yeast bloom. (Note that if the water is too hot, the yeast won’t bloom. So be careful with the water. If the yeast doesn’t bloom, start again)

How to make Pav at home Easy recipe for dinner rolls Pav recipe Pau recipe Polkapuffs recipeHow to make Pav at home Easy recipe for dinner rolls Pav recipe Pau recipe Polkapuffs recipeHow to make Pav at home Easy recipe for dinner rolls Pav recipe Pau recipe Polkapuffs recipe

See the first picture above, the yeast has bloomed really well. It almost overflowed on the kitchen top.

Next, see the second picture above. For making the dough add the flour in the bowl, season with salt. Add the oil and slowly add the yeast mixture. Do not add all the mixture at one go as we may end up with a very gluey and wet dough. Keep adding a little bit at a time and make a dough like we do for rotis. This dough will be sticky so you can add some more flour and knead it well. The longer you knead it, the smoother and softer it will be.

If you feel the dough has become too dry while kneading, add the yeast mixture and continue kneading. I used the entire yeast mixture but did not require any more water. Once the dough has become smooth, grease it with oil and place it the bowl for it’s first rise/ prove. I gave it approximately 30 mins or so.

See the third picture above, the dough almost tripled.

Then I pushed down the dough and released the air within. I then greased my hands and divided the dough into 6 parts. I greased the baking tin and placed the divided dough in it. Brushed each portion with oil. Then I left it for the second rise/ prove for 20 mins.

How to make Pav at home Easy recipe for dinner rolls Pav recipe Pau recipe Polkapuffs recipe

Preheat the oven at 200’c for 10 mins. Place the tin on the middle rack and bake the Pav for 20 mins @ 200’c using both the upper and the lower heating coil/ rods/ elements. (Please note every oven works differently hence adjust the temperature and duration according to that). I let them sit in the oven with the upper rods turned on for an extra 5-7 mins to get a lovely brown crust.

This is what they looked like as they came out of the oven! Brush them with some melted butter if you like.

They turned pillowy soft with a firm crust and absolutely melt in the mouth kinda good….yum!

How to make Pav at home Easy recipe for dinner rolls Pav recipe Pau recipe Polkapuffs recipe

How to make Pav at home Easy recipe for dinner rolls Pav recipe Pau recipe Polkapuffs recipe

I have made Pizza Rolls, sandwich breads, focaccia bread & Wholewheat Pizza Base too for the blog, do check them out.

Love,

Shreya💝